How to Upload Photos from PC to Google Photos.
Google Photos is a service owned by Google and is usually used to store all your photos taken from any mobile device (phone or tablet), connected to your Google Account. On the other hand, Google Photos is a great way to view your photos and videos across all your devices and easily share them with other people.
In general, Google Photos provides users with a variety of features such as automatic photo organization and easy searching, as well as built-in editing tools to enhance their photos and videos.
Because to take advantage of all these features, photos need to be saved or uploaded to Google Photos, in this guide we'll show you two different methods to upload photos from your local computer to Google Photos.
How to Upload Pictures from your Computer to Google Photos.
Method 1. Upload Photos using Google Photos on the Web.
To upload/backup your pictures to Google Photos on your PC:
1. Navigate to Google Photos using your browser.
2. Now, either drag and drop the photos you want to upload into the Google Photos window, or…
a. Click the Upload option.
b. In UPLOAD FROM window, choose Computer.
c. Finally select the photos that you want to back up to Google Photos and click Open. *
* Note: To select multiple photos, hold down the SHIFT key while choosing the photos you want.
Method 2. Backup Local Photos to Google Photos with Google Drive desktop app.
Another easy way to back up and upload multiple photos from your local computer to Google Drive, is by using the Google Drive desktop app.
Google Drive application gives you the option to upload easily a local folder with photos and other images from your PC or MAC, to Google Photos.
To upload your photos in Google Photos with the Google Drive desktop application:
1. Download and install Google Drive for desktop app.
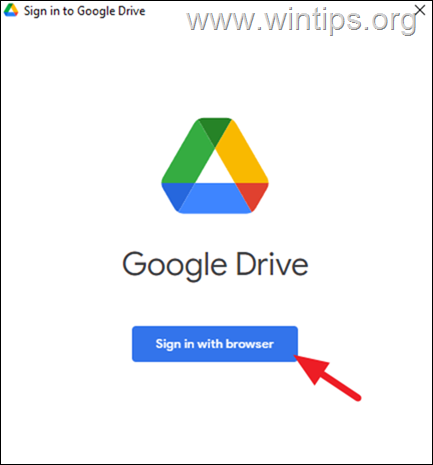
2. When the installation is completed click Sign in with browser and sing-in with your Google Account to Google Drive.
3. After signing in, right-click on the Google Drive app icon and go to Settings > Preferences.
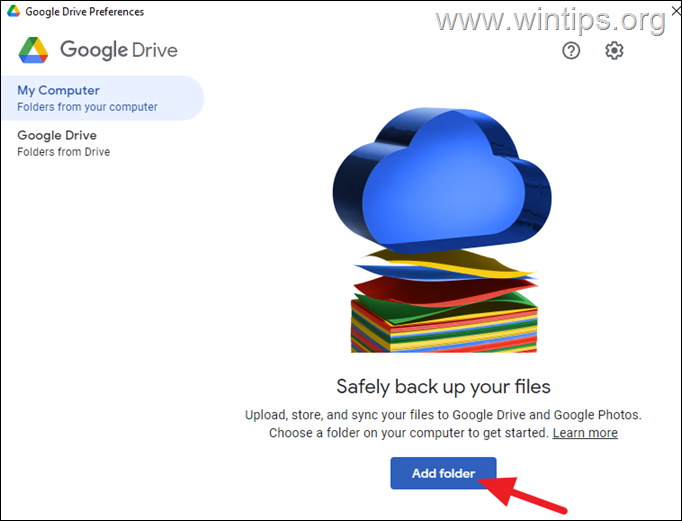
2. In Google Drive Preferences window, click Add folder.
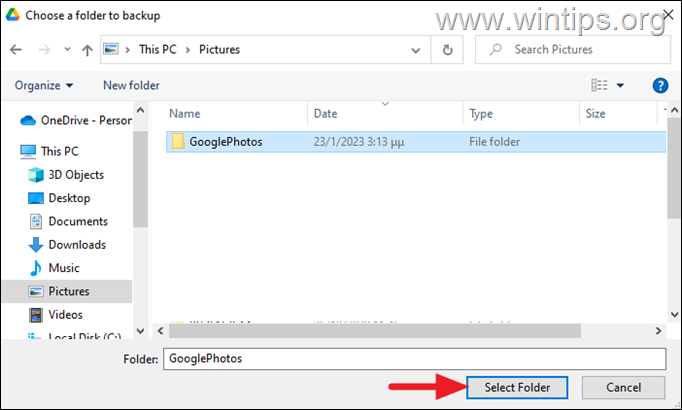
3a. Now choose from which folder on your computer you want the photos it contains to be uploaded to Google Photos.*
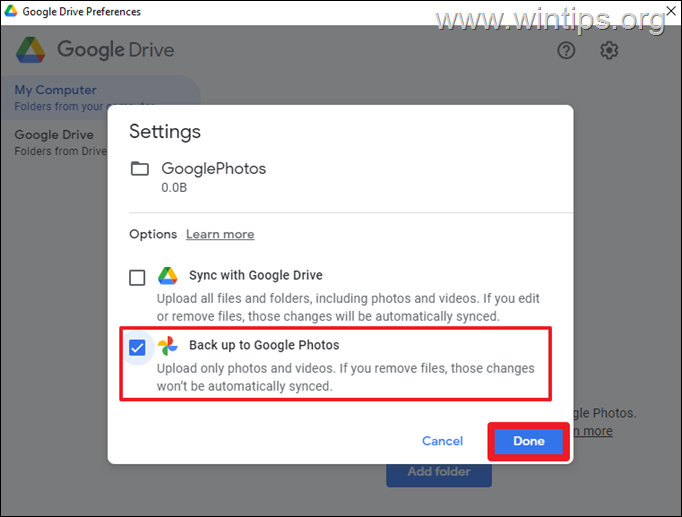
3b. At the Settings screen, check the Backup to Google Photos option and uncheck the Sync with Google Drive option. Then, click Done.
3c. Next, click on Save.
4. Finally, wait until all the photos from the selected folder are uploaded to Google Photos.*
* Note: By default your photos will be saved with reduced quality to save storage space in Google Photos. To change that and to upload your photos in their original quality:
a. Click Storage saver quality
b. Choose Original quality and Save, to upload your photos in their original (max) quality.
That's it! Let me know if this guide has helped you by leaving your comment about your experience. Please like and share this guide to help others.
We're hiring
We're looking for part-time or full-time technical writers to join our team! It's about a remote position that qualified tech writers from anywhere in the world can apply. Click here for more details.
- FIX: Numeric keypad Not Working on Windows 10/11 - July 24, 2024
- How to Share Files or Printers in Hyper-V? - July 22, 2024
- How to invoke Hyper-V Screen resolution prompt? - July 17, 2024


