How to Install and Register PnP PowerShell for SharePoint Online.
In this guide, you'll learn how to install and register PnP PowerShell for SharePoint Online on Windows and verify that everything is working correctly.
If you manage Microsoft SharePoint sites, automating administrative tasks can save significant time and effort. One of the most powerful tools available for SharePoint administrators is PnP PowerShell, an open-source PowerShell module that provides hundreds of cmdlets for managing SharePoint Online, Microsoft Teams, OneDrive, and other Microsoft 365 services.
What is PnP PowerShell?
PnP PowerShell is a cross-platform PowerShell module that provides a rich set of commands for managing and automating Microsoft 365 services, with a primary focus on SharePoint Online. It enables administrators to perform common tasks, such as managing sites, permissions, lists, libraries, files, and users, through PowerShell scripts.
Some common tasks that can be performed with PnP PowerShell include:
- Managing SharePoint sites and subsites
- Creating and updating lists and libraries
- Managing permissions and security groups
- Uploading and downloading files
- Generating SharePoint reports
- Automating tenant administration tasks
- Managing Microsoft Teams and Microsoft 365 Groups
However, before you can start using these cmdlets, you must install PowerShell 7, install the PnP PowerShell module, register an Entra ID application for PnP PowerShell, and sign in to your SharePoint Online tenant interactively using Multi-Factor Authentication (MFA).
How to Install and Connect to PnP PowerShell for SharePoint Online.
Prerequisites.
- Windows 10/11 or Windows Server.
- Windows Administrator privileges.
- Microsoft 365 Global Admin or SharePoint Admin rights.
Step 1. Install PowerShell 7.4.0 or later.
To use PnP PowerShell, you must have PowerShell 7.4.0 or later installed. The easiest way to download and install the latest version of PowerShell on Windows is by using winget or by downloading the latest PowerShell Installation package as instructed in this guide.
Source: Install PowerShell on Windows
1. Download and run the latest PowerShell MSI installation package.
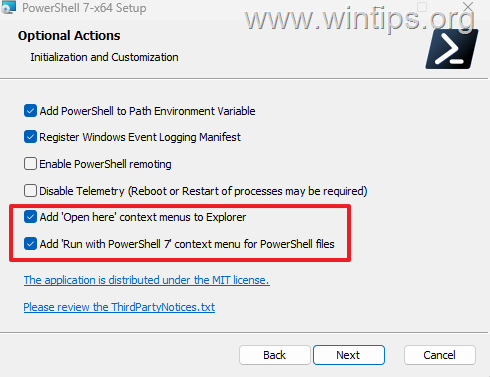
2. In the Optional Actions screen, select the following additional options, and then click Next:
- Add 'Open here' context menus to Explorer
- Add 'Run with PowerShell 7' context menu for PowerShell files
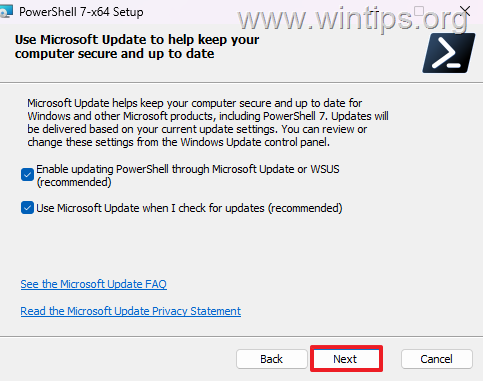
3. Click Next again in the Update settings screen and then click Install to install PowerShell 7.
Step 2. Install PnP PowerShell Module.
After installing PowerShell 7 follow the steps below to install the PnP PowerShell module :
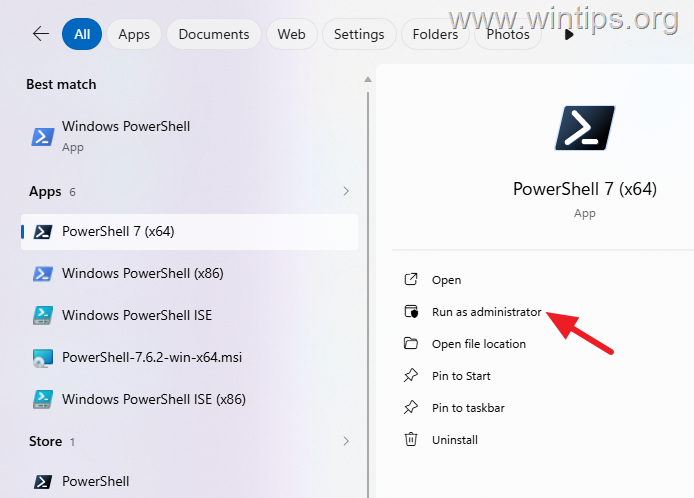
1. Open PowerShell 7 (x64) as Administrator
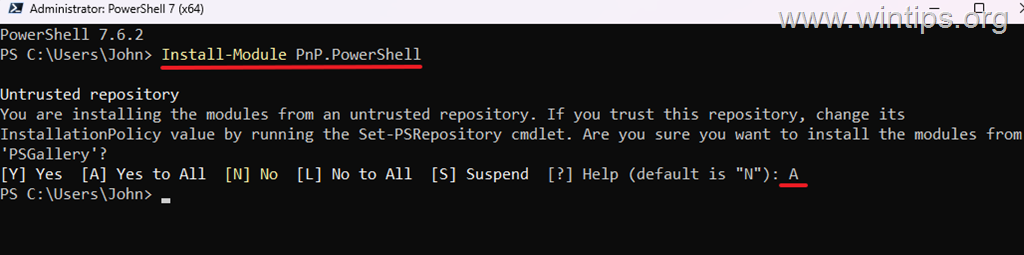
2a. Issue the following command to install PnP PowerShell and press Enter:
- Install-Module PnP.PowerShell
2b. Press "A" when asked to install the modules from "PSGallery".
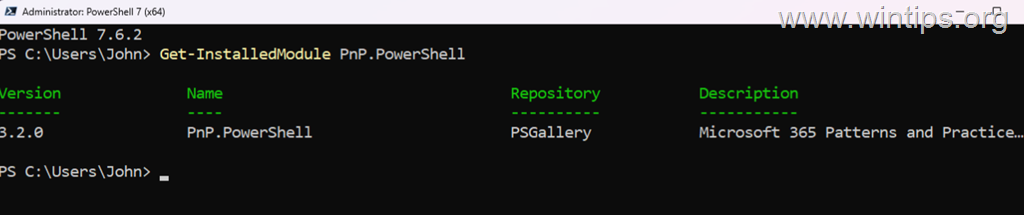
3. To verify that the PnP PowerShell module was installed successfully and see the installed version, run this command in PowerShell 7 as administrator):
- Get-InstalledModule PnP.PowerShell
If PnP PowerShell was installed you should see information similar to:
Version Name Repository Description
3.x.x PnP.PowerShell PSGallery Microsoft 35 Patterns and Practice…
Step 3. Register an Entra ID Application for PnP.PowerShell Module.
To securely sign in to Microsoft 365 services, such as SharePoint Online, you must register a new Entra ID application for PnP PowerShell. This ensures that every time you sign in to your tenant, you are prompted to enter your credentials, enabling multi-factor authentication (MFA) and enforcing any Conditional Access policies configured for your tenant.
1. Open PowerShell 7 (x64) as Administrator.
2. Run the following command to register an Entra ID application for the PnP PowerShell module and enable interactive login. Replace <yourtenantname> with the name of your tenant.
Register-PnPEntraIDAppForInteractiveLogin -ApplicationName "PnP.PowerShell" -Tenant <yourtenantname>
For example: If your tenant name is "example.com", run the following command:
- Register-PnPEntraIDAppForInteractiveLogin -ApplicationName "PnP.PowerShell" -Tenant example.com

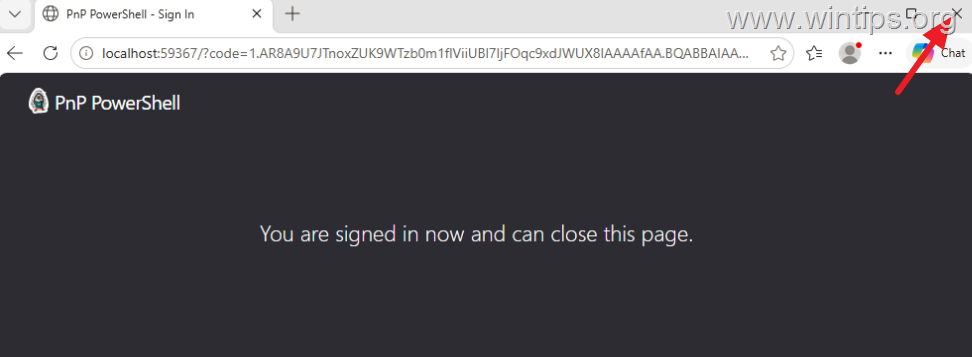
3. When prompted, sign in using your Microsoft 365 global admin account and complete the multi-factor authentication (MFA) process.
4. After successfully signing in, close the browser window and wait until the application created.
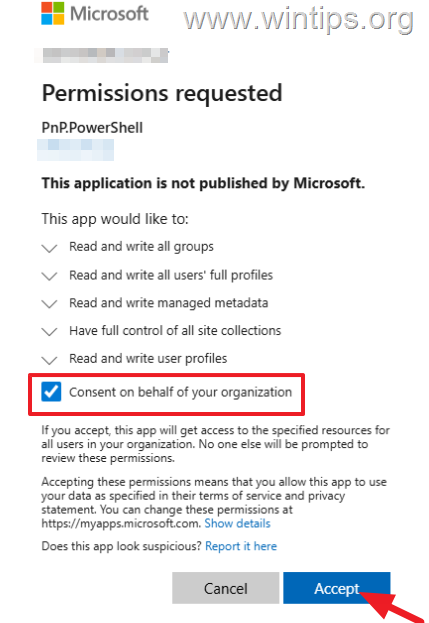
5. Grant consent to the permissions requested on behalf of your organization, and then click Accept.
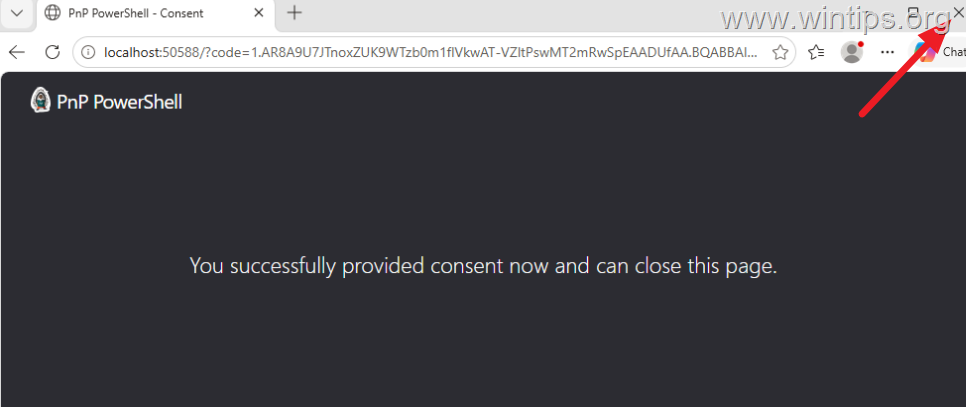
6. After providing consent close the browser window.
7. When the "PnP.PowerShell" application has been successfully created, make a note of its AzureAppId/Client ID, because you'll need it every time you want to connect to your tenant with PnP PowerShell.
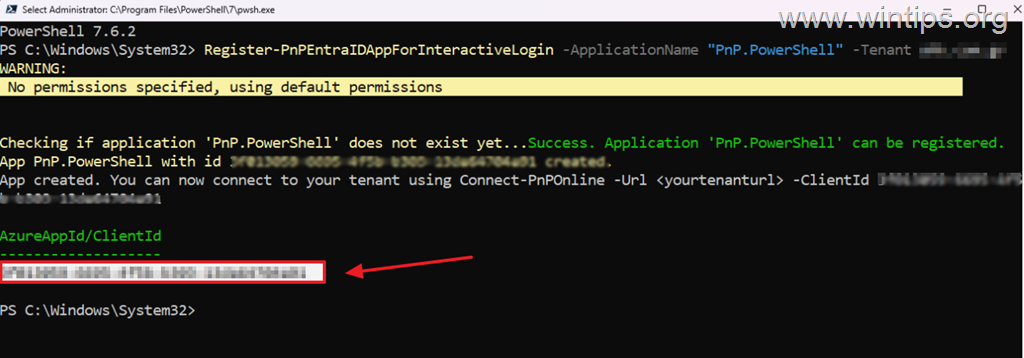
8. From now on, you can connect to your tenant interactively using the Client ID of the PnP PowerShell Entra ID application you registered by running the following command:
-
Connect-PnPOnline -Url <yourtenantname> -Interactive -ClientId <ClientID>
For example: If your tenant name is "example.com" and the ClientID of PnP PowerShell is "12345678-1234-1234-1234-123456789012", run the following command:
- Connect-PnPOnline example.com -Interactive -ClientId 12345678-1234-1234-1234-123456789012

Step 4. Connect to SharePoint Online using PNP PowerShell
A. To connect to SharePoint Online using PNP PowerShell with interactive login and MFA authentication, issue the following command:
- Connect-PnPOnline <yourtenantname>.sharepoint.com -Interactive -ClientId <ClientId>
For example: If your tenant name is "example.com" and the ClientID of PnP PowerShell is "12345678-1234-1234-1234-123456789012", run the following command:
- Connect-PnPOnline examplecom.sharepoint.com -Interactive -ClientId 12345678-1234-1234-1234-123456789012

B. To connect to a specific SharePoint Online Site using PNP PowerShell with interactive login and MFA, issue the following command:
- Connect-PnPOnline <yourtenantname>.sharepoint.com/sites/sitename -Interactive -ClientId <ClientDd>
For example: If your tenant name is "example.com", the ClientID of PnP PowerShell is "12345678-1234-1234-1234-123456789012" and the SharePoint site you want to connect to is named "sales", run the following command:
- Connect-PnPOnline examplecom.sharepoint.com/sites/sales -Interactive -ClientId 12345678-1234-1234-1234-123456789012

How to update PnP PowerShell ?
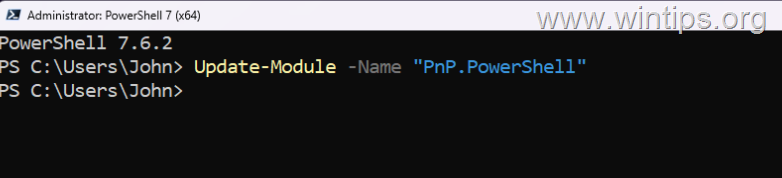
To update PNP.PowerShell module to the latest version, run the following command in PowerShell 7 as administrator:
-
Update-Module -Name "PnP.PowerShell"
How to Uninstall PnP PowerShell?
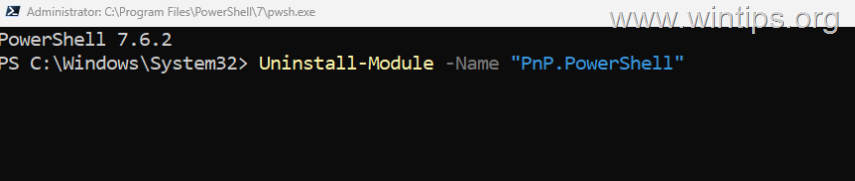
To uninstall PNP.PowerShell module, run the following command in PowerShell 7 as administrator:
- Uninstall-Module -Name "PnP.PowerShell"

Why do I receive the message "Please specify a valid Client ID for an Entra ID app registration" with the error "Connect-PnPOnline: Specified method is not supported"?
Newer versions of PnP PowerShell require you to use your own Entra ID app registration Client ID for interactive authentication. To register an Entra ID app for PnP PowerShell, follow the instructions in Step-3 above.

Summary.
PnP PowerShell is one of the most powerful tools available for managing and automating SharePoint Online. By installing PowerShell 7, deploying the PnP PowerShell module, and connecting to your SharePoint Online environment, you can automate tasks, manage permissions, generate reports, and simplify tenant management.
That's it! Let me know if this guide has helped you by leaving your comment about your experience. Please like and share this guide to help others.
Frequently Asked Questions
What is PnP PowerShell used for?
PnP PowerShell is a cross-platform PowerShell module that provides a comprehensive set of commands for managing and automating Microsoft 365 services, mainly focusing on SharePoint Online. It allows administrators to perform tasks like managing sites, permissions, lists, libraries, and users through PowerShell scripts.
What are the prerequisites for installing PnP PowerShell on Windows?
To install PnP PowerShell on Windows, you need to have Windows 10/11 or Windows Server, Windows Administrator privileges, and Microsoft 365 Global Admin or SharePoint Admin rights.
How can I verify if the PnP PowerShell module is installed successfully?
You can verify the installation of the PnP PowerShell module by opening PowerShell 7 as an administrator and running the command: Get-InstalledModule PnP.PowerShell. This command will display the installed version of the module, confirming its installation.
Why is it necessary to register an Entra ID application for PnP PowerShell?
Registering an Entra ID application for PnP PowerShell ensures secure sign-in to Microsoft 365 services like SharePoint Online. It allows for Multi-Factor Authentication (MFA) and enforces Conditional Access policies, enhancing security during tenant access.
Still having trouble fixing this issue?
💬 Get WinTips Remote Support →

- How to Install and Register PnP PowerShell for SharePoint Online. - November 9, 2026
- KB5127648 Fails to Install (0x800f0845) or Causes Windows 11 to Loop in Recovery Mode (0xc000000d): How to Fix - November 4, 2026
- How to Set Microsoft Edge as the Default Browser on iOS Devices Using Intune. - November 2, 2026