
How to create a bootable Windows 7 USB or DVD Installation Setup disk
In nowadays most new computers are shipped without Windows 7 (or Windows 8) installation disks and some of them without a DVD drive installed on them. Instead they include a recovery program that uses a hidden recovery partition to restore the computer to the default factory working state or to create (by the user) recovery disks in case of system crash. For my experience many users do not know the importance of having recovery disks for the case of system (disk) crash and they don’t create them when they obtain their new computer. In the other hand many users they don’t want all the extra trial software that was installed on their computers and they want to perform a fresh clean installation without any extra or crap software.
This tutorial is written to helps users to create a bootable Windows USB or DVD disk and perform a clean installation of Windows 7 OS using their own valid Windows 7 Product Key.*
* Note: Keep in mind that you can use this tutorial as well to create a Windows 8 USB or DVD bootable disk.
Requirements
1. Product Key: Before you continue to the steps bellow, first make sure that you have a valid Windows product Key on your disposal.
2. An Empty USB or DVD media device: e.g an empty USB flash disk with (at least) 4GB capacity or an empty DVD disk.
3. For Windows XP Users Only: Microsoft .NET Framework & Microsoft Image Mastering API v2 already installed on your computer.
How to find your Windows Product Key:
- Look at the computer case (or at the bottom if your own a laptop) to find a sticker with a 25-digit number typed on it.

- If you cannot find the sticker with the 25 digit product key then you can download and install a product key finder utility to retrieve your product key from the installed OS. You can use one of the following programs to do that:

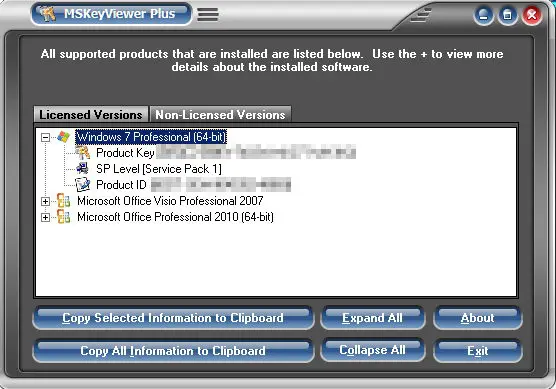
- MSKeyViewer Plus : A freeware and portable utility that reads the Windows Registry and displays the product key of Windows and Office programs.
- Belarc Advisor: Another freeware utility (for personal use only) that creates a detailed report of your installed software, hardware, Antivirus Status, etc. and displays the report into a Web browser window (as an HTML file).
Step 1. Download Windows 7 Disc Image File (.ISO).
Download the appropriate Windows 7 DVD ISO image for the version that you own, from Microsoft's Software Recovery Center.
* Note: You must have your own Product key to download and to activate Windows 7.
Step 2. Install the “Windows 7 USB/DVD Download tool”.
Download and install the “Windows 7 USB/DVD Download tool”.
1. Press “Run” when you are prompted to start the installation.
![]()
2. Press “Next” at Windows 7 USB/DVD Download Tool Setup Wizard.

3. Press “Install” at the next screen.

4. Finally press “Finish” when the installation is completed.

Step 3. Create a Windows 7 bootable USB or DVD disk.
1. Double-click to open the “Windows 7 USB DVD Download Tool” utility.

2. In the first screen click “Browse”.

3. Select the Windows 7 ISO image file you downloaded at “Step 1” and press “Open”.

4. Press “Next”.

5. Now select the Windows Boot Media type that you want to create (USB or DVD): e.g USB device.

6. At the next set (Step 3 of 4) select your USB disk from the list of available devices and press the “Begin copying” button.

7. Press “Erase USB device” if prompted.

8. Press “Yes” to confirm the media erase.

9. Now sit back and wait until your boot media is created.

When the media creation is completed you can use the media created to boot and install the operating system from it.
Additional info:
To be able to boot from the USB device to must enter your BIOS settings, and change the boot order. To do that:
(With the Windows 7 USB or DVD bootable device already plugged).
1. Enter the BIOS settings by pressing "DEL" or "F1" or "F2" or "F10". *
* The way to enter into BIOS Settings depends on the computer manufacturer.
2. Inside Bios menu, find "Boot Order" setting. This setting is commonly found inside "Advanced BIOS Features" menu.

3a. Navigate to “First Boot Device” option press “Enter”.
![BIOS-First-Boot-Device[3]](https://www.wintips.org/wp-content/uploads/2014/01/BIOS-First-Boot-Device3.jpg "BIOS-First-Boot-Device[3]")
3b. Navigate with your keyboard arrows to select “USB-HDD” as “First Boot Device” and then press “Enter”.


4. Press “ESC” to return to the BIOS main menu & select “Save and Exit Setup” to save your selections and exit from BIOS CMOS Setup Utility.

5. Continue with Windows installation.

- How to Resolve Hyper Backup Error "Failed to Export System Configuration" on Synology NAS. - June 17, 2026
- How to Require MFA for All Users in Microsoft 365 with a Conditional Access Policy. - June 15, 2026
- How to Resolve Error "Something Went Wrong 657rx" in Outlook or Microsoft 365 Apps. - June 10, 2026


