
How to Automatic Create System Restore Points in Windows 10.
If you 're looking for a way to automatically create system restore points in Windows 10 then continue reading this tutorial. As you may know, the System Restore tool allows you to revert Windows to an earlier working state (point in time), and it used to recover Windows if something goes wrong and Windows does not work properly.

In all versions of Windows, the System Restore tool, which only works if the System Protection is enabled on the computer, automatically creates a snapshot of the current state (system files and registry), prior to installing a Windows update or other software, or when you install a new hardware device driver.
So, at my opinion, it is very important to frequently create system restore points so that you can restore your system if Windows 10 does not function properly (e.g. after a major change or after a virus attack), or if you want to restore a file/folder to its previous version.
This tutorial shows two (2) different methods to daily create System Restore points in Windows 10, automatically.
How to Create System Restore Points in Windows 10 Automatically.
Step 1. Turn on the System Restore Protection in Windows 10.
By default, the System Restore protection is not enabled in Windows 10. So, proceed and enable it by following the instructions below:
1. Open the System Protection settings, by using one of the following ways:
-
- Right-click at the Windows icon
 at the screen’s bottom-left corner and from the pop-up menu choose System, or…
 - Open Windows Explorer, right click at 'This PC' and select Properties.
- Right-click at the Windows icon

2. Click System protection at the left pane.

3. At System Protection tab, click Configure.

4. To enable the System Restore Protection: *
a. Check the Turn on system protection.
b. Adjust the maximum disk space used for system protection, to (about) 10-15% of the maximum disk space.
c. Click OK .

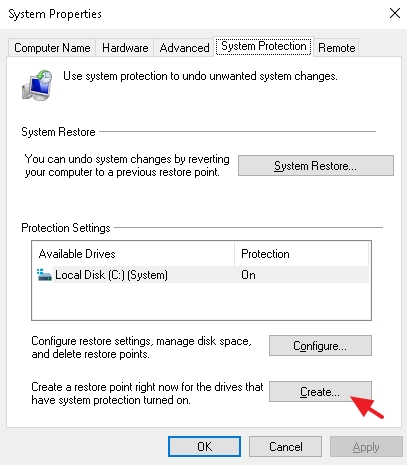
5. If you want to manually create a restore point immediately (or at any time), click the Create button, give a recognizable name for the restore point and click OK. Otherwise continue to step-2 to configure the automatically creation of restore points.
Step 2. Create Automatic System Restore Points in Windows 10.
After enabling the system protection, follow the instructions of one of the following two methods to create daily restore points automatically.
- Method 1. Create Automatic Restore Point with a Scheduled Task.
- Method 2. Create Automatic Restore Point when Windows Defender Scans.
Method 1. How to Automatically Create Restore Points by using Task Scheduler in Windows 10.
To automatically create a System Restore Point (Snapshot) on a Daily Schedule on Windows 10:
1. At the search box, type: task scheduler
2. Open Task scheduler

3. From Action menu select Create Task.

4. At General tab:
a. Type a name for the task. e.g. "Create Restore Point".
b. Click Change User or Group
c. At 'Enter the object name' box, type system and click OK.
d. Click the Triggers tab.


3. At Triggers tab, click New.

3a. Specify how often to create the restore point (e.g. Daily) and then specify a time for the creation of the restore point. (e.g. at 11.00AM).
3b. Click OK.* Note: Keep in mind that the scheduled task will not create a new restore point if there are earlier points created in the past 24 hours.

4. At Actions tab, click New.

4a. At Program/Script field, type the following command:
- wmic.exe
4b. At Add arguments (optional) filed type:
- /Namespace:\\root\default Path SystemRestore Call CreateRestorePoint "Daily Restore Point", 100, 12
4c. Click OK.

5. Finally click OK to close the new task's Properties.
Method 2. How to Create Restore Points when Windows Defender Scans in Windows 10.
- Windows 10 Home
In Windows 10 Home, you can create an automatic restore point when the Windows Defender scans your computer, by using the Registry Editor. To do that:
1. Simultaneously press the Windows ![]() + R keys to open run command box.
+ R keys to open run command box.
2. Type regedit and press Enter.

3. At the left pane, navigate to this key:
- HKEY_LOCAL_MACHINE\SOFTWARE\Policies\Microsoft\Windows Defender
4. Right click at 'Windows Defender' key and select New -> Key

5. Type Scan as key name and press Enter.
6. Highlight the 'Scan' key and then right click at an empty space on the right pane and select New -> DWORD (32-bit) Value.

7. Name the new DWORD value DisableRestorePoint and press Enter.
8. Double click at DisableRestorePoint REG_DWORD value and set the value data to 0.

9. Close Registry Editor and restart your PC.
- Windows 10 Pro
If you own Windows 10 Professional, Enterprise or Education version, then you can force Windows to create a daily restore point when the Windows Defender scans your computer, by using the Group Policy Editor. To do that:
1. Simultaneously press the Windows ![]() + R keys to open the run command box.
+ R keys to open the run command box.
2. Type gpedit.msc & Press Enter.

3. In Group Policy Editor navigate to the following path (in the left pane): *
- Computer Configuration -> Administrative Templates -> Windows Components -> Windows Defender Antivirus -> Scan *
* Note: In latest versions of Windows 10 the path is changed to: "Computer Configuration -> Administrative Templates -> Windows Components -> Microsoft Defender Antivirus -> Scan"
4. At the right pane, double click at Create a system restore point.

5. Set to Enabled and then click OK.

6. Close the Group Policy Editor.
That's it! Let me know if this guide has helped you by leaving your comment about your experience. Please like and share this guide to help others.

- How to Resolve Hyper Backup Error "Failed to Export System Configuration" on Synology NAS. - June 17, 2026
- How to Require MFA for All Users in Microsoft 365 with a Conditional Access Policy. - June 15, 2026
- How to Resolve Error "Something Went Wrong 657rx" in Outlook or Microsoft 365 Apps. - June 10, 2026


December 23, 2023 @ 5:19 pm
What about the deletion of older Restore points, will they be deleted automatically ?
December 24, 2023 @ 11:12 am
Windows automatically deletes older restore points when the available space given for restore points is full to make room for new ones.
December 31, 2021 @ 12:31 pm
Something may have changed by 21H2. For Method 2, for Pro, 'Scan' seems to be under 'Microsoft Defender Anti-Virus' not 'Windows Defender Anti-Virus'. However I can find no created restore points after turning this on, and waiting a day. For Home I can also find no created restore points for that method after a day. I am investigating 'fast boot' as a possible cause. Any other ideas?
January 4, 2022 @ 2:45 pm
Open Task Scheduler and go to Task Scheduler Library > Microsoft > Windows > Windows Defender. At the right pane see the time(s) of Windows Defender Scheduled Scan and Cleanup and leave your computer ΟΝ during those hours.
February 27, 2021 @ 4:18 am
I set my system to restore once a week so I then used weekly instead of daily at the add arguments. Is this correct?
February 27, 2021 @ 12:24 pm
Right!
May 2, 2020 @ 12:38 pm
thanks a lot