How to Convert Shared Mailbox to User Mailbox or a User Mailbox to Shared Mailbox in Office365.
In this tutorial, you will learn how to convert a User mailbox (aka "Regular Mailbox") to Shared Mailbox or a Shared mailbox to User mailbox in Office365. One of the most useful features of Office 365, is the ability to create shared mailboxes. A shared mailbox can be accessed from many users and unlike a user mailbox, doesn't require a license.
Microsoft 365 (formerly known as "Office365"), gives you the option to convert a regular mailbox to a shared mailbox, or to convert a shared mailbox to a regular mailbox, to cover your needs.
* Note: The steps needed to create a new shared mailbox can be found in this article:
How to Convert a User Mailbox to Shared in Microsoft 365.
Converting a regular mailbox to a shared mailbox is usually required when an employee leaves a company in order to keep contact with customers who sent emails to the former employee's address. To change a regular mailbox to a shared mailbox:
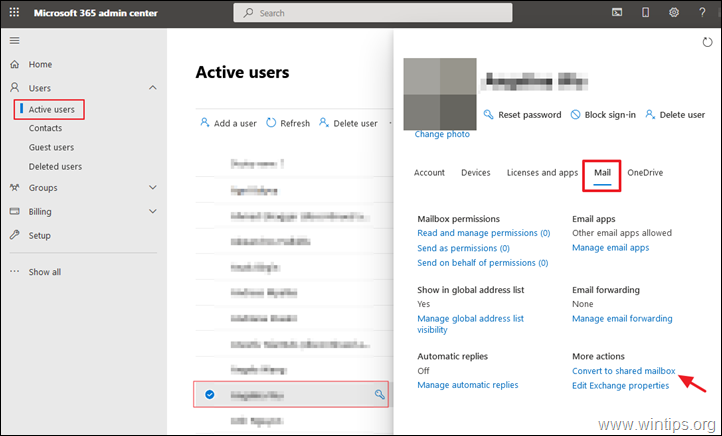
1. Login to Office 365 Admin center and go to Users > Active Users.
2. Select the user mailbox that your want to convert to a shared mailbox.
3. At Mail options, select Convert to shared mailbox. *
* Note: If the Convert to shared mailbox option, is unavailable proceed and assign a license to the mailbox, because is needed for the conversion. (after conversion you can remove the license).
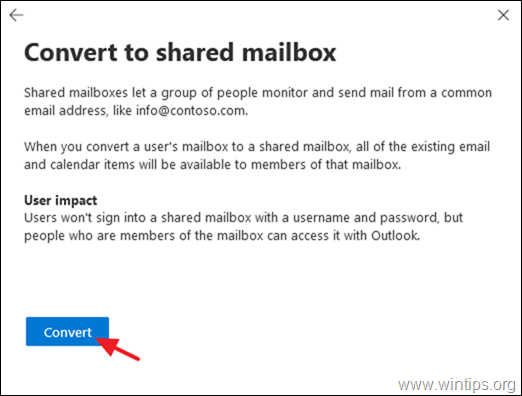
4. Press Convert.
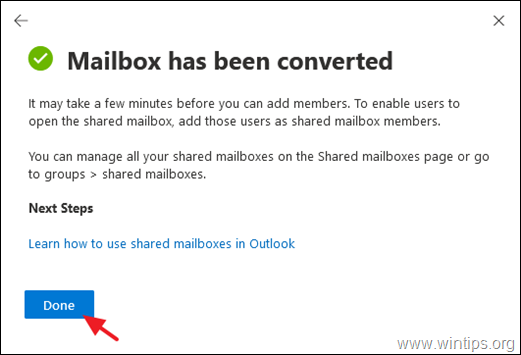
5. When the mailbox is converted click Done.
6. Finally, from the main page of the Office 365 Admin center, navigate to Groups > Shared Mailboxes. Select the new shared mailbox and click Edit under Members and Add the users that will be able to access the shared mailbox.
How to Convert a Shared Mailbox to Regular Mailbox.
* Note: Keep in mind that Regular Mailboxes needs a license to work. So, proceed and assign a license after the conversion. To change a Shared Mailbox to a User Mailbox:
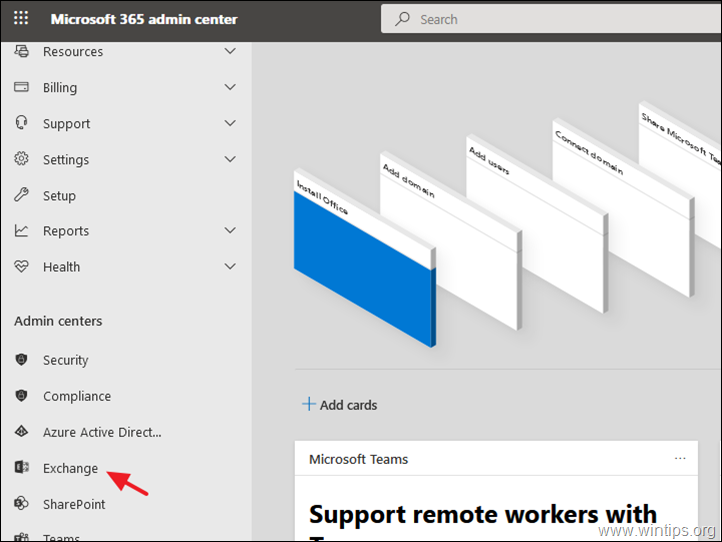
1. In Office 365 Admin center, click Show All and then click Exchange.
2. In Exchange Admin Center, go to recipients > shared.
3. Select the Shared Mailbox that you want to convert to User Mailbox.
4. Click Convert under Convert to Regular Mailbox.
5. At the warning message click OK to continue. *
* Note: Don't forget to assign a license to the mailbox after the conversion, in order the user mailbox to work.
6. When the conversion is completed click Close.
7. Now, from the Office 365 Admin center, go to Users > Active Users.
8. Select the new user mailbox and then click Licenses and apps.
9. Finally, assign a license and click Save changes.
That's it! Let me know if this guide has helped you by leaving your comment about your experience. Please like and share this guide to help others.
We're hiring
We're looking for part-time or full-time technical writers to join our team! It's about a remote position that qualified tech writers from anywhere in the world can apply. Click here for more details.
- FIX: Numeric keypad Not Working on Windows 10/11 - July 24, 2024
- How to Share Files or Printers in Hyper-V? - July 22, 2024
- How to invoke Hyper-V Screen resolution prompt? - July 17, 2024


February 17, 2022 @ 12:48 am
Yes Mailbox existing permission remain on the mailbox after Converting from Shared mailbox to "Regular"
January 21, 2022 @ 2:38 am
thank you so much
September 20, 2021 @ 7:56 am
What happens when one or more users have access to the shared mailbox. How are those rights preserved after conversion from shared to user mailbox?
September 23, 2021 @ 3:27 pm
I'm not sure for that, but I think the rights are retained after conversion.
August 26, 2021 @ 2:28 pm
Great instructions! Thanks