How to Downgrade Windows 11/10 Pro to Home.
While Windows 10//11 Pro provides advanced features and capabilities for business and power users, you may need to switch to a more basic version, such as Windows 10/11 Home.
Downgrading from Windows 10 Pro to Home can be done using three (3) different methods, depending on whether you had a Windows 10 Home key or not.
In any case, this guide is here to help you in the process of downgrading your Windows 10 Pro installation to Windows 10 Home.
How to Downgrade to Windows 10/11 Home from Windows 10/11 Pro.
- Downgrade to Windows 10/11 Home using a Product Key.
- Downgrade to Windows 10/11 Home with a Repair install.
- Clean Install Windows 10/11 Home using a Product key.
Method 1. Downgrade Windows 11/10 Pro to Home using a Product Key.
If you own a Windows 10/11 Home product key, you can easy downgrade your Windows 10/11 Pro computer to Windows 10/11 Home, by doing the following:
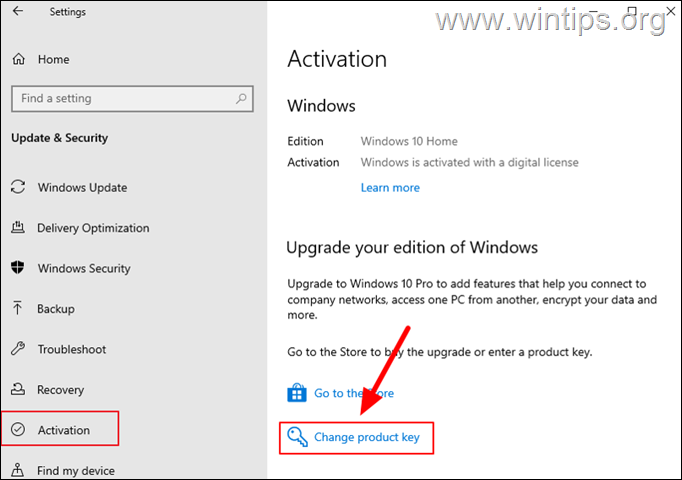
1. Go to Start > Settings > Update & Security and then select Activation on the left.*
* Note: On Windows 11, go to Start > Settings > System and click Activation on the right.
2. Then click Change product key on the right.
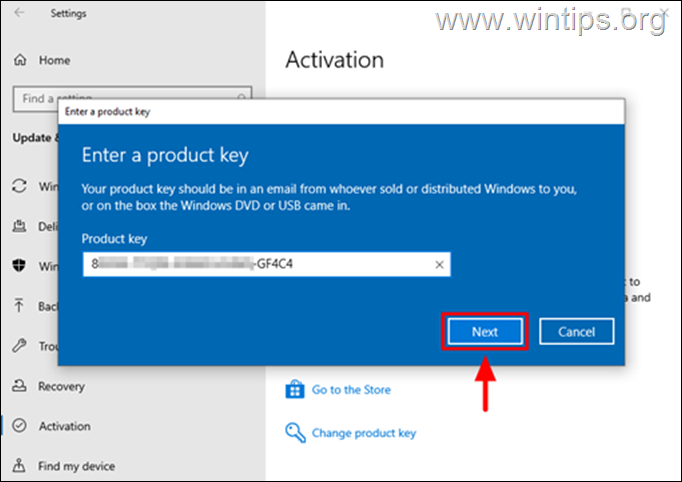
3. Now type the 25-digit Windows Home product key in the 'Enter Product key' window. When done, click Next.
4. After the key is confirmed, press the Start button to downgrade your Windows Edition.
Method 2. Downgrade Windows 10/11 Pro to Home with a Repair Install.
If your computer came with Windows 10/11 Home pre-installed and you've upgraded to Windows 10/11 Pro and now you want to go back to Windows 10/11 Home, follow these steps:
Step 1. Change Windows 10 Edition in Registry.
1. Press Windows ![]() + R keys to load the Run dialog box.
+ R keys to load the Run dialog box.
2. Type regedit and press Enter, to open the Registry Editor
3. Navigate to the following location:
-
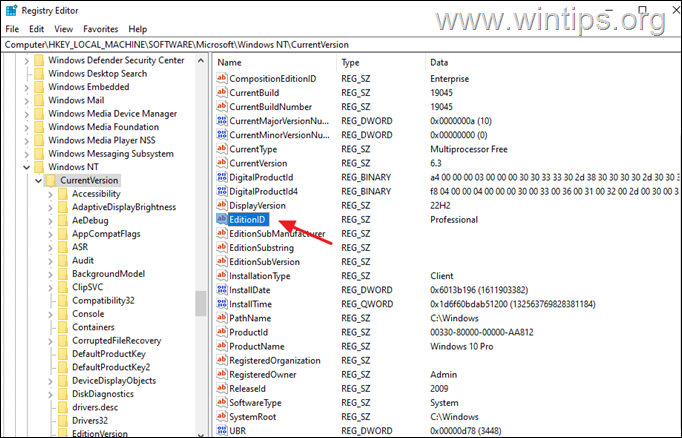
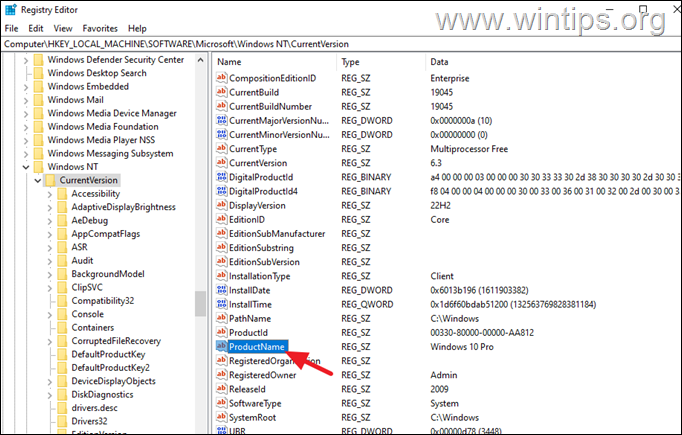
HKEY_LOCAL_MACHINE\SOFTWARE\Microsoft\Windows NT\CurrentVersion
4a. At the right pane, open the EditionID REG_SZ value.
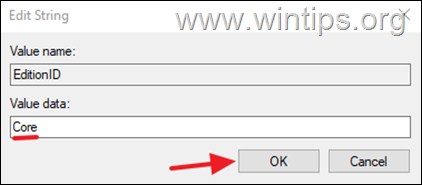
4b. Change the Value Data from "Professional" to Core and click OK.
5a. Then open the ProductName REG_SZ value.
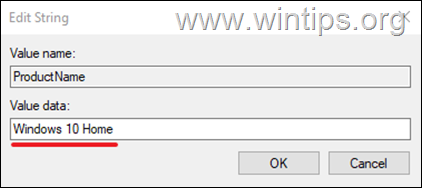
5b. Change the Value Data from "Windows 10 Pro" to Windows 10 Home and click OK.*
* Note for Windows 11 users: Note that even if you are using Windows 11, the value here says "Windows 10 Pro" and you need to rename it to "Windows 10 Home".
6. Now navigate to this registry location:
-
HKEY_LOCAL_MACHINE\SOFTWARE\Wow6432Node\Microsoft\Windows NT\CurrentVersion
7. Then perform the same steps as above and:
7a. Change the EditionID REG_SZ value from "Professional" to "Core"
7b. Change the ProductName REG_SZ value from "Windows 10 Pro" to "Windows 10 Home".
8. Close the Registry Editor and proceed to step-2.
Step 2. Download Windows 10 or Windows 11 in a ISO file.
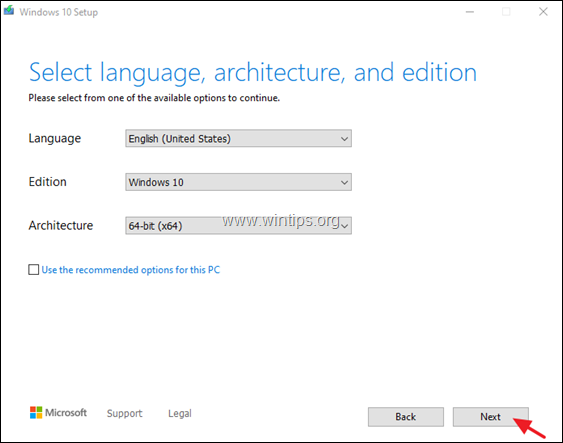
Proceed and download the latest version of Windows 10 in a ISO file, by using the Media Creation Tool (MCT). To do that:
1. Navigate to Windows 10 download site.
* Note: If you own Windows 11 navigate to Windows 11 download page.
2. Download and save the Windows Media Creation Tool (MCT) on your computer.
3. When the download is completed, run the Media Creation Tool (MediaCreationTool.exe).
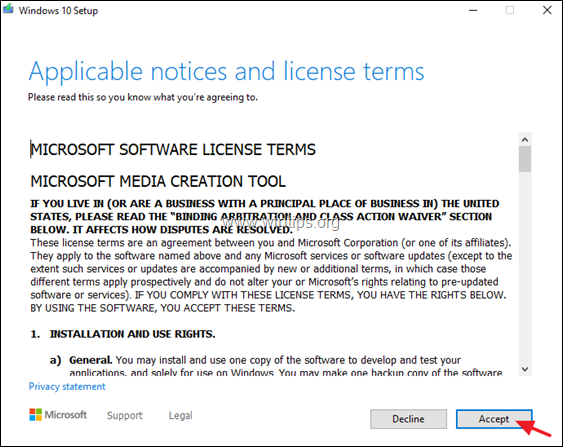
4. Accept the license agreement.
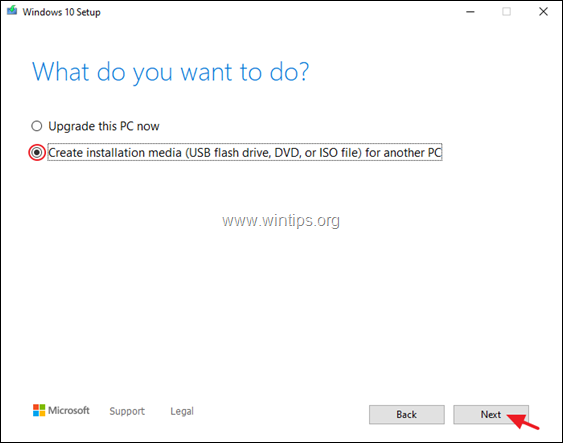
5. Choose Create installation media for another PC & click Next.
6. At the next screen choose Next.
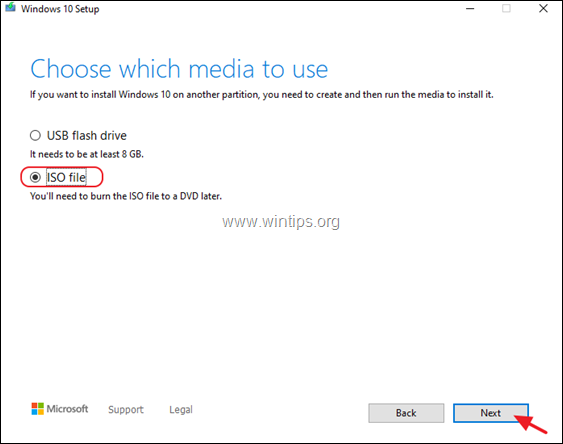
7. At 'Choose which media to use' choose ISO file and click Next.
8. Select a location to save the 'Windows.iso' file and click Save.
8. Now wait for the download to finish. When this done, click Finish and continue to next step.
Step 3. Repair Install Windows and return to Windows 10 Home.
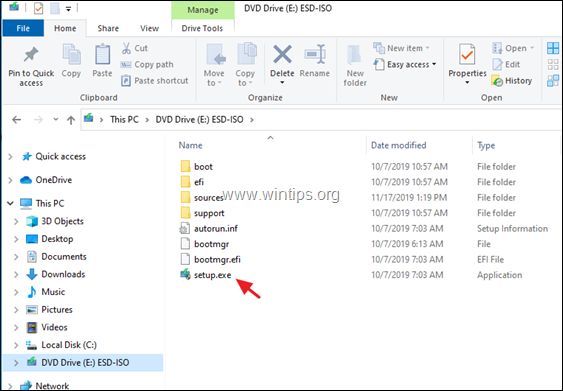
1. Open Windows Explorer and navigate to the folder you saved the 'Windows.iso' file.
2. Double-click at the ISO file to mount it in Explorer. (or right-click on the ISO file and select Mount).
3. At the mounted drive, double click at setup.exe application.
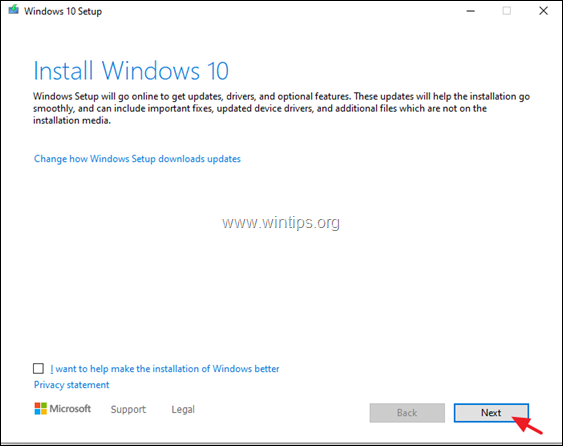
4. Press Yes at the 'UAC warning message' and then click Next to install Windows 10.
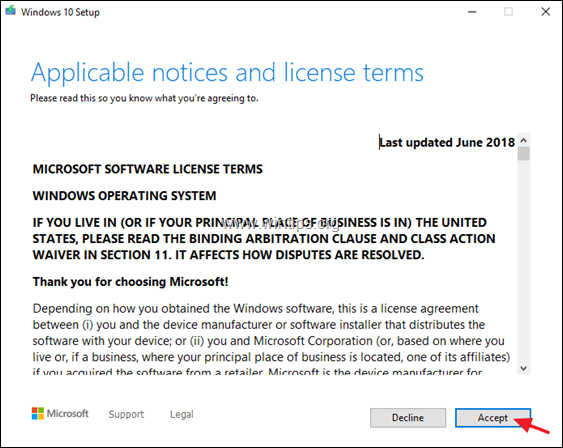
5. Accept the license terms and then be patient until Windows checks for updates.
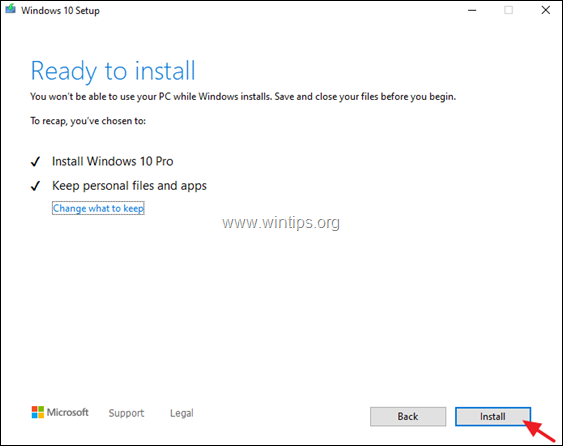
6. At 'Ready to Install' screen, make sure that the Keep personal files and Apps option is selected and click Install.
7. Finally, wait for the in-place upgrade/repair of Windows 10 to complete.
8. When the installation repair is complete, you will be downgraded to Windows 10 Home without losing anything.
Method 3. Clean Install Windows 10/11 Home.
The final method to downgrade your system from Windows 10/11 Pro to Windows 10/11 Home, is to backup your files and to perform a clean installation of Windows 10/11 Home.
For instructions on how to clean install Windows, read the instructions in one of these tutorials depending on your Windows Edition:*
* Note: After installation you'll need a valid Windows 10/11 Home product key to activate Windows.
That's it! Let me know if this guide has helped you by leaving your comment about your experience. Please like and share this guide to help others.
We're hiring
We're looking for part-time or full-time technical writers to join our team! It's about a remote position that qualified tech writers from anywhere in the world can apply. Click here for more details.
- FIX: Numeric keypad Not Working on Windows 10/11 - July 24, 2024
- How to Share Files or Printers in Hyper-V? - July 22, 2024
- How to invoke Hyper-V Screen resolution prompt? - July 17, 2024

