
How to fix MsMpEng.exe High CPU Usage problem
In my opinion, Microsoft Security Essentials is a well working free Antivirus solution for individuals and small business. But some times, on different computers, I have discovered that Microsoft Security Essentials (MSE) Antimalware service “MsMpEng.exe” causes high CPU usage with no obvious reason.
After resolving many times this problem, I discovered that the “MsMpEng.exe” high CPU usage problem may happen for various reasons so there is not only one solution to solve it. For example, in the past I have solved the “MsMpEng.exe” high CPU usage problem just by cleaning an infected computer from a nasty virus, or by uninstalling and reinstalling MSE again or by removing an incompatible with MSE security program, etc.
If you want to resolve the MsMpEng.exe high CPU usage problem, then try the following solutions:
How to fix MsMpEng.exe high CPU usage problem.
Attention:
1. Before continuing to resolve the "MsMpEng.exe" high CPU usage problem, first make sure that you haven't installed another antivirus program on your computer.
2. if you have Windows XP then you must uninstall Microsoft Security Essentials because is no longer supported in Windows XP.
Solution 1: Check and Clean your computer from Malware.
Solution 2: Uninstall & Re-install Microsoft Security Essentials.
Solution 3: Exclude "MsMpEng.exe" file from scanning.
Solution 4. Re-Schedule MSE scanning time – Disable Microsoft Security Client.
Solution 5: Install another antivirus program on your computer.
Solution 1: Check your computer for Malware.
Step 1. Start your computer in Safe Mode with Networking.
In order to check your computer for possible Malware programs running on it, it is better to start your computer in Safe mode with network support. To do that:
Windows 7, Vista & XP users:
- Close all programs and reboot your computer.
- Press the "F8" key as your computer is booting up, before the appearance of the Windows logo.
- When the "Windows Advanced Options Menu" appears on your screen, use your keyboard arrows keys to highlight the “Safe Mode with Networking” option and then press "ENTER".
![safe-mode-with-networking_thumb1_thu[1]](https://www.wintips.org/wp-content/uploads/2014/04/safe-mode-with-networking_thumb1_thu1.jpg "safe-mode-with-networking_thumb1_thu[1]")
Windows 8 & 8.1 users:
- Press “Windows”
 + “R” keys to load the Run dialog box.
 - Type “msconfig” and press Enter.
- Click the Boot tab and check “Safe Boot” & “Network”.
- Click “OK” and restart your computer.
Note: In order to boot Windows in “Normal Mode” again, you have to uncheck the “Safe Boot” setting by using the same procedure.

Step 2. Check & terminate possible malicious processes with RogueKiller.
1. Download and save "RogueKiller" utility on your computer'* (e.g. your Desktop)
Notice*: Download version x86 or X64 according to your operating system's version. To find your operating system's version, "Right Click" on your computer icon, choose "Properties" and look at "System Type" section.

2. Double Click to run RogueKiller.
3. Let the prescan to complete and then press on "Scan" button to perform a full scan.
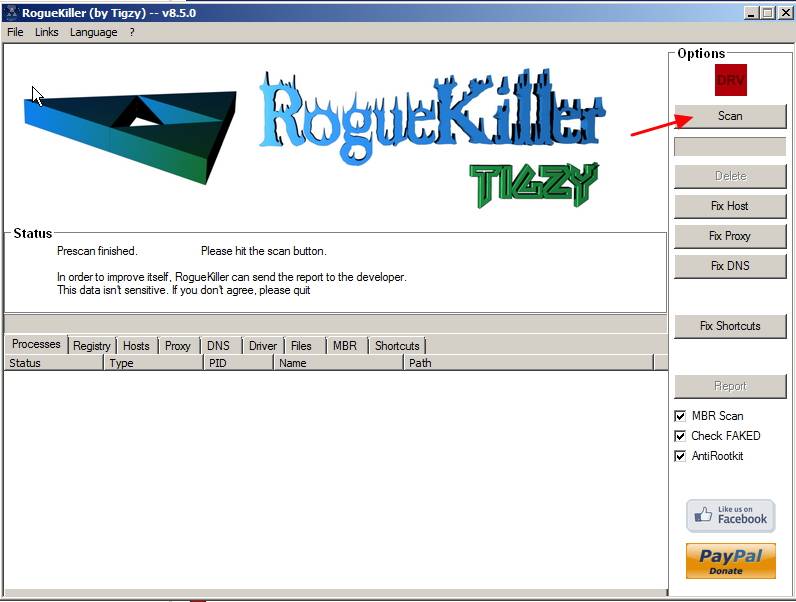
3. When the full scan is completed, press the "Delete" button to remove all malicious items found.

Step 3: Remove Adware programs with AdwCleaner.
1. Download and save “AdwCleaner” utility to your desktop.

2. Close all open programs and Double Click to open ”AdwCleaner” from your desktop.
3. Press “Scan”.
![adwcleaner-scan_thumb1_thumb[1]](https://www.wintips.org/wp-content/uploads/2014/04/adwcleaner-scan_thumb1_thumb1.jpg "adwcleaner-scan_thumb1_thumb[1]")
4. When the scan is completed, press “Clean” to remove all the unwanted malicious entries.
![adwcleaner-clean_thumb1_thumb[1]](https://www.wintips.org/wp-content/uploads/2014/04/adwcleaner-clean_thumb1_thumb1.jpg "adwcleaner-clean_thumb1_thumb[1]")
4. Press “OK” at “AdwCleaner – Information” and press “OK” again to restart your computer.

5. When your computer restarts, close "AdwCleaner" information (readme) window and continue to the next step.
Step 4. Remove Malware with Malwarebytes Anti-Malware Free.
Download and install one of the most reliable FREE anti malware programs today to clean your computer from remaining malicious threats. If you want to stay constantly protected from malware threats, existing and future ones, we recommend that you install Malwarebytes Anti-Malware Premium:
Malwarebytes™ Protection
Removes Spyware, Adware & Malware.
Start Your Free Download Now!
Quick download & Installation instructions:
- After you click the above link, press at the “Start My Free 14-Trial” option to start your download.
![malwarebytes-downlaod_thumb1_thumb2_[1]](https://www.wintips.org/wp-content/uploads/2014/04/malwarebytes-downlaod_thumb1_thumb2_11.jpg "malwarebytes-downlaod_thumb1_thumb2_[1]")
- To install the FREE version of this amazing product, uncheck the “Enable free Trial of Malwarebytes Anti-Malware Premium” option at the last installation screen.
![malwarebytes-anti-malware-free-insta[2]](https://www.wintips.org/wp-content/uploads/2014/04/malwarebytes-anti-malware-free-insta22.jpg "malwarebytes-anti-malware-free-insta[2]")
Scan & Clean your computer with Malwarebytes Anti-Malware.
1. Run "Malwarebytes Anti-Malware" and allow the program to update to its latest version and malicious database if needed.

2. When the update process is completed, press the “Scan Now” button to start scanning your system for malware and unwanted programs.
![start-scan-malwarebytes-anti-malware[1]](https://www.wintips.org/wp-content/uploads/2014/04/start-scan-malwarebytes-anti-malware13.jpg "start-scan-malwarebytes-anti-malware[1]")
3. Now wait until Malwarebytes Anti-Malware finishes scanning your computer for malware.
![malwarebytes-scan_thumb1_thumb_thumb[2]](https://www.wintips.org/wp-content/uploads/2014/04/malwarebytes-scan_thumb1_thumb_thumb22.jpg "malwarebytes-scan_thumb1_thumb_thumb[2]")
4. When the scan has completed, first press the “Quarantine All” button to remove all threats and then click “Apply Actions”.

5. Wait until Malwarebytes Anti-Malware removes all infections from your system and then restart your computer (if required from the program) to completely remove all active threats.

6. After the system restarts, run Malwarebytes' Anti-Malware again to verify that no other threats remain in your system.
Now check if “MsMpEng.exe” high CPU usage problem is gone, otherwise continue to the rest of this article.
Solution 2: Uninstall and Re-install Microsoft Security Essentials.
Step 1. Uninstall Microsoft Security Essentials from your Control panel.
1. To do this, go to:
- Windows 7 & Vista: Start > Control Panel.
- Windows XP: Start > Settings > Control Panel

- Windows 8 & 8.1:
- Press “Windows”
 + “R” keys to load the Run dialog box.
 - Type “control panel” and press Enter.
2. Double click to open:
- Add or Remove Programs if you have Windows XP
- Programs and Features if you have Windows 8, 7 or Vista.

3. In the program list, find and Remove (Uninstall) the “Microsoft Security Essentials” application.
Note: If you are having problems removing Microsoft Security Essentials by using the “Add/Remove Programs” feature, then you have to download and run the MSE removal utility.

4. After removing Microsoft Security Essentials restart your computer.
Note: After the restart, make sure that MSE application is not listed anymore on the installed programs.
Step 2: Reinstall Microsoft Security Essentials.
After the computer restarts, go to Microsoft Security Essentials download site to download and install MSE on your computer again.
Solution 3: Exclude “MsMpEng.exe” from scanning
1. Open Microsoft Security Essentials main application and click “Settings”.

2. Click “Excluded files and locations” on the left pane.

3. Click “Browse”.

4. Navigate to the following location to select the “MsMpEng.exe” file and press “OK”.
Windows 7, Vista & XP users: C:\Program Files\Microsoft Security Client\MsMpEng.exe
Windows 8 users: C:\Program Files\Windows Defender\MsMpEng.exe

5. Press “Add”.

6. Press “Save Settings”.

Solution 4. Re-Schedule MSE scanning time or Disable Real-Time Protection.
Step 1. Re-Schedule Microsoft Security Essentials Scanning times
One useful feature of MSE is the automatic scanning for virus risks at specific days and hours. So find out at what hours the scanning is performed and set a scan time that is not interrupting your work (e.g. late night hours).
To schedule the Microsoft Security Essentials scanning time:
1. Open Microsoft Security Essentials main application and click “Settings”.
2. Click at “Scheduled Scan” at the left pane.

3. Set a different day & time for the scheduled scan and then press “Save Changes”.

4. Close MSE main application.
Now check if the “MsMpEng.exe” high CPU usage problem still persists. If yes, then temporarily disable the MSE real-time protection to find out if this feature causes the high CPU usage problem.
Step 2. Disable Microsoft Security Essentials Real-time protection.
To disable Microsoft Security Essentials Real-Time protection:
1. Open Microsoft Security Essentials main application and click “Settings”.
2. Click “Real-time protection” at the left pane.

3. Uncheck the box next to “Turn on real-time protection (recommended)” and then press “Save changes”.

4. Close “Microsoft Security Essentials”.
If the “MsMpEng.exe” high CPU usage problem still persists, then continue to the next step and prevent the “Microsoft Security Client” from being loaded at Windows startup.
Step 3. Disable Microsoft Security Client from starting up.
To disable “Microsoft Security Client” from startup:
1. Press “Windows” ![]() + “R” keys to load the Run dialog box.
+ “R” keys to load the Run dialog box.
2. Type “msconfig” and press Enter.

3. Click the “Startup” tab.

4. Uncheck the box next to “Microsoft Security Client” entry” and press “OK”

5. Restart your computer.
After the restart, check if your computer is working smoothly and “MsMpEng.exe” high CPU usage problem is gone. Then uninstall Microsoft Security Essentials and install another antivirus program on your computer. (Solution 5).
Solution 5: Install another antivirus program on your computer.
If you are still having problems with Microsoft Security Essentials, then you can try to use another antivirus to protect your computer from risks. To do that:
Step 1. Uninstall Microsoft Security Essentials from your computer.
First of all completely uninstall MSE from your computer by using the instructions of “Solution 2 – Step 1“ of this post.
Step 2. Install a different antivirus program in your computer.
After you uninstall MSE from your computer, proceed to install a different antivirus security program to protect your computer. Suggested free antivirus programs for this task: Avira’s Antivir Free Antivirus, Avast Free Antivirus or AVG Antivirus Free.

- How to Resolve Hyper Backup Error "Failed to Export System Configuration" on Synology NAS. - June 17, 2026
- How to Require MFA for All Users in Microsoft 365 with a Conditional Access Policy. - June 15, 2026
- How to Resolve Error "Something Went Wrong 657rx" in Outlook or Microsoft 365 Apps. - June 10, 2026


January 14, 2018 @ 4:55 am
I can't say for sure your solution will work for me but after reading the article, it's clear why I don't use Windows. Microsoft's OS forces everyone to become computer techs instead of users.
That's why I use Linux instead. It's my wife's Windows 10 PC that's messed up so I'm the only one around here qualified to solve computer issues.
How Microsoft retains customers is still beyond me.
November 11, 2017 @ 7:22 am
I have genuine Windows 7 Home Premium SP1 64-bit HP Compaq Presario Desktop PC. I use IE 11 and Google browser. I have not been able to get my MSE or the AntiMalware Client version 4.10.209.10 to startup when I turn on my pc. The castle icon doesn't show in the system tray and it is not hidden. The notification area is set to always show icon and notifications, but still; I can only run it manually, update it manually, and scan it manually. It use to run automatically, but no longer. I am a NOVICE pc user. So; can you give me step-by-step instructions on how to get my MSE and the Antimalware Client to automatically startup, when I turn on (boot) my pc? NOTE: In System Configuration: msconfig On the General Tab: STARTUP SELECTION: It shows SELECTIVE STARTUP is ON with check marks next to Load System Services and Load Startup Items. Isn't the NORMAL STARTUP suppose to be ON instead? How to fix this? I don't know how to configure. What is to be enabled or disabled and or checked or unchecked. NEED HELP!
November 11, 2017 @ 11:23 am
@Bonnie Lou: Press Ctrl+Alt+Del > open Task Manager and select the Processes tab. Is the process "MsMpEng.exe" listed there? Also at "Service" tab is the "MsMpSvc" running? If yes, then the "Security Essentials" is working properly.
If you don't see the process "MsMpEng.exe" or the service "MsMpSvc" is not running, make sure that you have not installed another antivirus/security software on your machine and also check your computer for virus and malware by using the steps in this guide: https://www.wintips.org/quick-malware-check-removal-guide/
p.s. Yes the Startup should be Normal. If not, check the Normal and reboot.
April 30, 2017 @ 12:39 am
AWESOME – simple enough that even this non-technically-gifted numpty could follow yr advice & the CPU usage dropped like a stone – hope ive cracked it, if not then i know where to come looking for help!
December 20, 2016 @ 10:03 am
I found this article very informative, but did not include a solution for me. I was just about to forget about MSE and just purchase the Malwarebytes stuff, but being an old Unix hacker, decided to dig deeper. The task manager resource display was very helpful. It showed that there were a lot of file access activity by the process reading several very large archive files I brought over from Unix. They were zipped tar files (.gtz), .zip and .tar files. So I moved them all to a unix dir and mapped that dir out in the settings. Much better, but not fully fixed. I still had to also map out the MpMsEng.exe file as well. After a reboot, things look great now
July 20, 2016 @ 10:30 pm
Another possibility is to exclude mapped drives in Solution 3, Step 3.
I have 6 mapped drives that are on my C: drive and, because they could be excluded, I suspect that each is scanned as a mapped drive as well as when the C: drive is scanned.
A full scan has been going on for >60 hours. It is working on the Z: drive now, which is a separate drive, so I don't want to stop it to see if excluding those 6 mapped drives would make a difference.
May 20, 2016 @ 10:25 pm
Use to be a good product. Now it is trashy.
May 14, 2016 @ 4:01 pm
Where do you find Microsoft security essentials on windows 10????????
May 15, 2016 @ 8:59 am
@Barbara: On Windows 10 "Security Essentials" is renamed as "Windows Defender". Open Cortana and type Defender to find it.
January 22, 2016 @ 11:37 am
Omg omg thank you so much. I have shared the link to facey. I will be doing a couple of the extra steps even though solution 1 has helped a lot just in case it crops up again. When I have a little money to spare I will donate to you :) wonderful advice. Thank you again.
December 17, 2015 @ 4:48 pm
Hey, thanks! I didn't do the MalwareBytes anti-malware scans etc. yet, but I did do just one of your suggestion and it already made an immediate and huge difference! All I did was the suggestion to exclude MsMpEng.exe from the scanned files, and the MsMpEng.exe process CPU usage went way down. I am still using Windows XP (not for too much longer) which I know MSE no longer supports, so I didn't want to try uninstalling and re-installing MSE at this time.
But again, thanks for the suggestions.
August 12, 2015 @ 9:44 pm
Um I dont really want to install those programs so how do i do it?
August 15, 2015 @ 11:19 am
@Ahmed: Skip the 1st Solution and follow the others.
July 4, 2015 @ 1:24 pm
Thanks for such spot on advise.
So welcoming to have a responsive PC running again.
I did have a bit of a red herring chasing intially what I thought was an issue with WmiPrvSE.exe. However, perserverance paid off after finding your site and dealing with the errant MsMpEng.exe.
It also gave me the incentive to have a real tidy up, bite the bullet & clear out some old utils I have used very successfully in the past, but at the end of the day utils are helpful but as long as you know where to look and not tread you should get by with the MS basics and dogged determination.
My CPU still appears to be running a tad high though, so I think I'll reinstall altogethher MS Sec Essentials.
Once again thanks for your help and hope the small donatioin helps you too.
June 21, 2015 @ 7:46 am
Oh I see didn't run in save mode w/ networking
June 21, 2015 @ 7:40 am
Rougekiller was running then ¾ of the way through it blue screen shutdown on me.
March 30, 2015 @ 8:02 pm
All you did was handicap MSE. It was slow, because your computer is slow. I'm not saying there's anything wrong with that, but you shouldn't blame MSE for your slow computer.
January 22, 2015 @ 7:38 pm
Thanks a lot!
This completely fixed my problem… My Vaio is not working loudly anymore.
September 8, 2016 @ 7:30 pm
Thanks a lot!
December 21, 2014 @ 5:03 am
I'm having this issue, but MSE does not appear to be installed (not listed in my control panel uninstall programs list), even though the executable has several (obnoxious) instances running? I'm using Windows 8 — Have they made changes that you know of? I also tried the Windows FixIt utility mentioned above, but it is saying that it does not apply to my OS.
December 21, 2014 @ 12:29 pm
@Chrissy: In Windows 8, MSE was renamed to Windows Defender. So, press simultaneously the 'Windows' + 'Q' keys and at the search box type 'Windows Defender'. Then make the appropriate changes mentioned here (to Windows Defender).
November 13, 2014 @ 10:32 am
The option to set scan times (Solution 4, step 1) is not available in Win 8 Windows Defender.
I did all you recommended, hope it works long term- it has for now.
Thanks anyway- this was the most help I found anywhere- Microsoft's instructions are just a maze of misleading, outdated, confused nonsense. Bottom line: this sort of problem should never happen- it should monitor itself as to how much it runs and know it's not going to be acceptable to use 30-50% of a machine's CPU for a long period. Bad design.
October 18, 2014 @ 11:42 pm
Aloha,
Used your instructions "How to fix MsMpEng.exe High CPU Usage problem" and it solved my issue. Thank You! I'd like to contribute but I'm cautious using my credentials on your web site. I have a PayPal account and would like to send you a donation. Please give me you email address to use with PayPal.
Mahalo,
David
October 19, 2014 @ 9:23 am
Welcome David, If you want to contribute just click the "Donate" button at the end of the article. (The transaction procedure is made through PayPal, so is secure). Thanks!