
How to Fix: System Restore Fails with Error 0x80070005 (Windows 10)
On a Windows 10 based computer, System Restore fails with error 0x80070005: “System Restore did not complete successfully. Your computer’s system files and settings were not changed.
Details: System Restore could not access a file. This is because an anti-virus program is running on the computer. Temporarily disable your antivirus program and retry System Restore. An unspecified error occurred during System Restore. (0x80070005)”

This article contains detailed instructions to troubleshoot the System Restore Error 0x80070005 on Windows 10.
How to fix System Restore 0x80070005 Error in Windows 10.
System Restore problems are commonly caused due to malware infections, damaged file system (or hard disk) or after installing a Windows update. So, before proceeding to the methods below to resolve the System Restore 0x80070005 error, apply the following actions and then try to run System Restore again:
1. Scan your system for malware.
2. Completely uninstall the antivirus program or any other security program from your system. Additionally , if System Restore error reports which program failed to be extracted from the restore point, then uninstall the reported program.
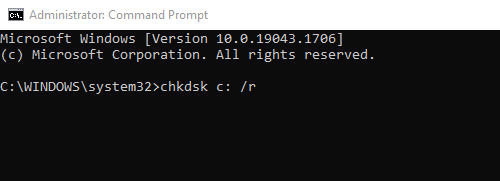
3. Run CHKDSK command to fix file system's corruptions:
-
-
- Right click on Start menu and select Command Prompt (Admin).
- Type the following command and press Enter:
- chkdsk C: /R
-
4. (Optional). Ensure that your hard disk is healthy, by following the instructions in this article: How to Test and Diagnose Hard Drive (HDD) for hardware problems.
Method 1. Run System Restore in Safe Mode.
Method 2. Run System Restore from Windows Installation Media.
Method 3. Verify Permissions in C:\System Volume Information folder.
Method 1. Run System Restore in Safe Mode.
The first method to resolve System Restore problems is to run System Restore in Safe Mode. To Start Windows 10 in Safe Mode:
Press “Windows” ![]() + “R” keys to load the Run dialog box.
+ “R” keys to load the Run dialog box.
- Type “msconfig” and press Enter.
- Click the Boot tab and then check the “Safe Boot” option.
- Click “OK” and restart your computer.
Note: In order to boot Windows in “Normal Mode” again, you have to uncheck the “Safe Boot” option by using the same procedure.
![windows-8-safe-mode_thumb[2]](https://www.wintips.org/wp-content/uploads/2014/04/windows-8-safe-mode_thumb2.jpg "windows-8-safe-mode_thumb[2]")
Method 2. Run System Restore from Windows Installation Media.
The next method to bypass the System Restore error 0x80070005 is to run System Restore by starting your computer from a Windows Installation media.
If you don't own a Windows installation media (USB or DVD), then you can create one by using the Media Creation tool.
1. Place the Windows 10 installation media on your computer.
2. Start your system from the Windows Installation Media. To do that, enter BIOS settings and at Boot Order setting, set the CD/DVD (or the USB if you have created a USB media) as first boot device. Then Save & Exit BIOS Setup.
3. Select the Language to install, Time/Currency format and Keyboard input method and press Next.
4. Choose Repair your computer.

5. Then choose Troubleshoot > Advanced Options > System Restore.

6. Follow the on-screen prompts to restore your system to a previous working state.
Method 3. Verify Permissions in C:\System Volume Information folder.
1. Start Windows normally.
2. Enable Hidden files view. To do that:
1. Right click on Start menu
and select Control Panel.
2. Change the View by: to Small icons.
3. Open File Explorer Options.
4. At View tab: check the Show hidden files, folders or drives option & uncheck the Hide protected operating system files option.
5. Click OK when done.

3. Open Windows Explorer.
4. Right click at C:\System Volume Information directory and select Properties.

5. Select the Security tab and click Advanced.
6. At Advanced Security Settings, click Continue.

7. Make sure that SYSTEM account has Full control access on the folder.

8. If the SYSTEM has not Full Control permissions, then click Cancel and then click the Advanced button again.
9. Click Change Owner.

10. Type your account username (e.g. "Admin") and click OK.

11. Check the "Replace owner on subcontainers and objects" checkbox and click OK. *
* Note. Select Yes at to the Windows Security message to replace permissions and hit continue to any other warning message.

12. Click OK again to close security settings.
13. Right click – again – at C:\System Volume Information directory and select Properties.
14. Select the Security tab and click Advanced.
15. At Advanced Security Settings, click Add.

16. Click Select a principal on the top.

17. Type SYSTEM and click OK.

18. Check the Full control checkbox and click OK three (3) times to close all windows. *
* Note: Hit continue to any other warning message

19. Press the Windows ![]() + R keys to load the Run dialog box.
+ R keys to load the Run dialog box.
20. Type the following command to open the System Restore utility and press Enter.
- rstrui

21. Follow the on screen prompts to restore your system.
That's it! Let me know if this guide has helped you by leaving your comment about your experience. Please like and share this guide to help others.

- How to Resolve Hyper Backup Error "Failed to Export System Configuration" on Synology NAS. - June 17, 2026
- How to Require MFA for All Users in Microsoft 365 with a Conditional Access Policy. - June 15, 2026
- How to Resolve Error "Something Went Wrong 657rx" in Outlook or Microsoft 365 Apps. - June 10, 2026


July 12, 2018 @ 12:42 pm
System Restore in Safe Mode worked for me. Thank you!
May 21, 2018 @ 10:49 am
Option 2 works. Thank you.