How to Mount ISO Files in Windows 8, 7, Vista, XP, Server 2008 & Server 2003
An ISO file Image or Disk Image is a file that contains all the data contents of an optical disk (CD, DVD or Blu-ray disk). This file contains also the file system of the optical disk and can be created by using a burning software like Nero, ImgBurn, etc. The advantages is that you can always have the digital copy of your original optical disk inside your hard drive or removable media, without the need to have the physical optical disk.
One of my favorites freeware utilities to mount an ISO file is called “Virtual CloneDrive” by “Slysoft” company. Using this utility you can mount .ISO, .CCD, .DVD, .IMG, .UDF and .BIN files very easily in all Windows versions. (Windows 10, 8, 7, Vista, XP, Server 2008 & Server 2003)
Related article: How to Burn an ISO file to DVD or CD (Create DVD, CD from ISO)
(Watch this tutorial in YouTube)
How to Mount (Open and Explore) ISO image files in W. *
* Notice: The instructions below are written for Windows 7 & Vista OS. Windows 10 & 8 operating systems has built in features to mount .ISO files. Just double-click at the .ISO image file you want to open and the .ISO will be mounted as a virtual drive in your computer.
Step 1. Download and Install “Virtual CloneDrive”.
1. Download “Virtual CloneDrive” from here. (Scroll down to "Freeware" section.)
2. Choose “Run” in the next screen.
3. Choose “I Agree” in License Agreement.
4. Leave the default setup options and choose “Next”.
5. Leave the default setup directory (unless you are using a different directory to install programs) and choose “Install”.
6. Choose “Install” at windows security pop-up window.
7. When the installation is complete, choose “Close”.
Step 2: Using “Virtual Clonedrive” to mount & explore ISO image file's contents.
How to mount .ISO, .CCD, .DVD, .IMG, .UDF and .BIN files with “Virtual Clonedrive”.
After installing “Virtual Clonedrive” you should be able mount images files easily.
1. Just select the image file you want to mount, right click on it and select “Mount (Virtual CloneDrive x:)” from the menu.*

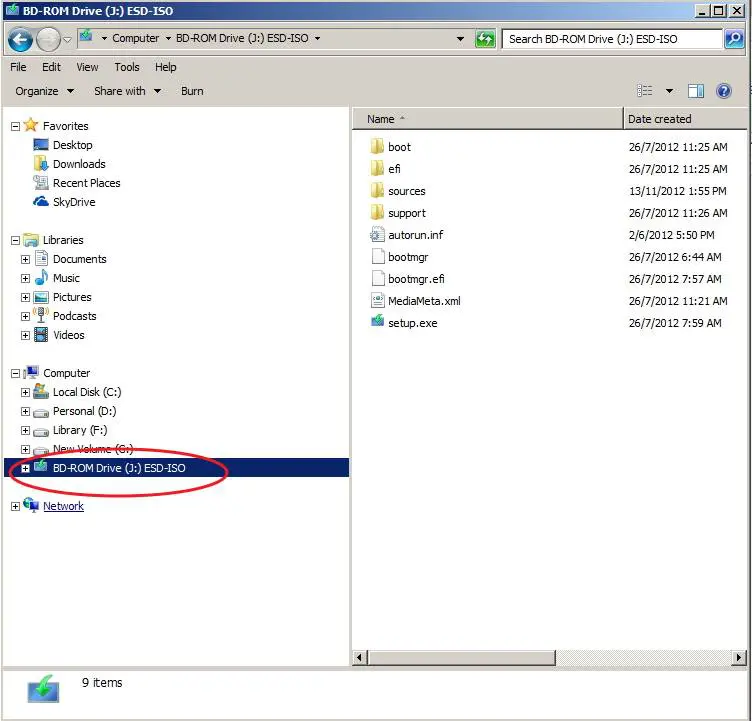
2. Then open Windows Explorer, find the virtual drive’s letter (x:) and explore your image file contents. *
* If you want to unmount the ISO image, right click on the virtual drive letter it and select“Unmount”.
(Watch this tutorial in YouTube)
We're hiring
We're looking for part-time or full-time technical writers to join our team! It's about a remote position that qualified tech writers from anywhere in the world can apply. Click here for more details.
- FIX: Numeric keypad Not Working on Windows 10/11 - July 24, 2024
- How to Share Files or Printers in Hyper-V? - July 22, 2024
- How to invoke Hyper-V Screen resolution prompt? - July 17, 2024


December 23, 2022 @ 2:52 am
2013 – XMASS2022,
I think the Blog is an Ocean of generosity . The past article still always solving issues when you're patient and a bit smart to adjust to the evolution of the features.
I will not miss donating.
On standby, thanks again very much, Happy and Merry Christmas, long life, health, property, and prosperity…
October 8, 2021 @ 8:59 am
If the disk you are extending is in a linux guest OS once you have extended the disk in vmware go to the guest OS as root and use fdisk. Do a df to see the device name, something like /dev/sda, thus fdisk /dev/sda, enter p to see current partitions, n to create a new one, accept the default size and save with w. Once done you can now see the physical disk partition in Linux. You can then use lvm gui or manual commands to initialise the partition and extend your file system. Thanks Paul for pointing me in the right direction.
Harold Burton
June 26, 2013 @ 2:47 pm
i need to open gta 3 iso file
i can get good help in vituralclone drive…
back pain remedies
March 23, 2013 @ 4:39 pm
Hey there! I've been following your site for a while now and finally got the courage to go ahead and give you a shout out from Huffman Texas! Just wanted to tell you keep up the good work!…
johnny
March 22, 2013 @ 8:05 pm
This blog is amazing. I realy like it!…