How to Uninstall Updates in Windows 11 (All Methods).
In this guide, we'll show you several methods to uninstall updates in Windows 11. Windows updates often include bug fixes, security patches, and new features, but they can also be problematic, causing performance problems or other problems with the computer's operation.
If you experience a problem after a recent update to Windows 11, a simple way to solve it is to remove the recently installed update. Listed below are several methods of uninstalling updates in Windows 11 OS.
How to Remove Windows 11 Updates.*
* Note: All these methods also work on Windows 10.
Method 1. Uninstall Updates through Windows Update Options.
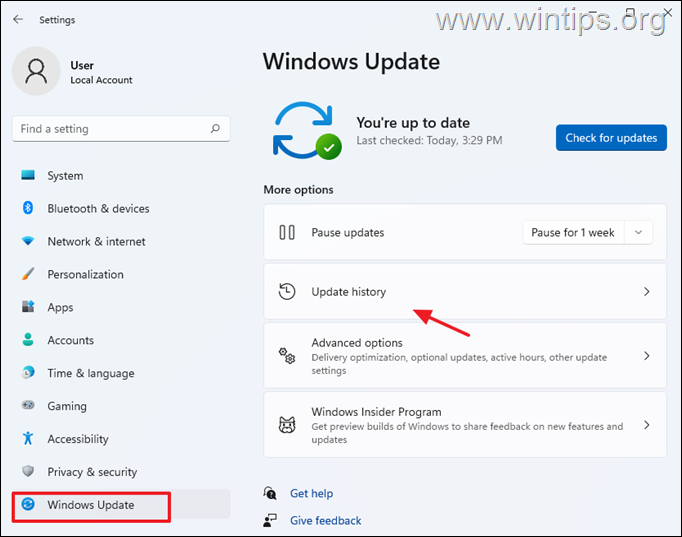
1. Press Windows + I keys simultaneously on your keyboard to launch Windows Settings.
2. In the newly launched window, select Windows Updates from the left pane and then click on Updates history in the right side.
3. Now click on Uninstall updates under Related Settings.
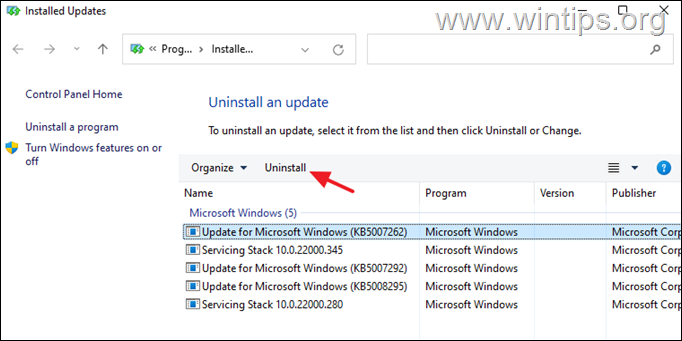
4. Select the update that you want to uninstall (or right-click on it) and click Uninstall.
5. When prompted, click Yes to confirm your decision and wait for the process to complete.
6. Once the update is uninstalled, restart your PC.
Method 2. Uninstall Updates from Programs & Features in Windows Control Panel.
1. Navigate to Control Panel > Programs & Features, or…
-
- Press the Win+R keys to open the Run dialog.
- Type appwiz.cpl in the search box and press Enter
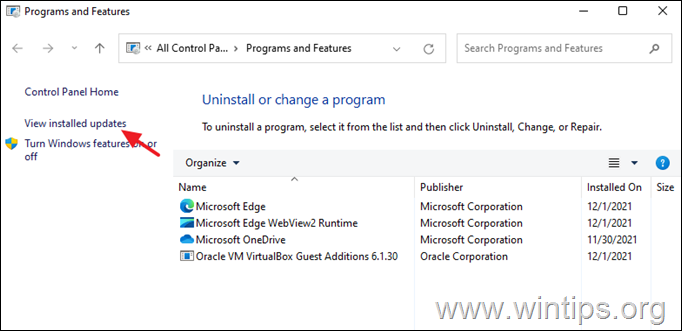
2. At Programs and features click View installed Updates at the left pane.
3. Select, or right-click on the update that you want to uninstall and click Uninstall.
4. When the update removal is completed, restart your computer.
Method 3. Remove Windows 11 Updates from Command Prompt.
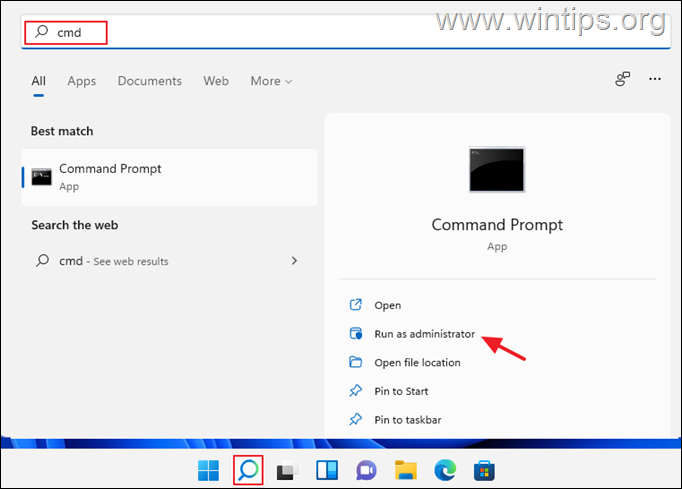
1. Click the Search icon and type CMD or Command Prompt.
2. Click Run as administrator to launch command prompt with administrative privileges.
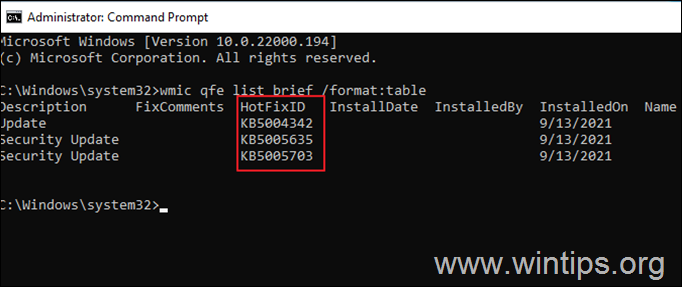
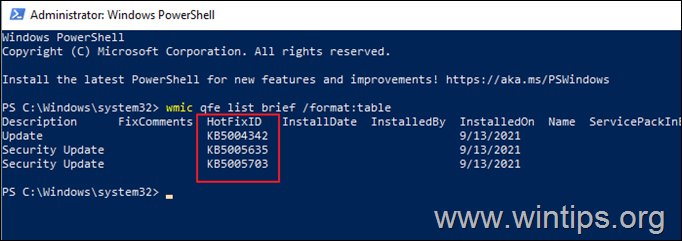
3. In the Command Prompt window, type the following command and press Enter to view a list of the installed updates:
- wmic qfe list brief /format:table
4. Now look at "HotFixID" column and notice the KB number of the update that you want to uninstall.
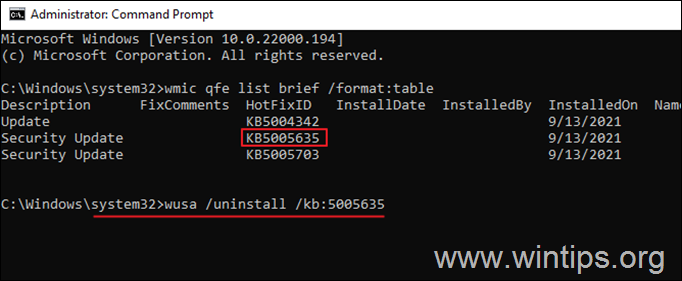
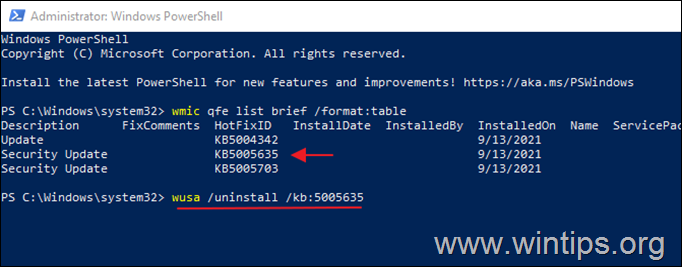
4. Now remove the desired update from command prompt, by using the following command:
- wusa /uninstall /kb:Number
Note: Replace ‘Number’ with the KB number of the update you want to remove. For example: to remove the KB5005635 give this command:
- wusa /uninstall /kb:5005635
5. A confirmation box will appear on your screen to confirm the action. Select Yes to proceed.
6. When the uninstallation is complete, restart your PC.
Method 4.Uninstall Updates from PowerShell.
1. Click the Search icon and type poweshell.
2. Click Run as administrator to open Windows PowerShell with administrative privileges.
3. In the PowerShell window, type the command mentioned below and hit Enter to get a list of installed updates.
- wmic qfe list brief /format:table
4. An overview of all the Windows updates installed on your system will now appear on your screen. Take note of the KB number associated with the Windows Update you wish to remove.
4. Now execute the following command to remove the desired update in PowerShell:
- wusa /uninstall /kb:Number
Note: Replace ‘Number’ with the KB number of the update you want to remove. For example: to remove the KB5005635 give this command:
- wusa /uninstall /kb:5005635
5. If a confirmation prompt appears, select Yes. Once the process is complete, restart your computer.
That’s it! Let me know if this guide has helped you by leaving your comment about your experience. Please like and share this guide to help others.
We're hiring
We're looking for part-time or full-time technical writers to join our team! It's about a remote position that qualified tech writers from anywhere in the world can apply. Click here for more details.
- FIX: Numeric keypad Not Working on Windows 10/11 - July 24, 2024
- How to Share Files or Printers in Hyper-V? - July 22, 2024
- How to invoke Hyper-V Screen resolution prompt? - July 17, 2024


![clip_image011[1] clip_image011[1]](https://www.wintips.org/wp-content/uploads/2021/11/clip_image0111_thumb-1.png)
