How to View Folder Sizes on a Synology NAS.
In this guide, you will learn how to view folder sizes on a Synology NAS, using DSM's built-in tools and Storage Analyzer.
If you use a Synology NAS to store your files, you may need to check which folders are using the most storage space. However, as you may have noticed, the File Station browser in DSM—like file explorers in some other operating systems—does not display the size of each folder by default. This makes it difficult to quickly identify the largest folders or files.
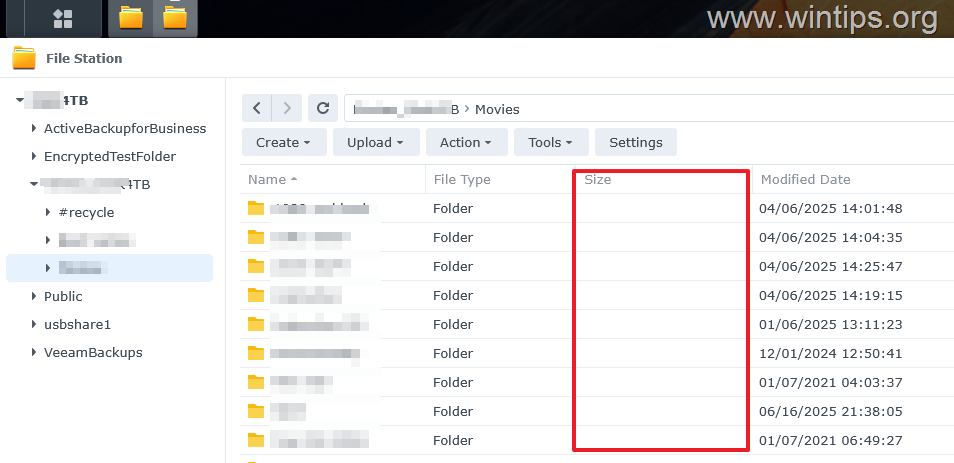
In this guide, you will learn the most practical ways to check folder sizes on your Synology NAS, from viewing the size of a single folder or all folders, to analyzing overall storage usage.
How to Check Folder Sizes & Storage Usage on a Synology NAS.
1. How to Check the Size of a Single Folder on a Synology NAS.
If you want the view the size of an individual folder using File Station:
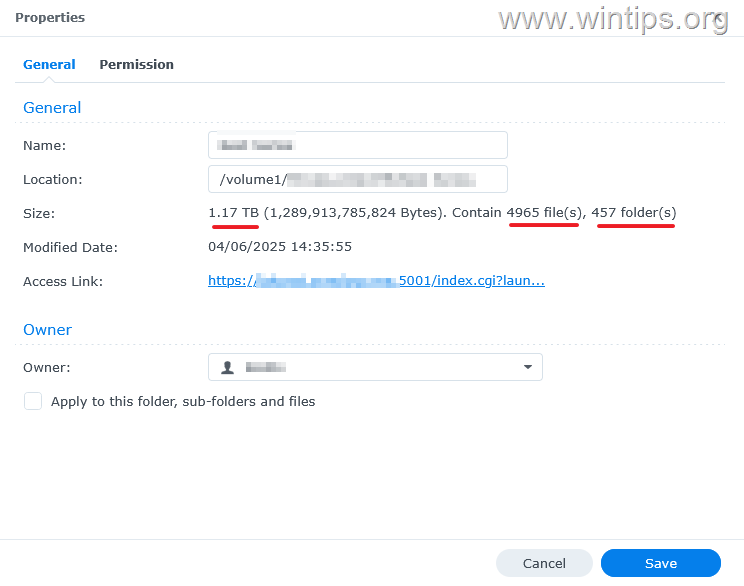
1. Right-click on the desired Shared Folder or Folder and select Properties.
2. DSM will calculate the size of the folder and display the following:
- Total size of the folder.
- The number of files the folder contains
- The number of subfolders the folder contains
2. How to Check the Size of All Shared Folders & Subfolders on your Synology NAS.
Although the above method is convenient for checking the size of an individual folder, is not practical when you want to learn easy which are the largest files and folders on your Synology NAS or to examine the size of each folder in a large number of folders/subfolders. This is where Storage Analyzer becomes useful.
Storage Analyzer is a free Synology utility designed to analyze storage usage on your NAS. Similar to the Windows TreeSize tool, it provides a detailed breakdown of disk usage, showing the total space used as well as the size of each folder and subfolder.
To check the used storage space and folders size on your Synology NAS with the Storage Analyzer:
1. Open the Package Center, search for "Storage Analyzer" and install it.
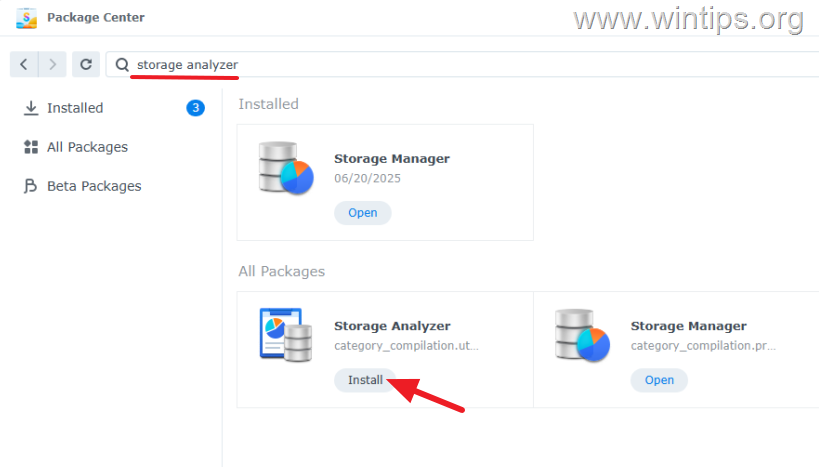
2. Open Storage Analyzer.
3a. On the popup window click Yes to specify a location for saving the storage reports.
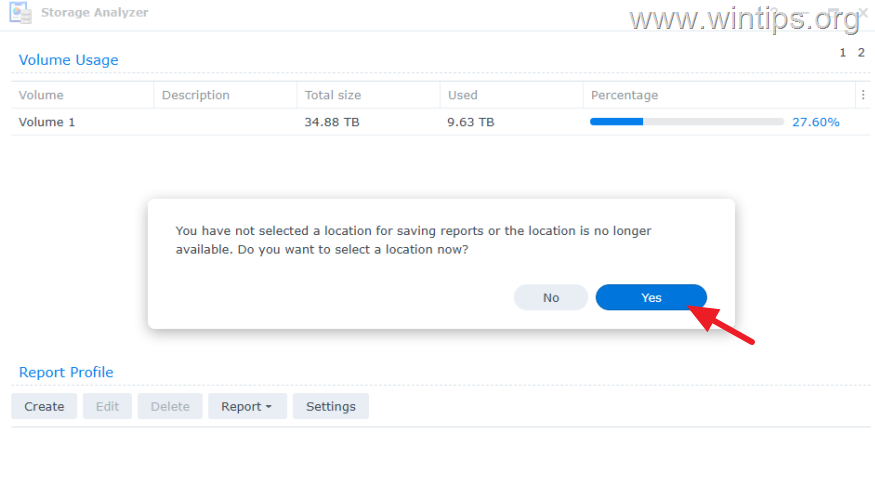
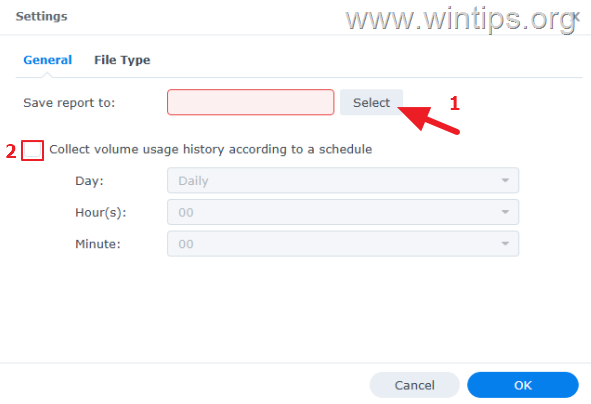
3b. On the 'Settings' screen:
-
Click Select and choose a folder on the disk to save the Storage Analyzer reports.
-
According your wish, keep checked or uncheck the option to "Collect the usage history according to a schedule" and click OK.
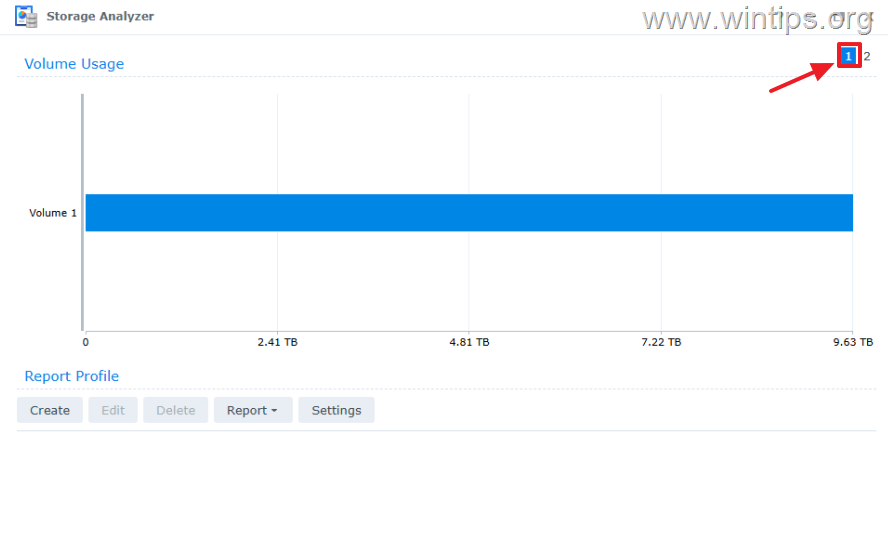
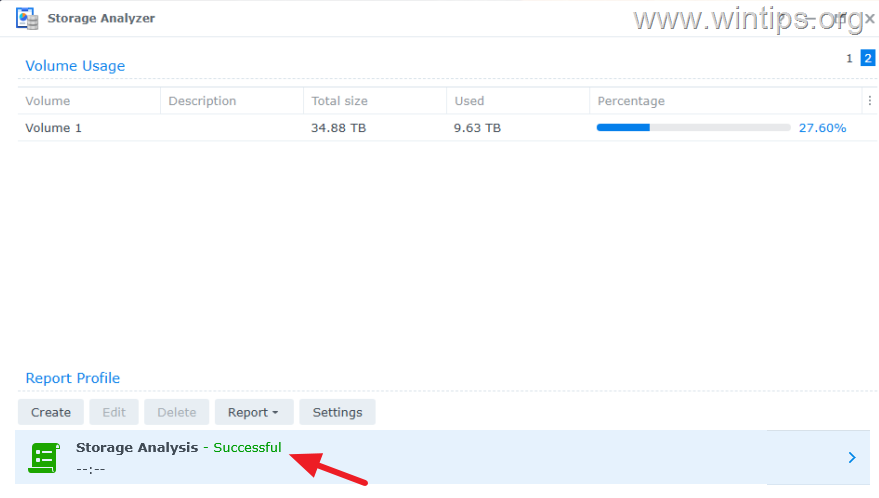
4. The main screen of Storage Analyzer has two main pages (1 & 2).
4a. On page 1 you can see the usage on your NAS in a chart format.
4b. On page 2 you can see the Total size of the storage space of your NAS, the Used space and the usage percentage.
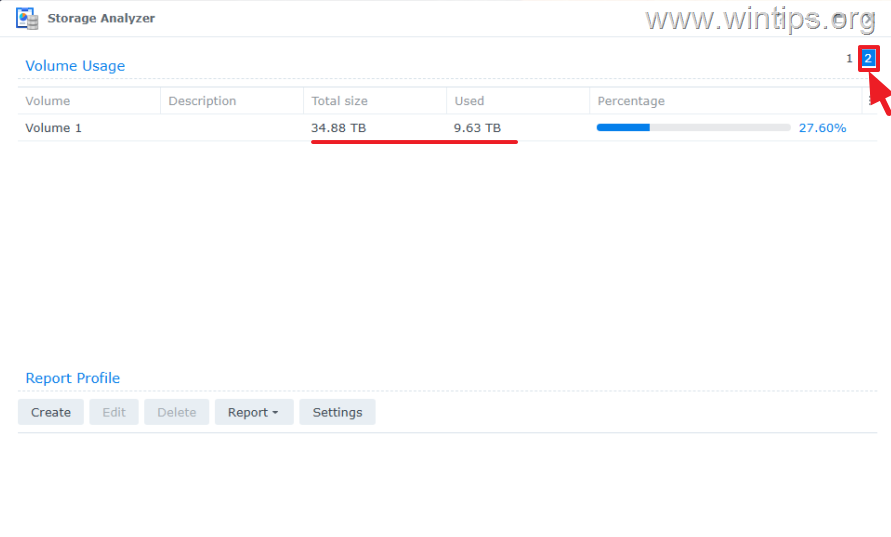
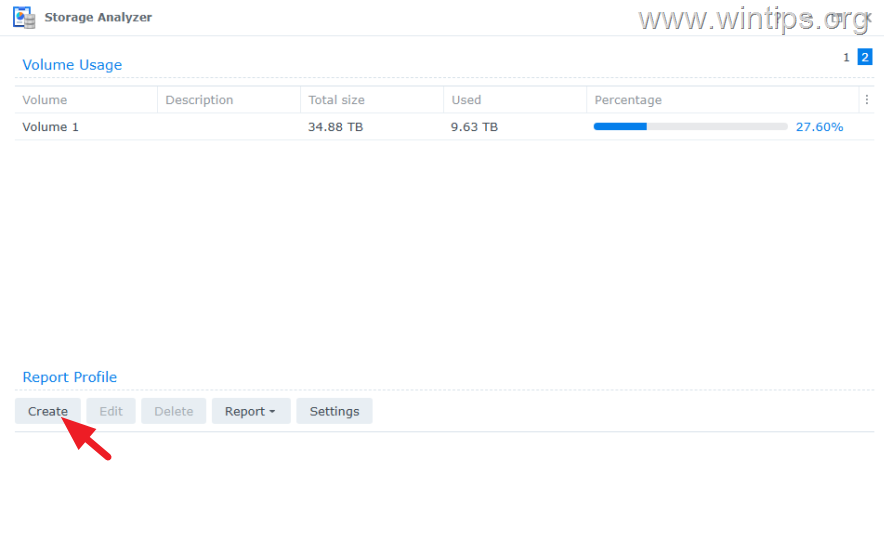
5. To view a detailed analysis of the storage and folder usage, click Create under Report Profile
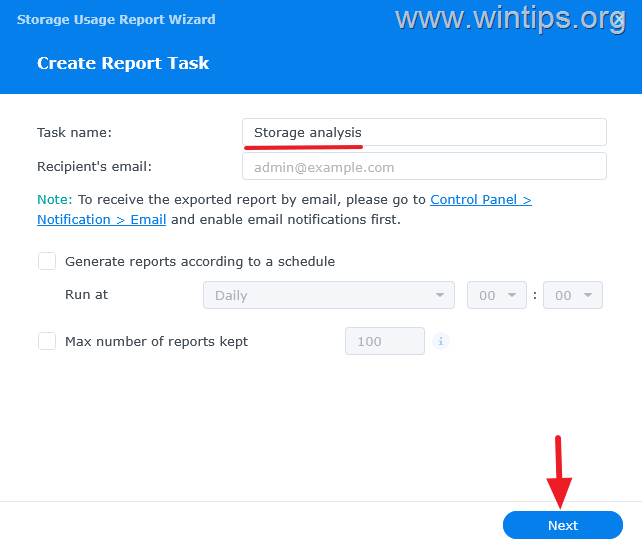
6. Type a name for the task (eg. "Storage Analysis") and click Next.*
* Note: Here you can choose also to generate reports according to schedule or receive reports via email. In this guide, we have skipped these options because they can be set up later.
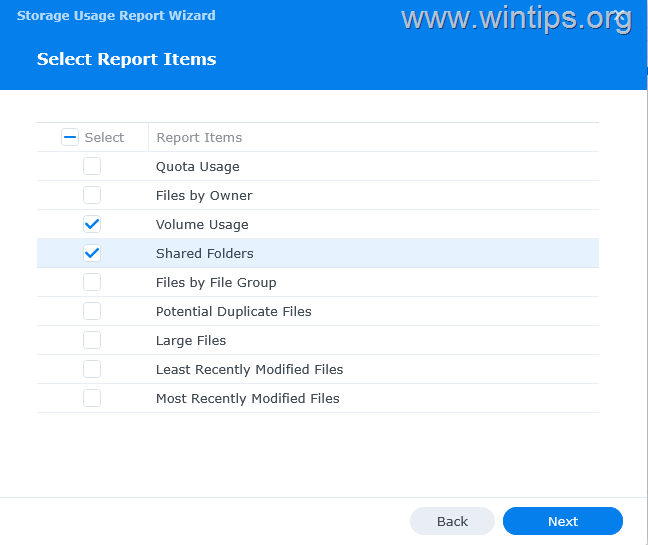
7. On the next screen, you will be prompted to select the items for which you want to generate the detailed report. For the purposes of this guide, we have chosen to create a usage report for the Volume and Shared Folders. When done, click Next to continue.
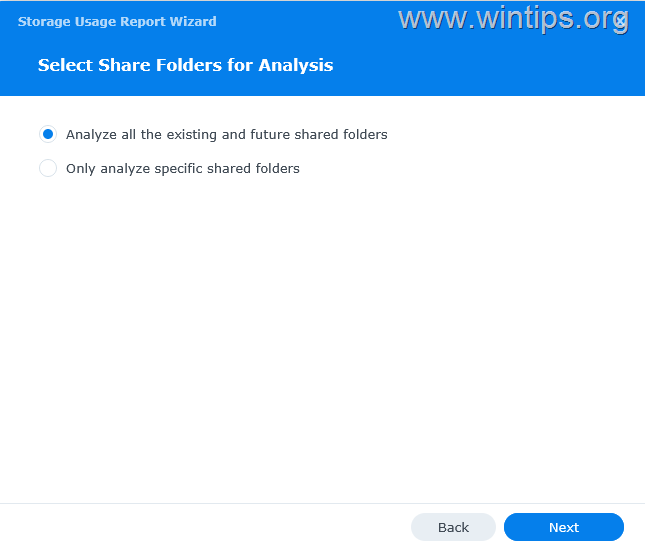
8. On the next screen you will be asked to choose whether you want to analyze all folders or specific ones. Choose the first option, and click Next. *
* Note: If you want to include encrypted shared folders in the report task, ensure that these folders are already mounted.
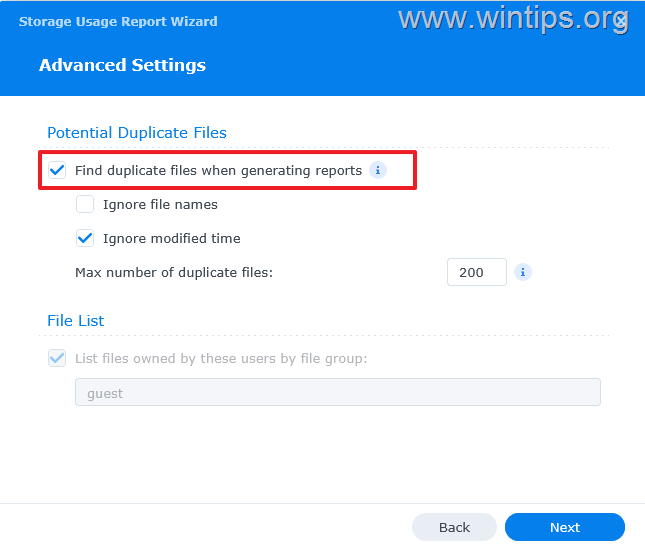
9. Storage Analyzer can detect duplicate files when generating reports. If you want to do this, keep the corresponding option selected, otherwise uncheck this option before clicking the Next button.
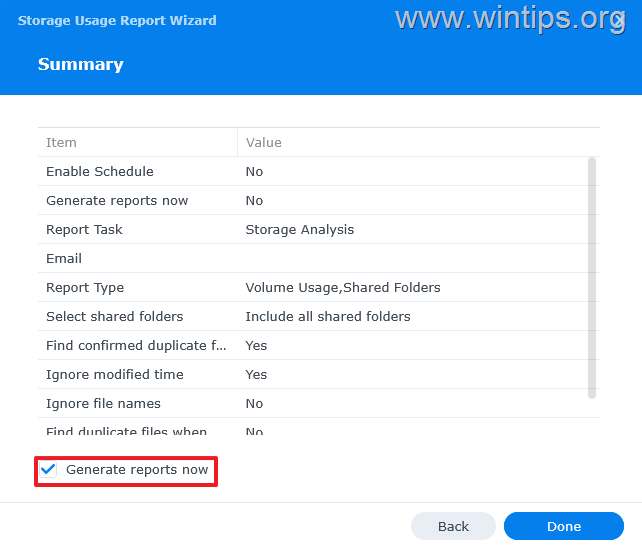
10. Finally review the report settings, check the "Generate reports now" option and click Done to generate your first storage report.
11. Wait for the reporting task to complete.
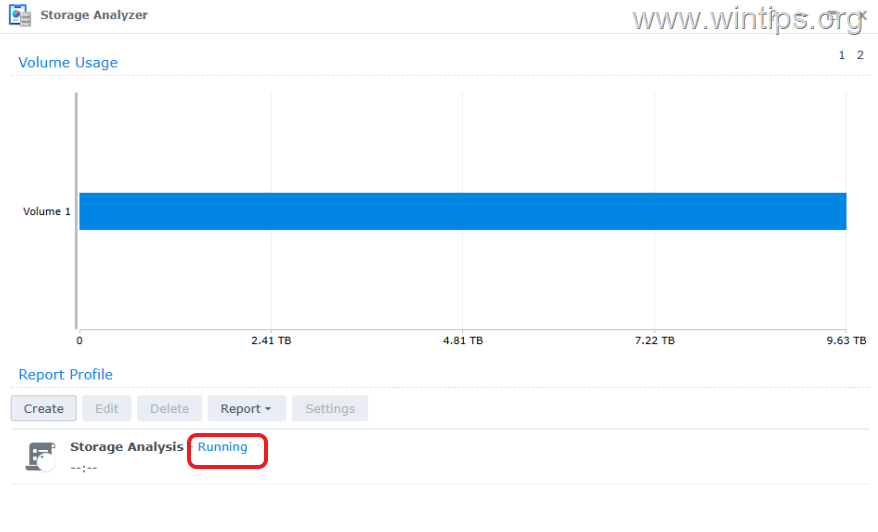
12. When the report job is complete, double-click it to see a detailed breakdown of storage usage.
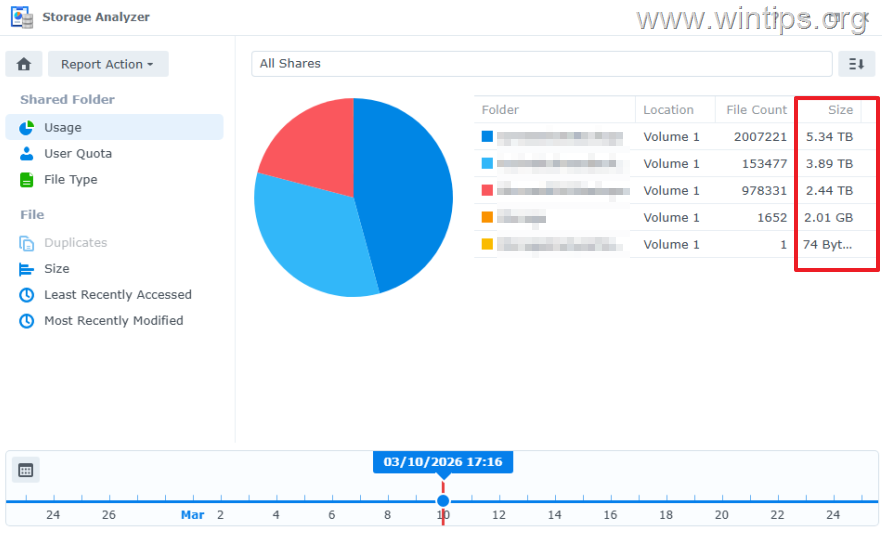
14. Within the report you can view the following information by selecting the corresponding option on the left:
-
Usage: The total space occupied by each shared folder and by selecting each of them individually you will see the space occupied by each subfolder. This way you will easily identify the folders that are consuming the most storage space.
-
User quota: The storage usage per user.
-
File type: The storage usage per file type.
-
Duplicates: To view the duplicate files. (if you have include them in the report)
-
Size: To see the largest files on your Synology NAS.
Additional Help:
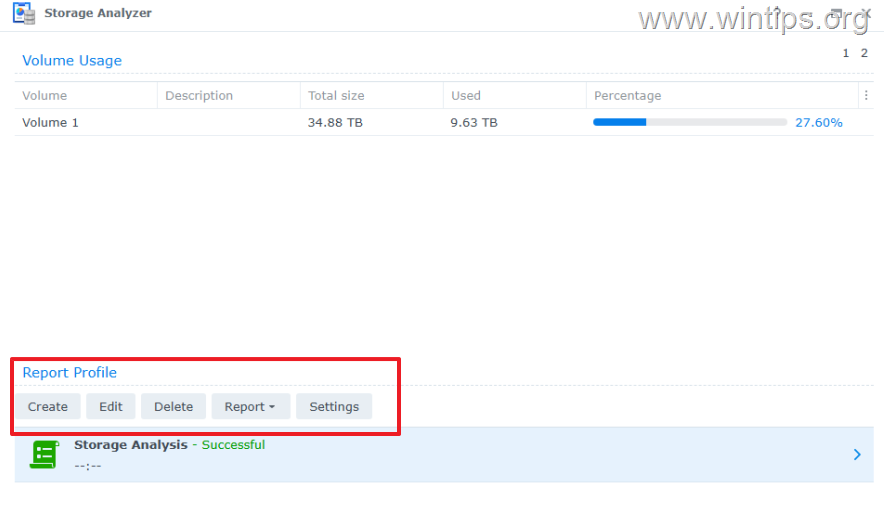
Use the corresponding button under "Report Profile" to:
-
Create: To create a new report task.
-
Edit: To edit the settings of the report task (eg. to specify a schedule, to include duplicates on the report, etc..)
-
Delete: To delete a report task.
-
Report: To Generate a new report immediately or view historical reports.
-
Settings: To change where reports are saved of to search for specific file types only.
3. How to Check Storage Usage on a Synology NAS.
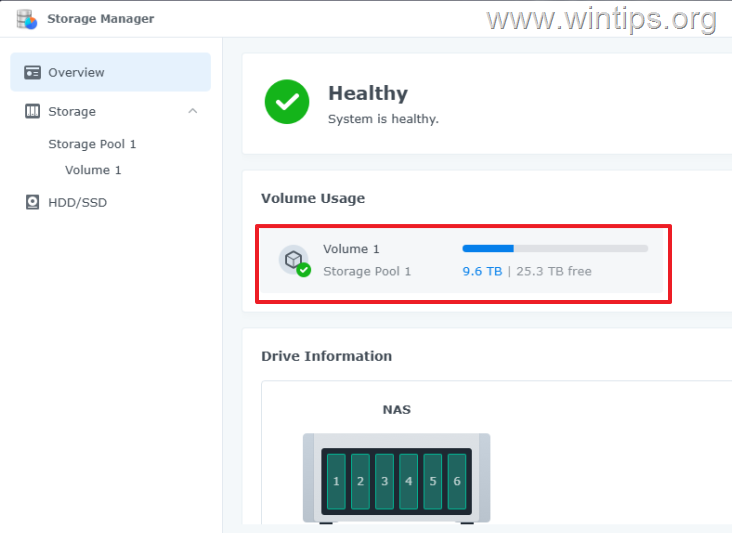
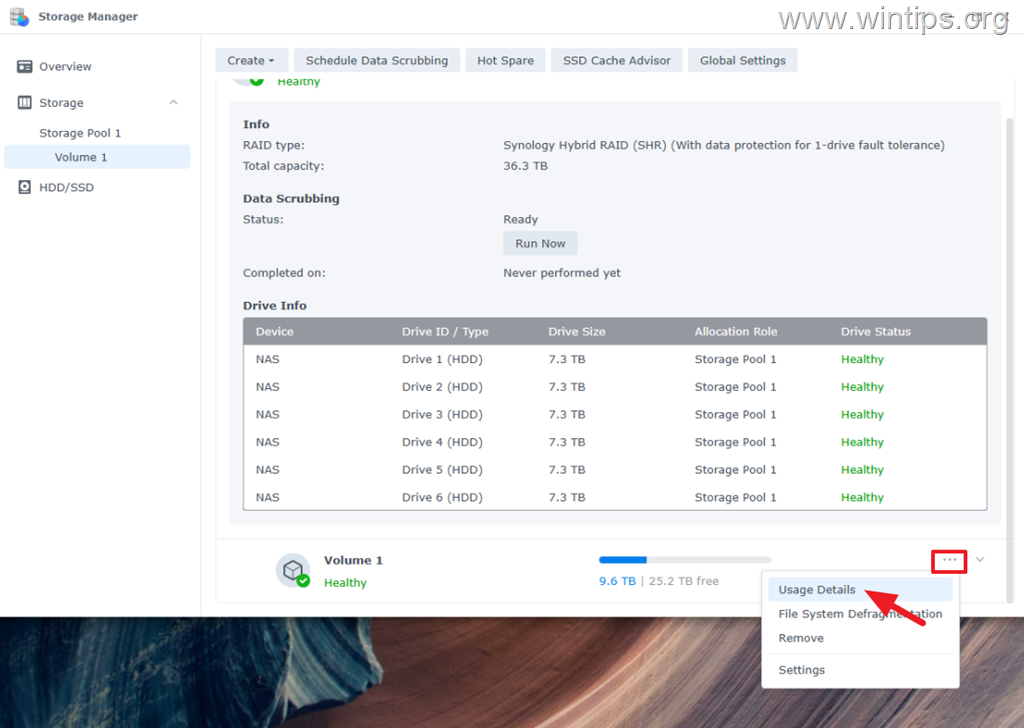
1. To view the overall storage usage on your Synology NAS, open the Storage Manager from the main menu.
2. To see some details about storage usage on a volume:
a. Select the desired volume on the left and then from the 3-dot menu select Usage Details.
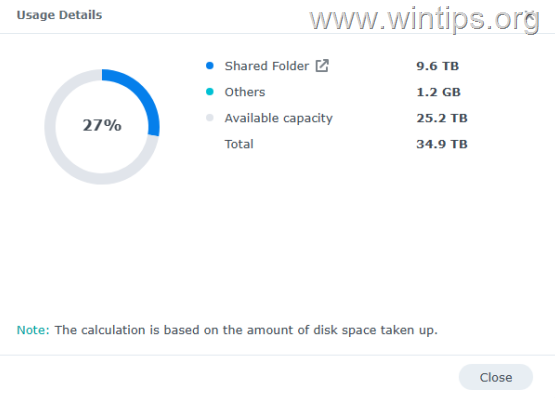
a. In 'Usage Details' you will see an overview of the items taking up your NAS storage space.
Summary:
Checking folder sizes on a Synology NAS helps you manage your storage space more efficiently. Although File Station can help you view the sizes of each folder individually, using Storage Analyzer is the most efficient and practical method to view the sizes of all or specific shared folders at once and find duplicate files on your NAS.
That's it! Let me know if this guide has helped you by leaving your comment about your experience. Please like and share this guide to help others.
Frequently Asked Questions
How can I view the size of an individual folder on a Synology NAS using File Station?
Right-click on the desired Shared Folder or Folder in File Station and select 'Properties.' DSM will calculate and display the total size of the folder, the number of files it contains, and the number of subfolders.
What is the Storage Analyzer on a Synology NAS and what is its function?
Storage Analyzer is a free utility on Synology NAS that analyzes storage usage. It provides a detailed breakdown of disk usage, showing the total space used and the size of each folder and subfolder, similar to the Windows TreeSize tool.
How do I set up Storage Analyzer to generate reports on Synology NAS?
First, install Storage Analyzer via the Package Center. Open the tool, specify a location for saving reports, and create a report profile. Follow on-screen instructions to select the items for analysis, schedule the task, and choose specific folders if needed. Generate the report to view the analysis.
Can I use Storage Analyzer to check for duplicate files on a Synology NAS?
Yes, Storage Analyzer can detect duplicate files when generating reports. You can keep the option to detect duplicates selected when setting up a report task.


- Remote Desktop (RDP/RDS) Stops Working After September 2026 Windows Update: How to Fix - September 15, 2026
- Windows 11 KB5124008 Causes No Sound or USB Audio Code 10: How to Fix - September 14, 2026
- Copilot Missing or Grayed Out in Outlook: How to Fix - September 10, 2026