Disable "Skip for now (14 days until is required)" and Microsoft 365 Two-Factor Authentication.
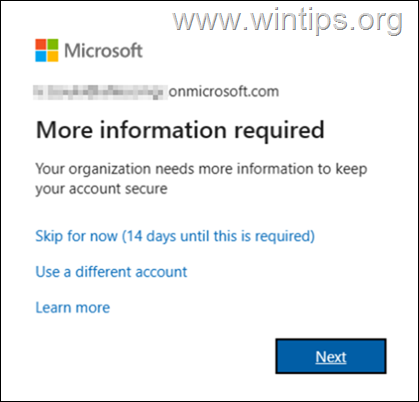
In this guide you'll find step by step instructions to disable the Microsoft 365 Two-Factor Authentication prompt "More information is required. Your organization needs more information to keep your account secure. Skip for now (14 days until this required)".
Multi-factor authentication (MFA) or two-factor authentication (2FA) in Microsoft 365 (ex. Office 365), requires users to use a additional step to authenticate themselves. Using MFA in Microsoft 365 provides you with greater security when authenticating users and prevents their account and data from being compromised.
MFA/2FA is enabled by default in Azure Active Directory for new users created in Microsoft Office 365, and prompts them at their first sign-in, to setup and use an additional authentication method to authenticate themselves within 14 days or to "skip for now". If after the 14-day period, the user does not specify an additional method to verify their identity, they will not be able to connect to Microsoft 365 services and will be locked out.
Since some organizations don't want users to always use a secondary step to verify their identity, in this tutorial we show how to turn off two-factor authentication in the Microsoft 365 admin center for all users in the organization and to enable it only for Admin or other account that need it to stay secure.
How to Safely Disable Microsoft 365 two-factor authentication in Azure AD.
Step 1. Turn Off MFA for All Users by Disabling Azure AD Security Defaults.
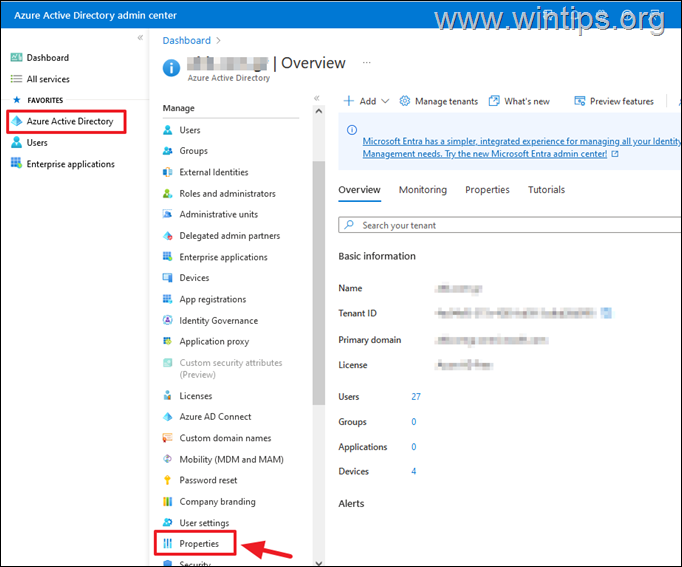
1. Sign-in to Azure Portal. (Azure Active Directory Admin Center)
2. Choose Azure Active Directory on the left and and on right click Properties.
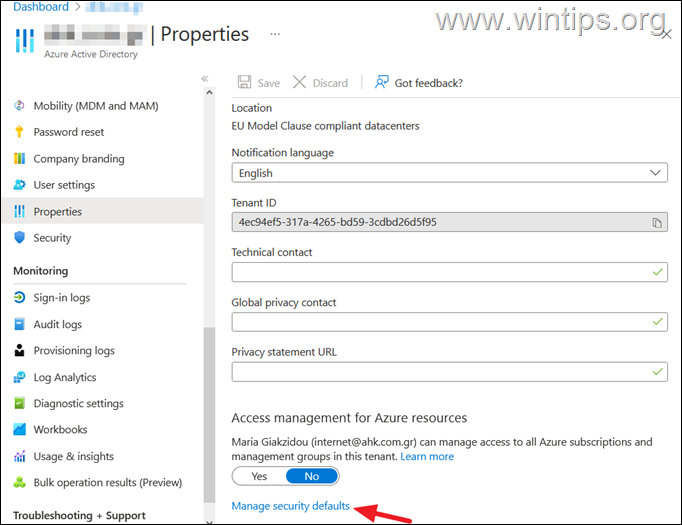
3. At Properties page select Manage security Defaults.
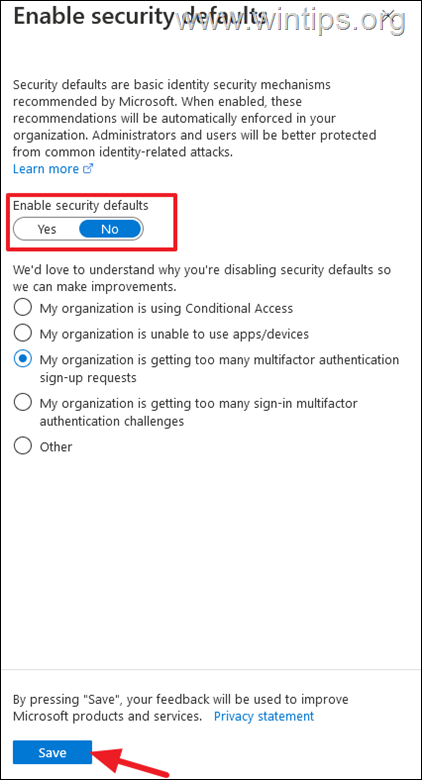
4. Set the Enable security defaults switch to No, then select a reason below and click Save.
5. At this point, you have disabled multi-factor authentication for all users in Azure AD, including global administrators and billing accounts which is not secure and it's not recommended. So, proceed and enable the multifactor authentication at least for the Global administrators and Billing Administrators accounts, as instructed below.
Step 2. Enable MFA for specific accounts in Microsoft 365 (Enable MFA Per user).
To require Administrators or specific users to use Multifactor authentication (aka "Two factor authentication"), in order to login to Office 365, proceed to modify the MFA per user as follows:
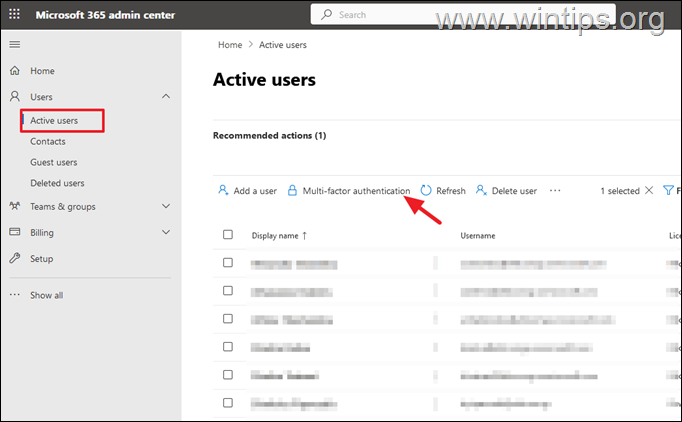
1. From Microsoft Office 365 Admin Center, go to Users > Active Users.
2. Select Multi-factor authentication in the menu bar.
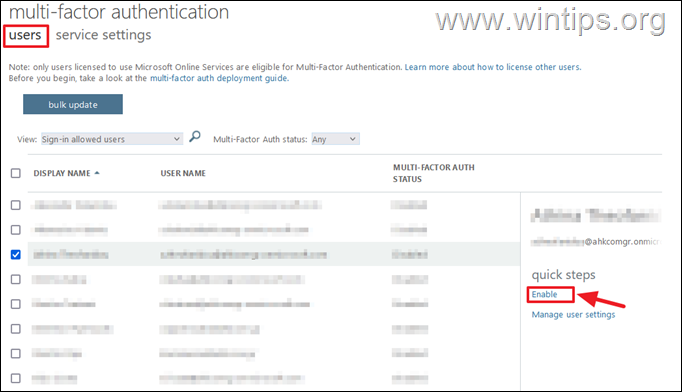
3. In 'multi-factor authentication' page:
4a. In users tab, select the user(s) that you want to enable the MFA and click Enable. *
* Important: Two-factor authentication should be required at least for Microsoft 365 Global and Billing administrators.
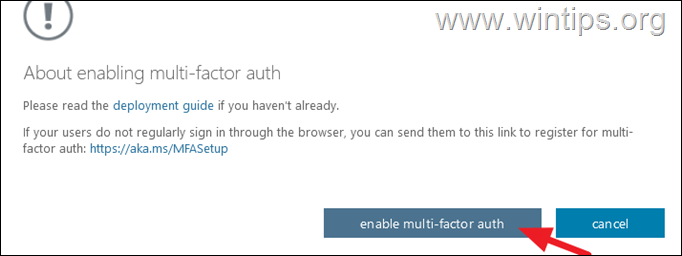
4b. Click enable multi-factor auth
4c. Click Close and you're done. From now on the selected users will be asked for MFA to login.
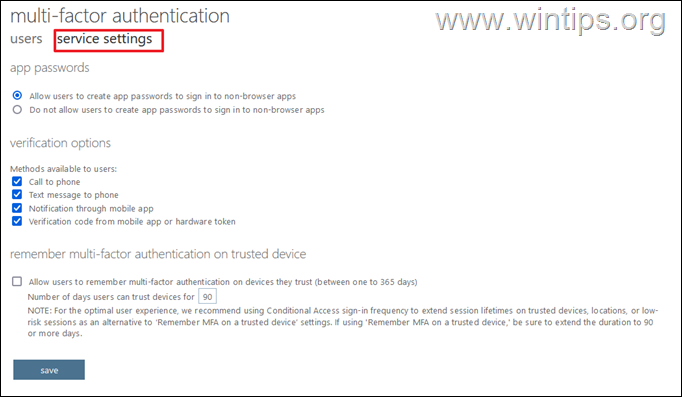
5. Select the service settings tab, to view and select the available multi-factor authentication methods for the user and click Save. *
* Additional help: To add or modify the authentication methods details (phone, email, etc.) for a Microsoft 365 user:
1. Go to Azure Active Directory Admin Center > Users
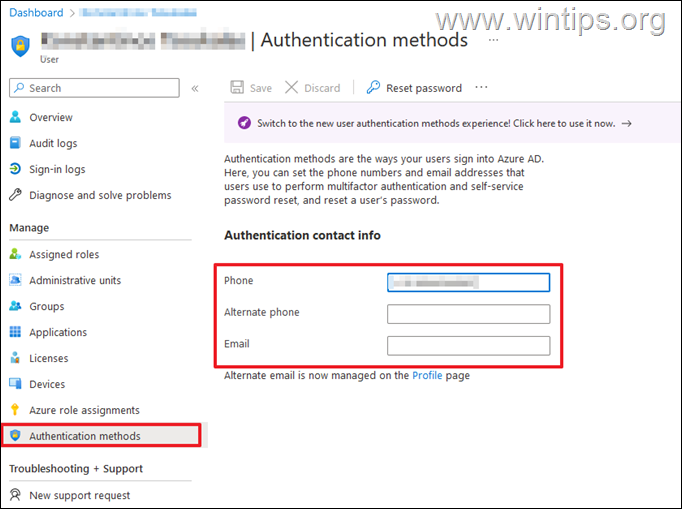
2. Click on the user that you want and then open the Authentication methods page. Here fill the required information in related 'Authentication contact info' fields and then click Save to apply the changes.
That's it! Let me know if this guide has helped you by leaving your comment about your experience. Please like and share this guide to help others.
We're hiring
We're looking for part-time or full-time technical writers to join our team! It's about a remote position that qualified tech writers from anywhere in the world can apply. Click here for more details.
- How to Disable Device Encryption in Windows 11. - April 17, 2024
- How to View Permissions on Shared Folders on Windows 10/11. - April 15, 2024
- FIX 0x80070643 error in KB5034441 update (Solved) - April 10, 2024

