How to Change the Default Location of Camera's Photos and Videos in Windows 10/11.
Sometimes it is useful to change the default storage location of camera photos and videos in Windows 10, especially if the C drive does not have enough free space.
In Windows 10/11, photos and videos taken with the Camera app are saved by default in the Camera Roll folder under the Pictures folder. More specifically, all images and videos captured by the Camera app are stored at the following location on your PC: "C:\Users\<username>\Pictures\Camera Roll".
However, if you have run out of disk space on your drive C: and you own a second disk with enough free space, then you can easily change the default storage location of Photos and Videos by following the instructions below.
This guide contains three (3) different ways to set a different storage location for the Camera's Videos and Photos.
How to Change the Store Location of Camera's Photos and Videos in Windows 11/10.
Method 1. Change Default Location for Photos and Videos in Windows 10 Storage Settings.
To specify a different location to save the Camera's videos and photos in Settings:
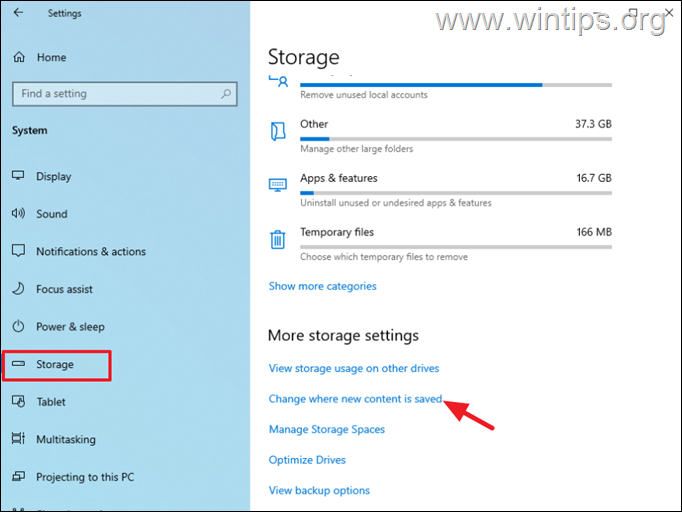
1. Go to Start > Settings > System.
2. Select Storage on the left and on the right click Change where new content is saved. *
* Note: In Windows 11, click Storage > Advanced Storage settings > Where new content is saved.
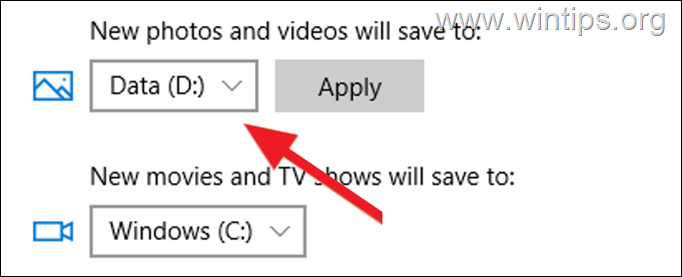
3. Expand the New photos and videos will save to and select the preferred drive for the Photos and Videos. Click on Apply to save the settings.
Method 2. Change Default Camera Roll Store Folder in Picture Properties.
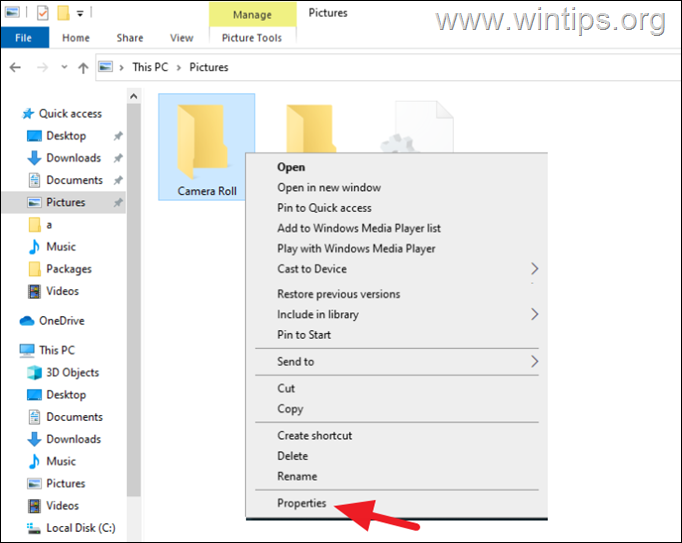
Another way to modify the default store location for your Photos and Videos taken with your camera, is by changing the Properties of the Camera Roll folder. To do that:
1. Open the Pictures folder, and then right-click at Camera Roll folder and select Properties.
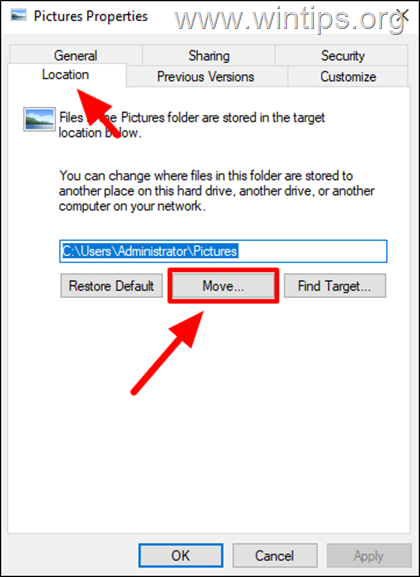
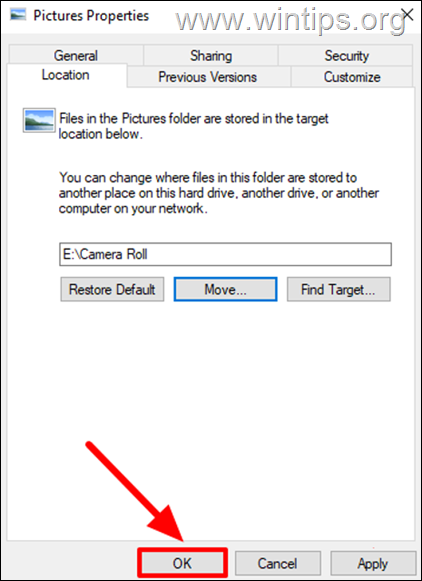
2. At Location tab, click the Move button.
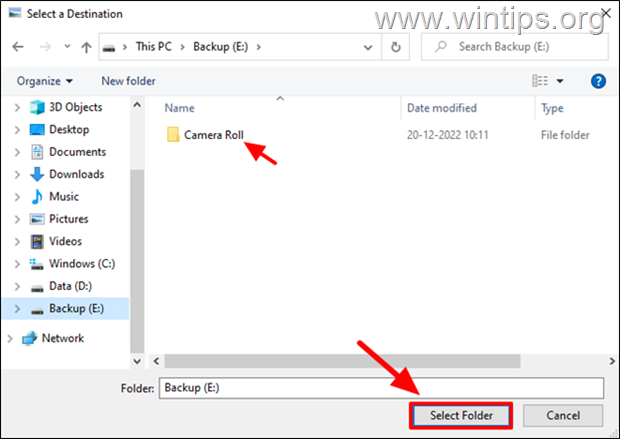
3. Now, choose the new folder to store your photos and videos from your Camera and click Select Folder.*
* Note: For this example, I have created a new folder named "Camera Roll" in disk E:
4. Click on Apply, then OK to save the change.
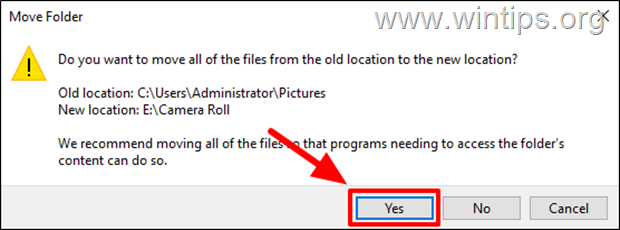
5. Finally click Yes on 'Move Folder' prompt to confirm the change and to move all the photos an videos from the old location to the new one.
Method 3. Move Camera Roll folder to another location (disk) via Registry.
Another method to change the save location for camera's photos and videos, is via Registry:
1. Open Registry Editor. To do that:
1. Simultaneously press the Win
+ R keys to open the run command box.
2. Type regedit and press Enter to open Registry Editor.
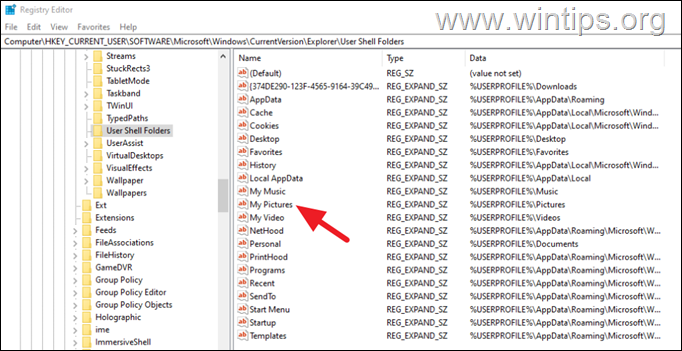
2. Navigate to this key at left pane:
HKEY_CURRENT_USER\SOFTWARE\Microsoft\Windows\CurrentVersion\Explorer\User Shell Folders
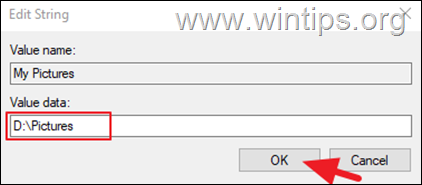
3. On the right pane double-click to open the My Pictures registry value.
4. At value data, type the new path (location), to save your photos and the captured images and videos from your Camera and choose OK.
5. Close the Registry Editor.
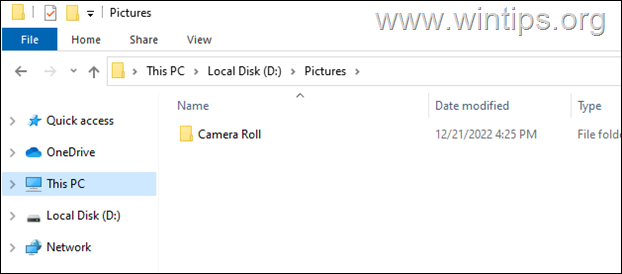
6. Navigate to the new location (e.g. in "D:\Pictures"), and create a new folder with name Camera Roll.
7. Finally, restart your computer and you're done! From now on all the new photos and videos from your camera will be stored inside the 'Camera Roll' folder at the new location (e.g.:"E:\Pictures\Camera Roll")
That's it! Which method worked for you?
Let me know if this guide has helped you by leaving your comment about your experience. Please like and share this guide to help others.
We're hiring
We're looking for part-time or full-time technical writers to join our team! It's about a remote position that qualified tech writers from anywhere in the world can apply. Click here for more details.
- FIX: Numeric keypad Not Working on Windows 10/11 - July 24, 2024
- How to Share Files or Printers in Hyper-V? - July 22, 2024
- How to invoke Hyper-V Screen resolution prompt? - July 17, 2024

