FIX: Windows 10 VPN Doesn't Connect from System tray but it Connects from Network Settings.
A few days ago, I faced the following weird problem on a Windows 10 Pro (v1809) based computer, when I tried to connect to a workplace using VPN: The VPN connection doesn't connect from the System tray icon in the taskbar (stuck on "Connecting"), but it connects from the Network Settings.
Problem in details: When you click "Connect" from the VPN Connection shortcut in Taskbar, the VPN connection doesn't work (the indicator stays forever at "Connecting to…" phase), but it works and connects immediately, if you start the VPN connection, from the Network & Internet settings.
How to fix: VPN Connection Doesn't Work from its VPN shortcut (icon) in Taskbar, but it Works from Network Settings.
At first, when I faced the above issue, I tried the following (usual) procedure to resolve the VPN Connection problem, but without any luck.
1. Reboot your computer.
2. Check the VPN Connection settings.
2. Temporarily disable your Antivirus/Security program.
4. Delete and recreate the VPN connection.
To resolve the "VPN connection is not connected by the system tray but is connected by Network Settings" issue in Windows 10, apply the steps bellow:
Step 1. Set Windows Firewall to ON.
First of all make sure, that the Windows Firewall is running. To do that:*
* Note: If you have previously disabled the Windows Firewall, you must enable it.
1. Go to Settings -> Update and Security.
2. Click Windows Security at the left pane and then click Firewall & network protection at the right.
3. Check if the Firewall is On, at all listed networks (Domain, Private & Public), otherwise set it to OΝ and restart your computer.
Step 2. Fix Taskbar issues.
1. Open Windows Explorer and navigate to the following path:
-
C:\Windows\System32\WindowsPowerShell\v1.0\
2. Right click at powershell.exe and select Run As Administrator.
3. At PowerShell. copy and paste the following command and then press Enter.*
- Get-AppXPackage -AllUsers | Foreach {Add-AppxPackage -DisableDevelopmentMode -Register "$($_.InstallLocation)\AppXManifest.xml"}
*Note: During the command execution you'll receive some errors, which can be safely ignored.
4. When the command is completed, try to start the VPN connection from it's shortcut icon in taskbar.
5. Restart the PC. The problem should be fixed. *
* Note: If the problem is not fixed, follow the instructions below, to create a shortcut of the VPN connection on your desktop, until Microsoft fixes the bug.
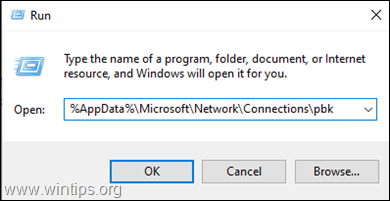
1. Simultaneously press the Win
+ R keys to open the run command box.
2. In command prompt, copy and paste the following command and press OK.
- %AppData%\Microsoft\Network\Connections\pbk
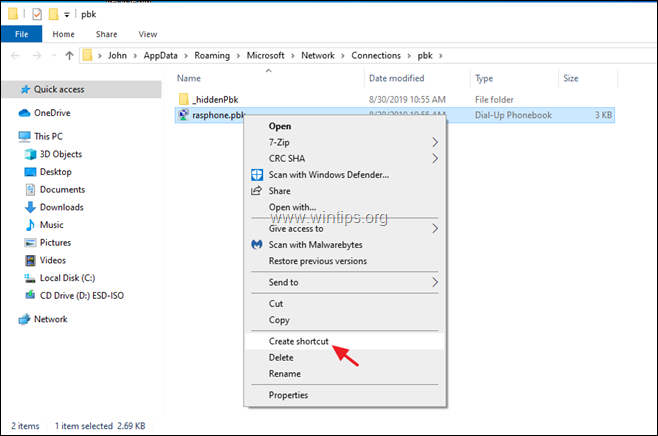
2. Right-click at rasphone.pbk and Create Shortcut
3. Move the created shortcut on your desktop.
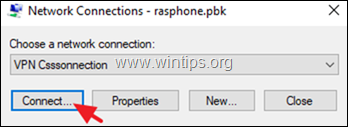
4. Double-click at the "rasphone.pbk-rasphone.pbk " to connect to VPN.
That's it! Let me know if this guide has helped you by leaving your comment about your experience. Please like and share this guide to help others.
We're hiring
We're looking for part-time or full-time technical writers to join our team! It's about a remote position that qualified tech writers from anywhere in the world can apply. Click here for more details.
- FIX: Numeric keypad Not Working on Windows 10/11 - July 24, 2024
- How to Share Files or Printers in Hyper-V? - July 22, 2024
- How to invoke Hyper-V Screen resolution prompt? - July 17, 2024


December 6, 2019 @ 4:53 am
Thanks for the info, the powershell command resolved the issue for me.
Win 10 v1909
November 15, 2019 @ 9:36 am
Not here too
November 15, 2019 @ 12:13 pm
Since this is a Microsoft bug, the article has been updated. Follow the instructions at the end of the article to create a shortcut to the VPN connection until Microsoft fixes the issue.
November 12, 2019 @ 2:52 am
This made no difference on my PC with Windows 10 [Version 10.0.18362.418]
Problem was still the same after running the Powershell command line as administrator