FIX: Windows Security History Crashes (Windows11/10)
If you can't view the Protection History results because the Windows Security crashes and then closes, then continue reading below to learn how to fix the problem.
Symptom: When opening the 'Protection history' to view the protection actions and recommendations from Windows security, the Windows Security app crashes and closes.
Cause: The mentioned problem is usually caused because the Protection history is corrupted. To fix the problem follow the methods below.
How to fix: Windows Defender Protection History crashes and closes in Windows 10/11.
- Reinstall/Reset Windows Security app.
- Delete Windows Security Protection History.
- Delete Windows Security Database.
- Repair Windows System Files.
- Repair Windows with an In-place upgrade.
Method 1. Fix Windows Defender History crashing by Resetting/Reinstalling Windows Security app.
The first method to resolve the issue is to reinstall the Windows Security application and reset its data to defaults. To do this:
1. In Windows Search, type PowerShell and select Run as Administrator to open PowerShell as an Administrator.

2. In PowerShell window, copy and paste the following command and then press Enter.*
- Get-AppxPackage Microsoft.SecHealthUI -AllUsers | Reset-AppxPackage

Method 2. Delete Windows Security Protection's History Files.
The second method to resolve the mentioned problem, is to clear the protection history. To do this:
Step-1. Restart Windows in Safe Mode.
1. Press the Windows + R keys to open the 'Run' command box.
2. Type msconfig and press Enter to open the System Configuration utility.
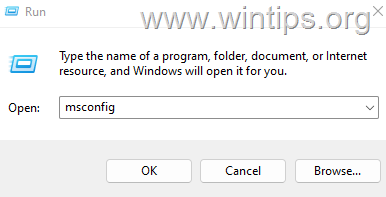
3. Navigate to Boot tab and select Safe boot to start Windows with the minimal services and drivers. Then, click Apply > OK and then click Restart to reboot your computer in Safe Mode.

Step-2. Delete Windows Defenders' detection history files.
1. After entering in Safe Mode, open File Explorer and from the View menu click Show > Hidden items to force Windows to displayall hidden folders and files.

2. Now, navigate to the following location on disk C:
- C:\ProgramData\Microsoft\Windows Defender\Scans\History\Service\DetectionHistory
3. Press CTRL + A to select all the subfolders inside the 'DetectionHistory' folder and then press the Delete button to remove all of them.

Step-3. Restart Windows Normally.
1. Press the Windows + R keys to open the 'Run' command box.
2. Type msconfig and press Enter to open the System Configuration utility.
3. In General tab, select Normal startup then click Apply > OK and restart your PC in 'Normal Mode' with all drivers and services loaded.

4. After the restart, open the Windows Security and then see if the protection history opens normally and does not close. Normally the problem should be resolved. If not, continue to the next method.
Method 3. Delete the Windows Defender Security Database (mpenginedb.db).
The next method to solve the crashing problem when opening the "Protection history" in Windows Security app, is to delete the database of the Windows Security app. To do this:
Step-1. Start Windows in Safe Mode
1. Follow the instructions on Step-1 of Method-1 above to start Windows in Safe Mode and then continue to step-2 below.
Step-2. Stop Microsoft Windows Defender Antivirus service using Registry.
1. In Safe Mode, open the Registry Editor. To do that:
1. Simultaneously press the Win
+ R keys to open the run command box.
2. Type regedit and press Enter to open Registry Editor.

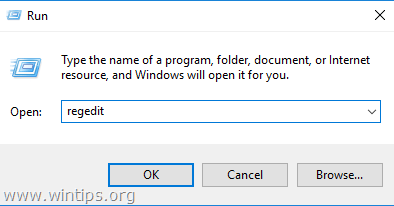
2. Navigate to this key at left pane:
- HKEY_LOCAL_MACHINE\SYSTEM\CurrentControlSet\Services\WinDefend
3. At the right pane, open the Start REG_DWORD value and change the Value data from "2" to "4" to disable the antivirus service and the antimalware process (MsMpEng.exe).

4. Close the Registry Editor, restart the computer again and continue to next step.
Step-3. Force Windows Defender to Recreate its Database (mpenginedb.db).
Now go ahead and force Windows Defender to recreate its database from scratch by deleting or moving the "mpenginedb.db" file to another location on disk.
1. Navigate to the following location:
- C:\ProgramData\Microsoft\Windows Defender\Scans
2. Select the "mpenginedb.db" file and delete it or move it to your desktop (to have a backup if something goes wrong). When done, continue to next step.

Step 4. Enable Microsoft Windows Defender Antivirus service using Registry.
1. Open Registry Editor and navigate to the following location:
-
HKEY_LOCAL_MACHINE\SYSTEM\CurrentControlSet\Services\WinDefend
2. At the right pane open the Start REG_DWORD value and change the Value data from "4" to "2" to enable the antivirus service and the antimalware process (MsMpEng.exe).

Step-5. Restart Windows in Normal Mode.
1. Follow the instructions on Step-3 of Method-1 above to start Windows in Normal Mode (Normal Startup).
2. Open Windows Security and navigate to Protection history to verify that the problem is solved.
3. If everything is OK, proceed and delete the "mpenginedb.db" file from your desktop and continue your work.
Method 4. Fix Windows Security Protection history by repairing system files.
Repairing Windows system files is a common but important step in solving Windows 10/11 problems like the one mentioned here.
1. Open Command Prompt as Administrator. (To do that, type "cmd" in Search and then at "Command Prompt" result, select "Run as Administrator")

2. At the command prompt window, type the following command & press Enter:
- dism.exe /Online /Cleanup-Image /Restorehealth
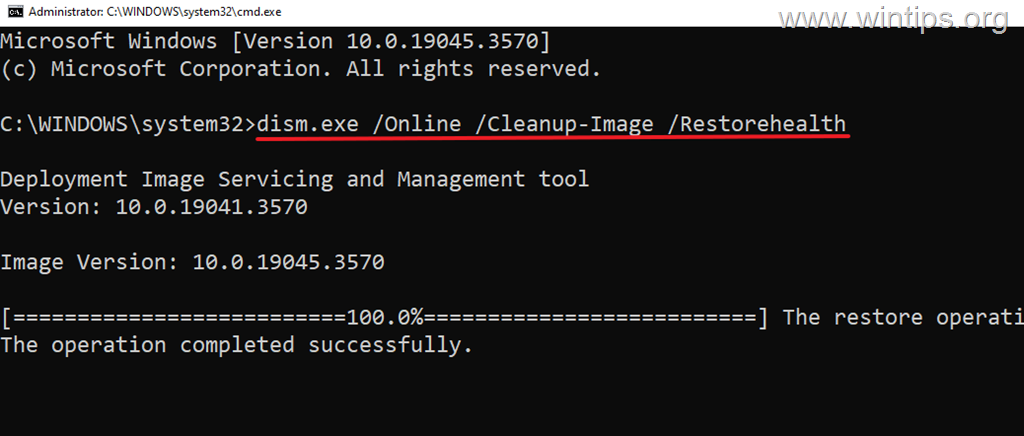
3. Be patient until 'Deployment Image Servicing and Management' (DISM) tool repairs the component store.
4. When the operation is completed, give the command below to repair the system files and press Enter:
- sfc /scannow
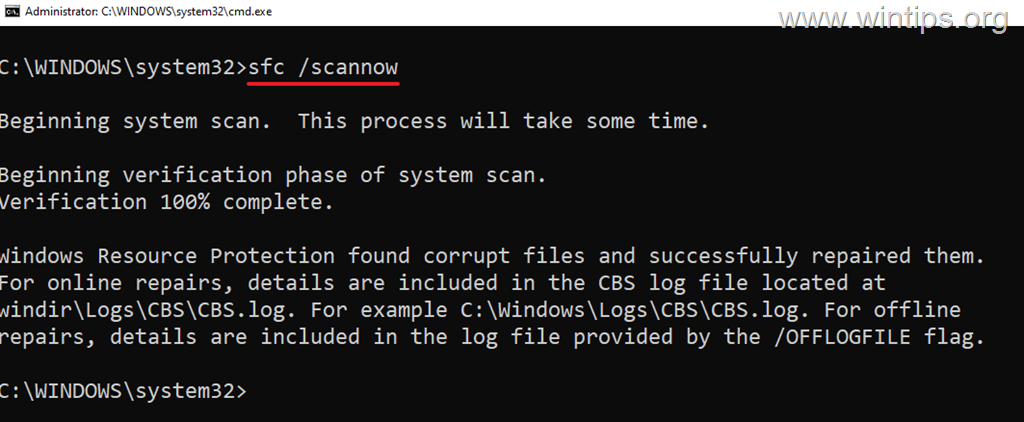
5. When SFC scan is completed, restart your computer.
6. After restarting check if the problem is fixed.
Method 5. Repair Windows with an in-place Upgrade.
Another common method to solve Windows 10/11 problems is to repair & upgrade Windows from a Windows ISO file. For this task, read the instructions in the articles below, according to your operating system version.
- How to Repair Windows 10 with an In-Place Upgrade.
- How to Repair Windows 11 with an In-Place Upgrade.
That's it! Which method worked for you?
Let me know if this guide has helped you by leaving your comment about your experience. Please like and share this guide to help others.
Frequently Asked Questions
What should I do if the Windows Security app crashes when viewing Protection History?
This issue may occur if the Protection History is corrupted. You can try several methods such as reinstalling/resetting the Windows Security app, deleting the Protection History, or repairing system files.
How can I reset or reinstall the Windows Security app to fix crashing issues?
Open PowerShell as an Administrator, then run the command: Get-AppxPackage Microsoft.SecHealthUI -AllUsers | Reset-AppxPackage. This will reset the Windows Security app to its default settings.
What are the steps to delete the Windows Security protection history in Safe Mode?
First, boot into Safe Mode by accessing msconfig and enabling 'Safe boot' under the Boot tab. Then navigate to C:\ProgramData\Microsoft\Windows Defender\Scans\History\Service\DetectionHistory and delete all files in this folder. Restart the computer in Normal Mode after deletion.
How do I disable the Microsoft Windows Defender Antivirus service using the Registry?
In Safe Mode, open the Registry Editor (type regedit in the Run command box). Navigate to HKEY_LOCAL_MACHINE\SYSTEM\CurrentControlSet\Services\WinDefend and change the Start REG_DWORD value from '2' to '4'. Restart the computer to continue with further troubleshooting steps.


- Fix New Outlook and Teams Not Opening After KB5121003 on ARM PCs - September 3, 2026
- Windows 11 KB5120998 Breaks Mouse Cursor and Wallpaper Personalization (FIX) - September 1, 2026
- Microsoft Defender Antivirus Is Turned Off Even Though It Is Running – How to Verify Your Protection - August 31, 2026