How to Repair and Upgrade Windows 11 with In-Place Upgrade.
In this tutorial I will show you how to repair and upgrade your Windows 11 PC at the same time, using the In-Place upgrade method. An In-Place upgrade is the process of upgrading Windows 11 to the latest version by fixing any Windows problems while keeping your personal files, programs and settings untouched.
The repairing of Windows 11 using the In-Place upgrade method, is the most reliable and fastest way to fix Windows 11 malfunctions, while updating your system with the latest available updates.
How to Perform a Windows 11 In-Place Upgrade.
Step 1. Download Windows 11 ISO File.
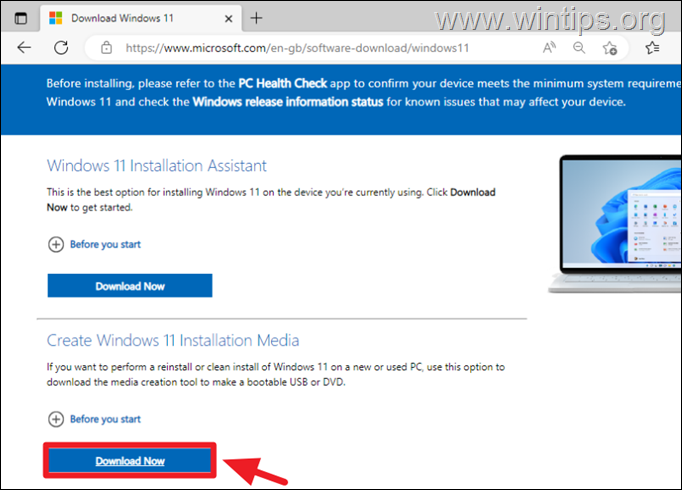
To repair and upgrade Windows 11, proceed and download the latest version of Windows 11 in a ISO file, by using the Media Creation Tool (MCT). To do that:
1. Navigate to Windows 11 download site, and download the Windows 11 Installation (Creation) Media Tool (MCT) on your computer.
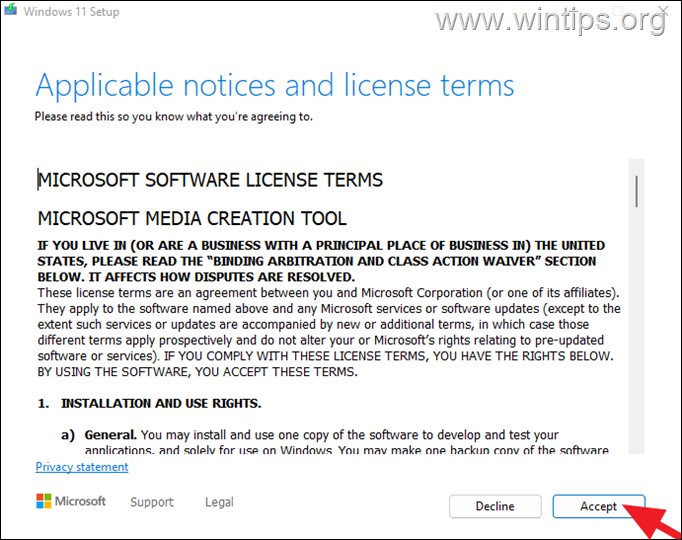
2. When the download is completed, double-click to run the "mediacreationtool.exe" file and Accept the license terms..
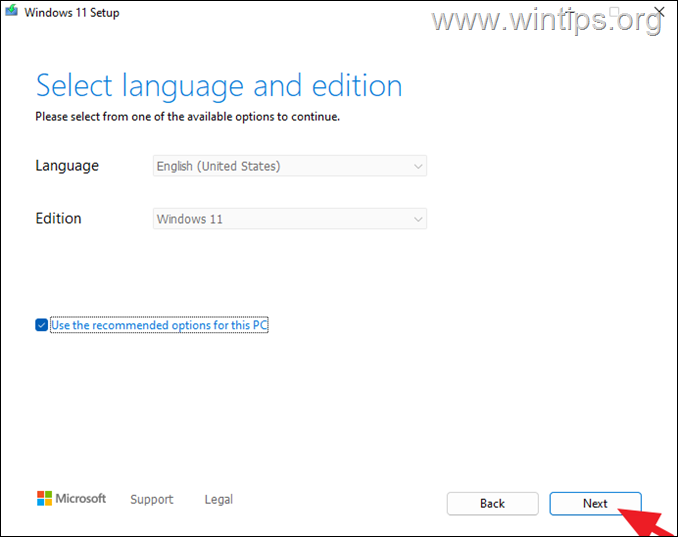
3. Leave the option "Use the recommended settings for this PC" checked and click & click Next.
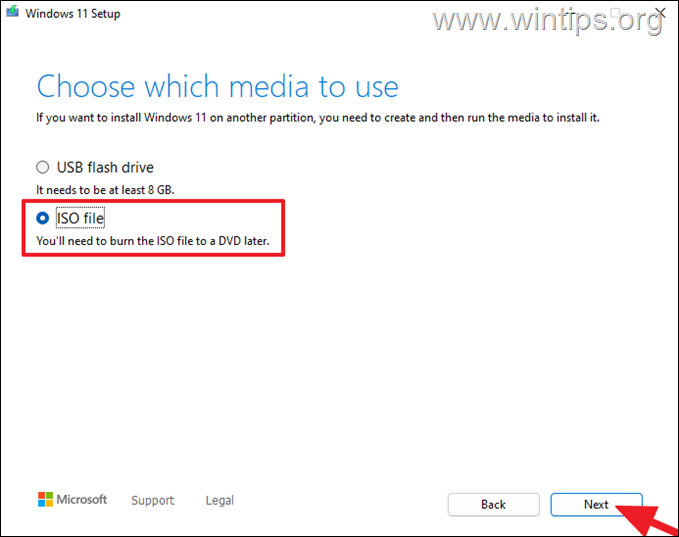
4. At the next screen choose ISO File and click Next.
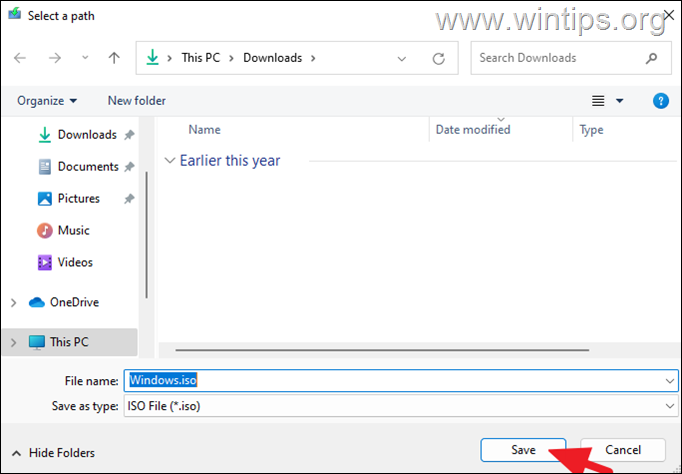
5. Select the "Downloads" folder to save the Windows.iso file and click Save.
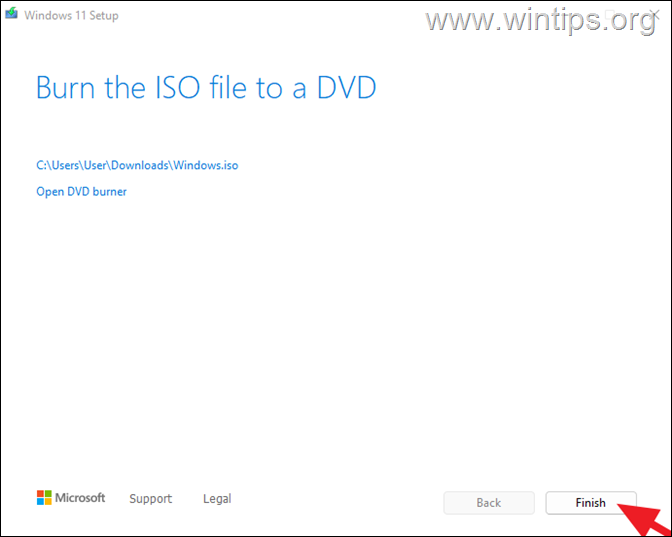
6. Now wait for the download to finish. When this done, click Finish and continue to next step.
Step 2. Repair and Upgrade Windows 11 from the Windows.ISO file.
Attention: To avoid problems during the Windows 11 installation, perform the following actions, before starting the Windows 11 upgrade/repair process:
1. Disable or -better- temporarily uninstall any non Microsoft antivirus or security software..
2. Make sure that you have enough space on your disk (at least 30GB).
3. Run Disk Cleanup and delete the useless files, by following the instructions in this tutorial: How to Free Up Disk Space with Disk Cleanup.
4. Disconnect all the USB peripheral devices that you don't need. (Especially in laptops disconnect also any external USB Keyboard/Mouse.)
To perform the In-Place Upgrade of Windows 11:
1. Open Windows Explorer and navigate to the folder you saved the 'Windows.iso' file (e.g. the "Downloads" folder.).
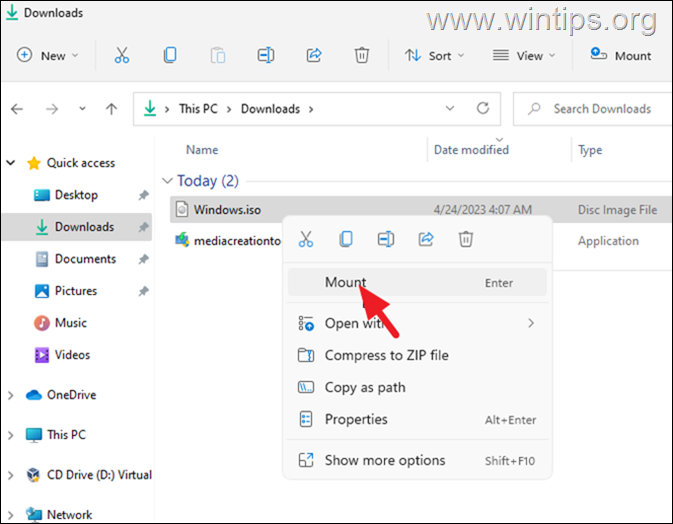
2. Double-click at the 'Windows.iso' file to mount it in Explorer, or right-click on the ISO file and select Mount.
3. Then , double-click at setup.exe application to start the repair-upgrade of Windows 11.
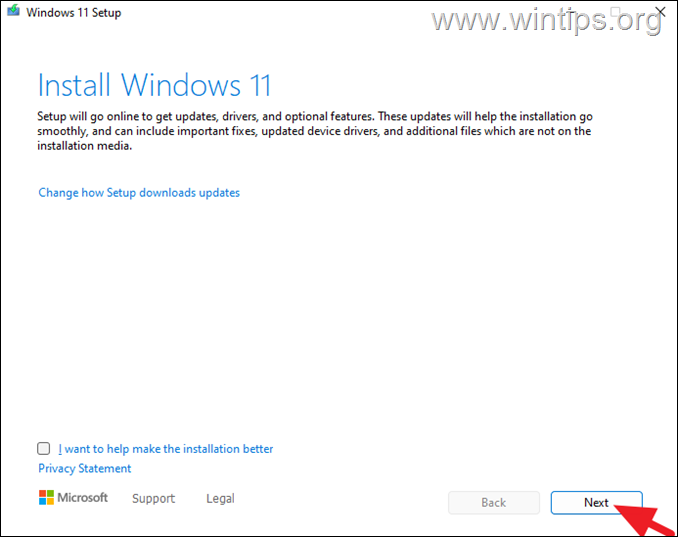
4. Press Yes at the 'UAC warning message' and then click Next to install Windows 11.
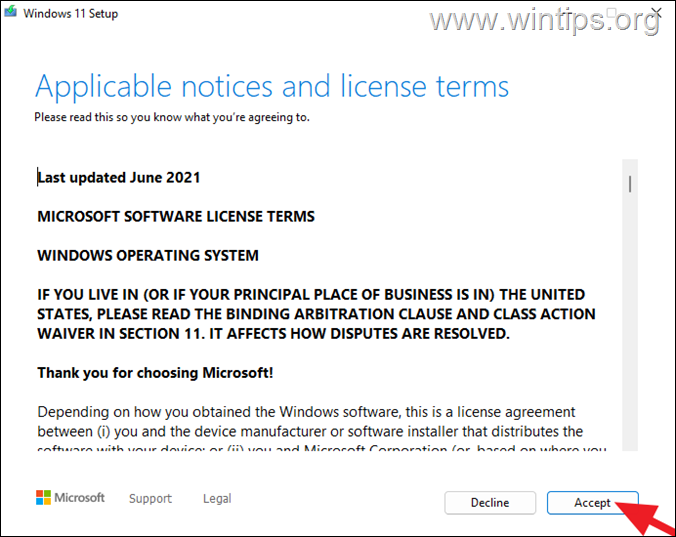
5. Accept the license terms and then be patient until Windows checks for updates.
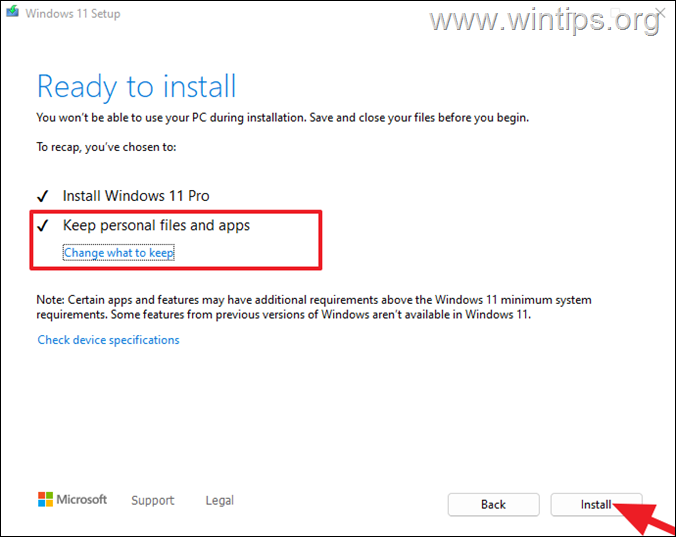
6. At 'Ready to Install' screen, make sure that the Keep personal files and Apps option is selected and click Install.
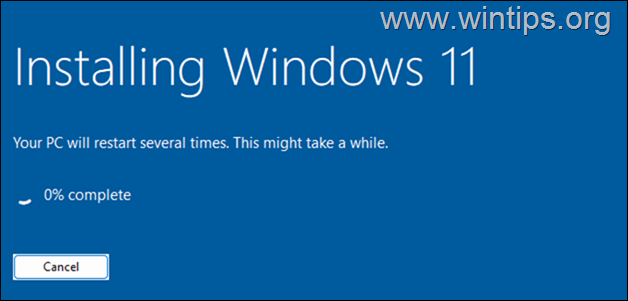
7. Finally, wait for the in-place upgrade/repair of Windows 11 to complete. When this is done, your system will be upgraded to the latest version of Windows with all updates installed and all files, apps and settings in place.*
* Note: If anything goes wrong and the upgrade couldn't be completed, do the following:
1. Plug an empty USB drive* (at least 8GB) on your PC.
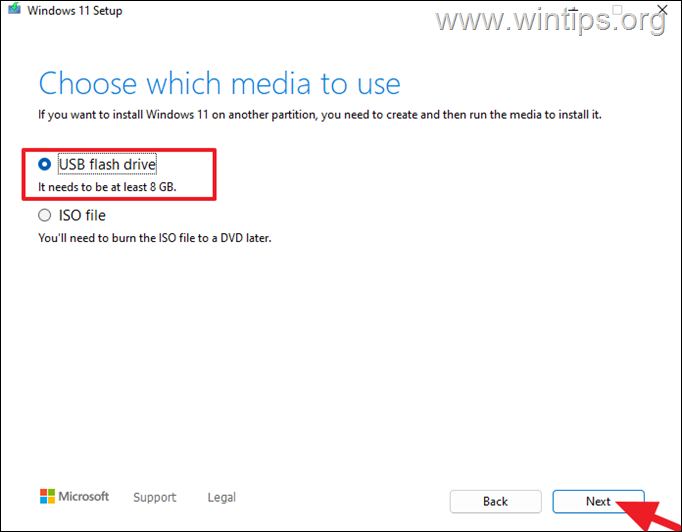
2. Run the "mediacreationtool.exe" file you downloaded at step-1 above and choose to create a USB flash drive.
* Attention: The USB drive will be formatted (deleted), during the media creation process. So, make sure there are no files you might want on the USB.
3. When the USB creation is done, run the "setup.exe" application from the USB drive and follow the instructions on the step-2 above (3-7), to repair and upgrade Windows 11 from the USB. *
* Additional Help: If the Windows 11 repair-upgrade process fails again, your last option to fix your system, is to backup your files to an external storage media (e.g. your USB drive), and to perform a clean Windows 11 installation from the USB drive.
That's it! Let me know if this guide has helped you by leaving your comment about your experience. Please like and share this guide to help others.
We're hiring
We're looking for part-time or full-time technical writers to join our team! It's about a remote position that qualified tech writers from anywhere in the world can apply. Click here for more details.
- FIX: Numeric keypad Not Working on Windows 10/11 - July 24, 2024
- How to Share Files or Printers in Hyper-V? - July 22, 2024
- How to invoke Hyper-V Screen resolution prompt? - July 17, 2024

