How to Change Email Settings in Outlook 2019 or older versions.
In this tutorial we will show you how to change the email settings in Outlook 2019 or older versions. Microsoft's Outlook is an excellent program for all your mail activities, but sometimes it needed to modify your email account settings.
For example, when you have trouble sending or receiving emails, or if you update your password, you should check and change your Outlook email settings accordingly. If you are not an experienced user, then this tutorial will help you complete this task in no time!
Important Notice: Before proceeding below, you should know your account type (POP or IMAP), the incoming and outgoing server names, and SSL and port settings for your email account. If you do not know this information, contact your email provider to find it. If you want to setup Outlook with Office 365, look here to find out the Office365 email server settings.
How to Change Email Account Settings in Outlook 2019/2016/2013 & Outlook 365.
There are two methods of accessing your Outlook account settings to view or change them.*
* Note: I personally prefer the 1st method because it works similarly in all versions of Outlook and Windows and is very reliable.
Method 1. Change Outlook Email Settings from Control Panel.
The first method to view or change your email settings or to add a new email account in Outlook, is by using the "Mail" applet in Windows Control Panel.
1. Close Outlook.
2. Navigate to Control Panel. If you don't know how to do this, here's how to do it:
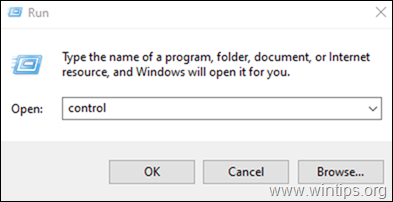
a. Simultaneously press the Windows
+ R keys to open run command box.
b. Type control and press Enter.
3. In Control Panel double-click at Mail (Microsoft Outlook) applet. *
* Note: If you don't see the 'Mail' applet, set the 'View By' to 'Small icons'.
3. In the new window that will open titled "Mail Setup", click on Email Accounts button, to view and modify your Account settings.
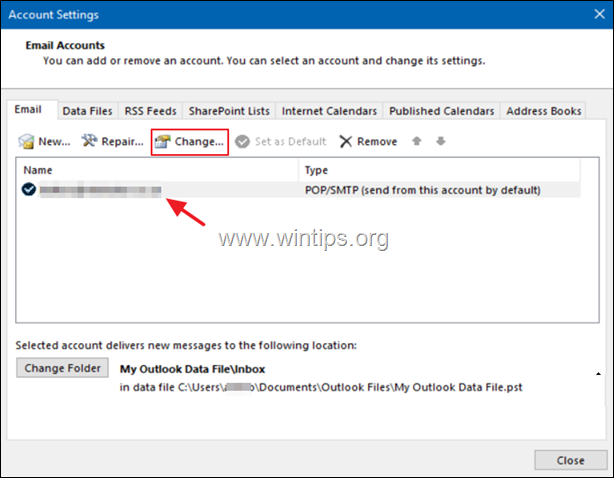
4. Now, in the 'Account Settings' window, you will see all the configured email accounts in Outlook. To change the email settings double-click on the account, (or select/highlight it) and click Change.
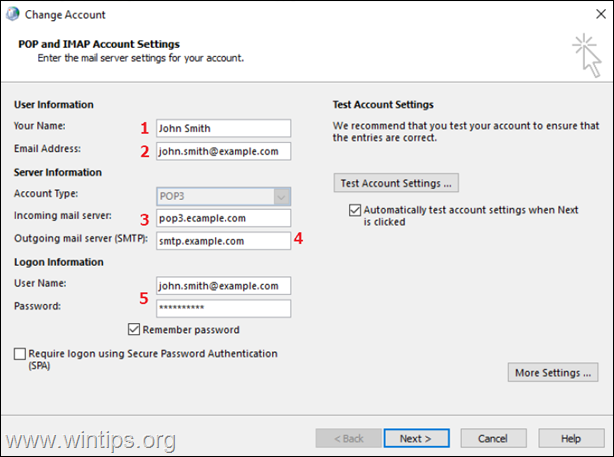
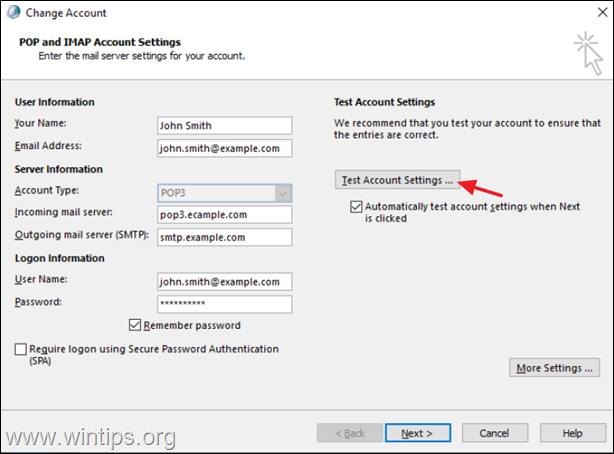
5. At 'Change Account' window that opens, you can change your name, your email account address, your incoming and outgoing email servers and your login credentials to the email servers. More specifically, you can modify the following:*
* Note: This window contains the most important settings for your email account and therefore they need to be filled in correctly.
- Your Name: Type here your real name or your company name. This information will be displayed on recipients, when receiving an email from you.
- Email Address: Type here your email address.
- Incoming Email Server: Specify here the address of the incoming mail server according the account type (POP3 or IMAP), as provided by your email provider. *
- Outgoing Email Server: Specify here the address of the outgoing email server (SMTP) as provided by your email provider.
- At Logon Information type the correct User Name and Password associated with your email account as provided by your email provider.
* Note: If you have set up a wrong "Account Type" and want to change it (from POP3 to IMAP or vice versa), the only way to do it is to delete and re-create the email account from scratch.
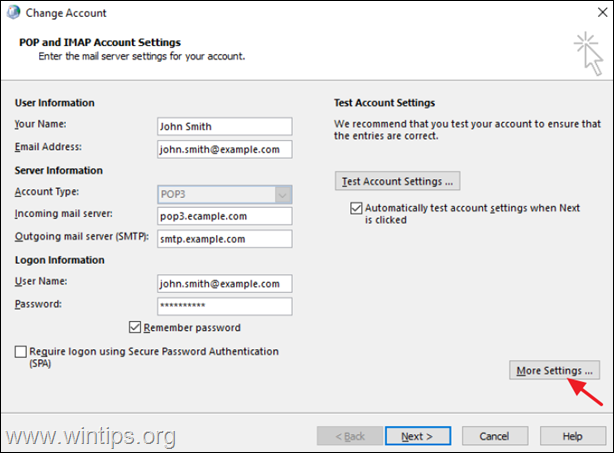
6. When done with the above settings, click the More Settings button, to change some additional settings that may needed from your email provider.
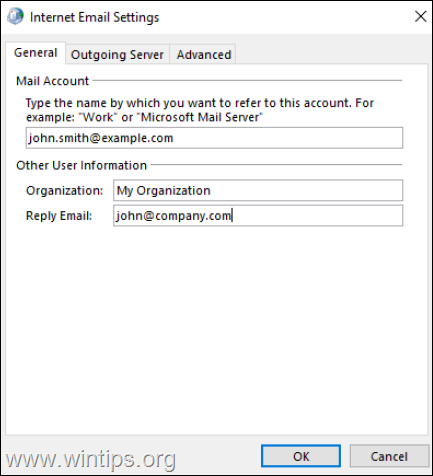
7. In 'Internet Email Settings' window:
7a. On the General tab you can enter a different email to refer to this account, and if you want, you can specify your organization name and a different email address for replies.
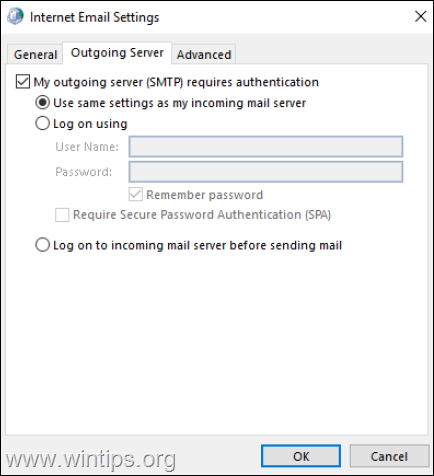
7b. On the Outgoing Server tab, and if the outgoing email server requires authentication, check the corresponding option.
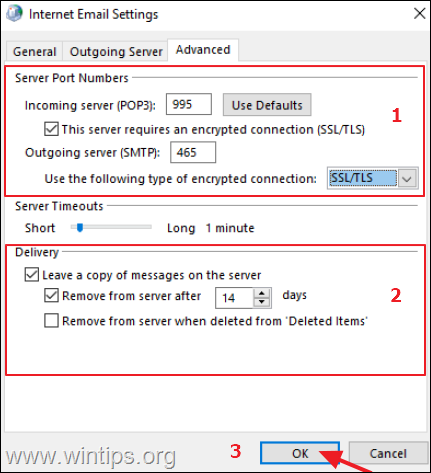
7c. On the Advanced tab:
1. At Server Port Numbers section:
- Compare the Incoming server (POP3) and Outgoing server (SMTP) numbers to those provided by your email provider and change then accordingly.
- Select the corresponding box if an encryption connection to the incoming mail server is required, and then type the port number and select the encryption type for the outgoing mail server (SMTP).
2. At Delivery section, specify if you want to Leave a copy of messages on server and how long to keep them.
3. When done, click OK.
8. Finally click Test Account Settings on the 'Change Account' window to test your settings.
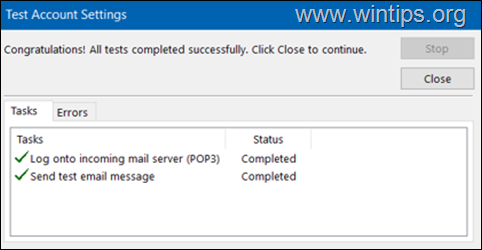
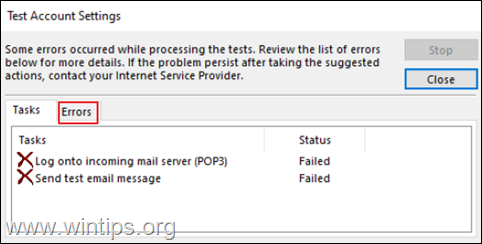
8a. On the 'Test Account Settings' window, check if you have green check marks or red markers:
- The Green check marks indicate that the specified settings are correct and that you have successfully configured your Outlook email account settings. At this case, click Close, and then click Next and Finish on the 'Change Account' window. Open Outlook program to start working.
- The Red markers indicate that some settings are incorrect. At this case, look at Errors tab, to find the reason of the fail and re-check all your settings. If all settings are correct, contact your email provider to help you.
Method 2. Access Email Settings from Inside Outlook.
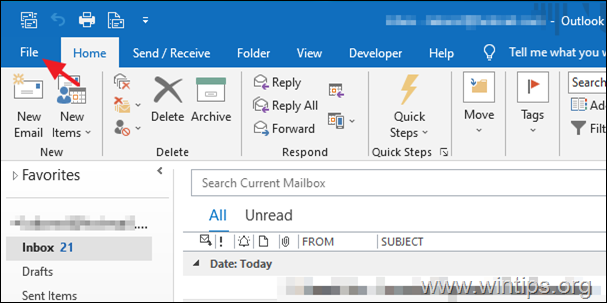
1. In Microsoft Outlook click on File menu..
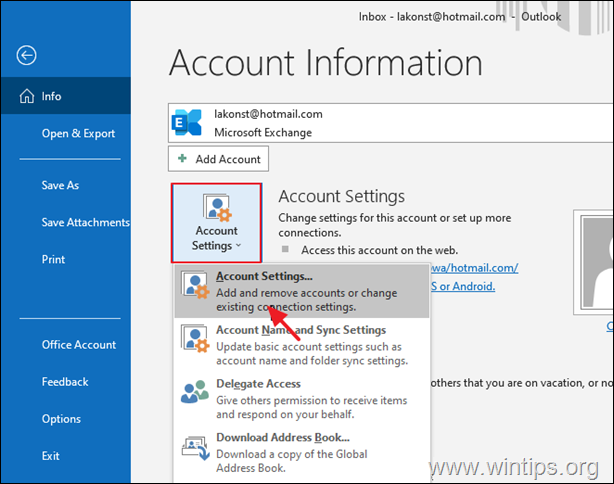
2. …and then click Account Settings > Account Settings.
3. The "Account Settings' window will open. Follow the instructions (from step-4 onwards) of the first method above, to change your Outlook Account Settings.
That's it! Which method worked for you?
Let me know if this guide has helped you by leaving your comment about your experience. Please like and share this guide to help others.
We're hiring
We're looking for part-time or full-time technical writers to join our team! It's about a remote position that qualified tech writers from anywhere in the world can apply. Click here for more details.
- FIX: Numeric keypad Not Working on Windows 10/11 - July 24, 2024
- How to Share Files or Printers in Hyper-V? - July 22, 2024
- How to invoke Hyper-V Screen resolution prompt? - July 17, 2024

