How to First Time Setup Synology NAS.
In this article, we will provide a step-by-step guide on how to setup your Synology NAS device for the first time.
Synology Network Attached Storage (NAS) systems have gained popularity for their reliability, flexibility and powerful feature set. Whether you're a home user who wants to have enough space for your digital content or a company that wants to protect data from loss, setting up your Synology NAS correctly from the start is vital to getting the most out of its capabilities.
The first time setup of a Synology NAS device is very easy and can be completed in no time. So, let's start.
How to Set up & Configure Synology NAS for first time.
Step 1. Prepare your Synology NAS.
Before continue to setup Synology NAS, do the following:
- Add the hard disks on your Synology NAS device.
- Connect an Ethernet cable from your Synology NAS device to your Network
- Power on the Synology NAS and continue at next step to setup it.
Step 2. Setup & Configure Synology NAS.
1. Open you web browser, type the following web address in the address bar and press Enter:
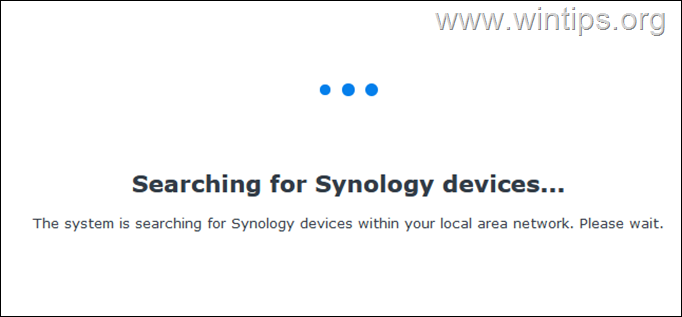
2. Let the system to search for Synology devices.
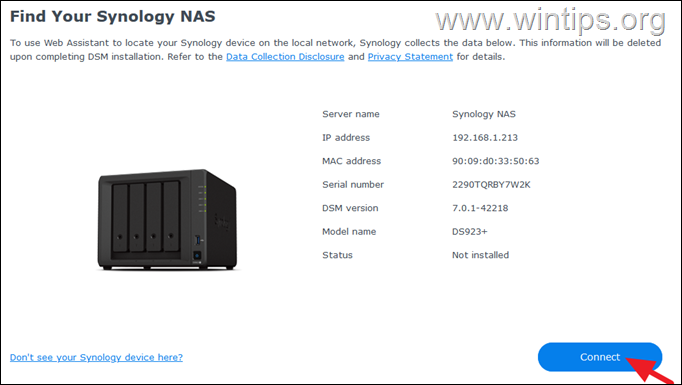
3. When the wizard finds your Synology NAS on your network click Connect.
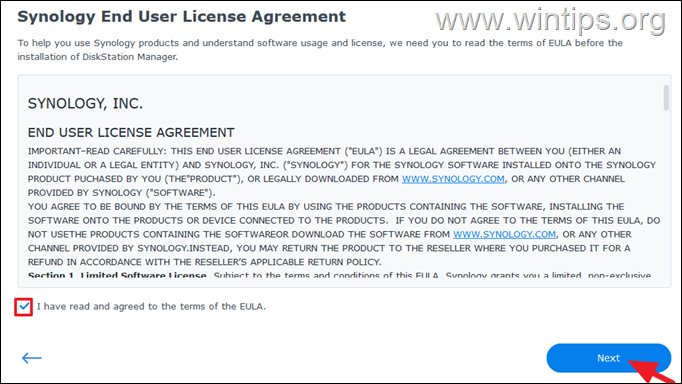
4. Accept the terms and click Next. Then click Continue to Privacy Statement.
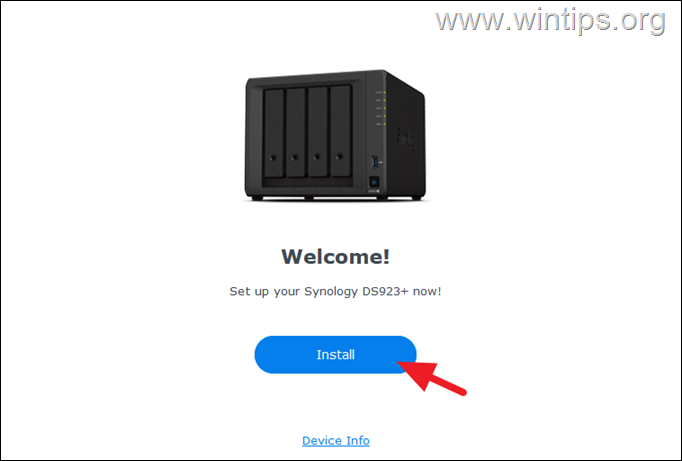
5. At Welcome screen, click Install.
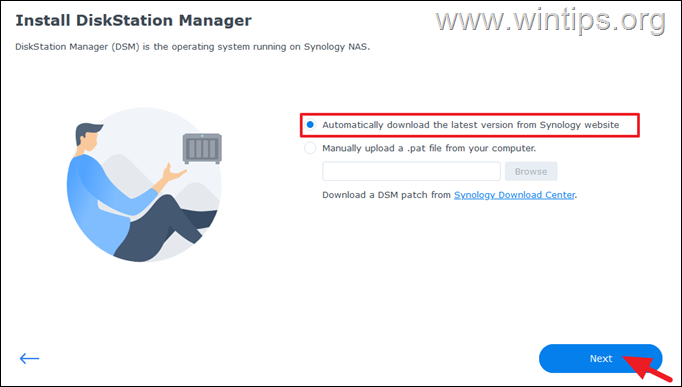
6. Leave checked the option "Automatically download the latest version from Synology website" and click Next, to install the DiskStation Manager, which is the operating system on Synology NAS devices.
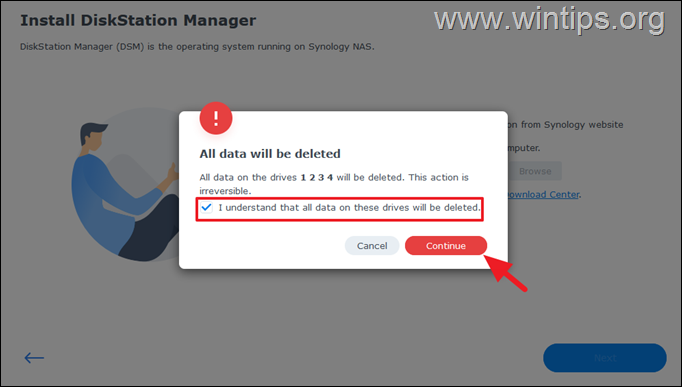
7. Check "I understand that all data on drives will be deleted" and click Continue, to erase all data on the connected drives.
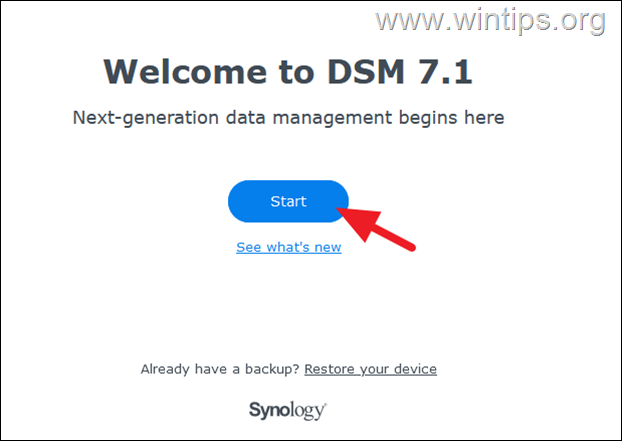
8. Now wait to download and install the Disk Station Manager (DSM). When this done, you'll see the below welcome screen. Click Start to continue.
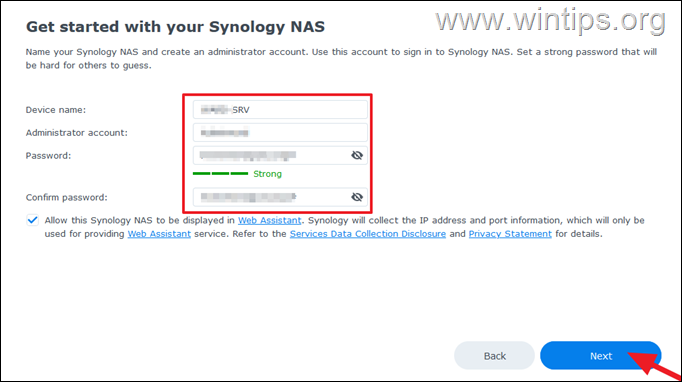
9. At "Get started" screen, type a name for your Synology NAS device, type a username for the Administrator account and specify a strong password. When done, click Next.
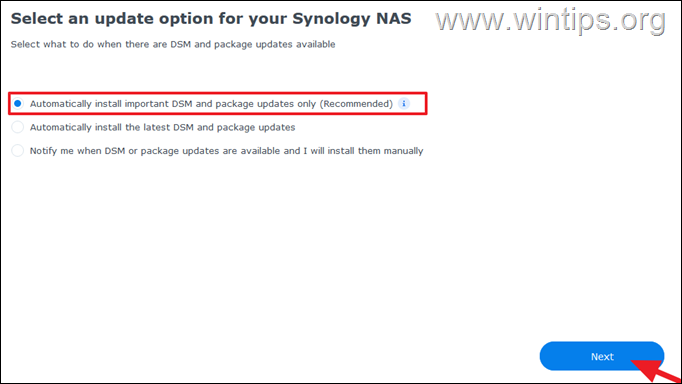
10. Leave checked the option to "Automatically install important DSM and package updates only (Recommended)" and click Next.
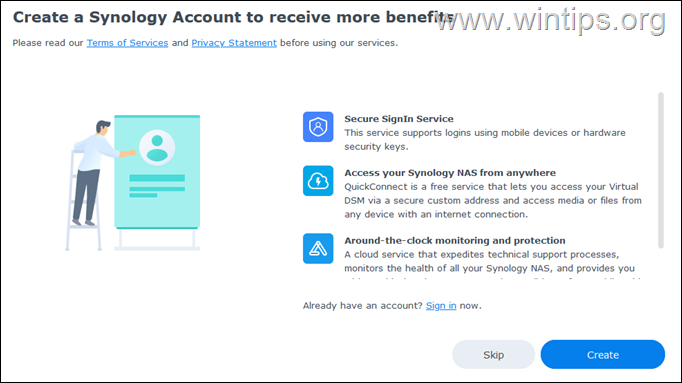
11. When prompted to create a Synology account, click Skip. *
* Note: You can create a Synology account later. See the instructions of this article.
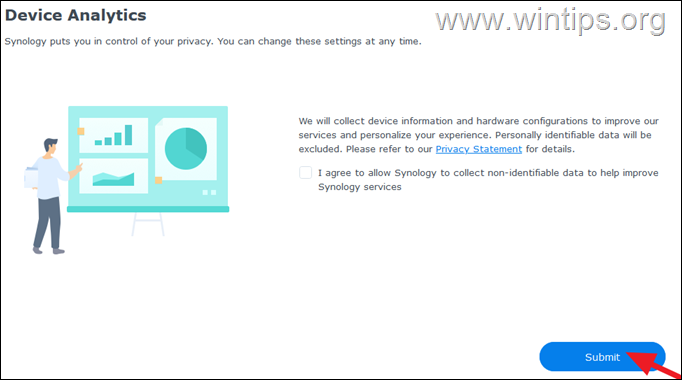
12. If you agree to send device analytics to Synology check the corresponding box and click the Submit button.
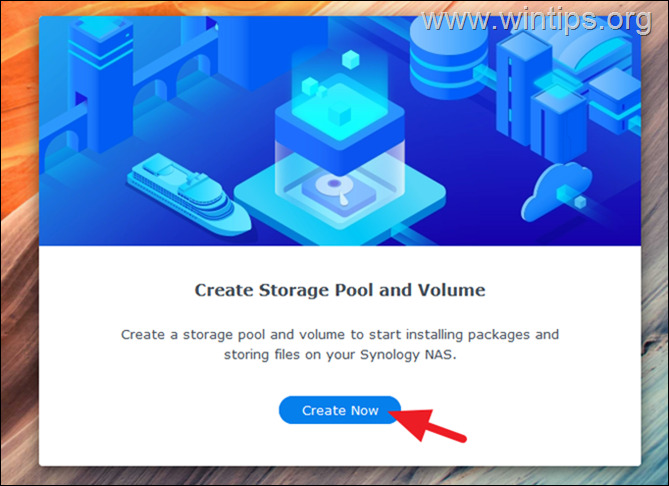
13. When prompted, click the Create Now button, to create a Storage pool and a Volume to start installing packages and storing files on your Synology NAS.
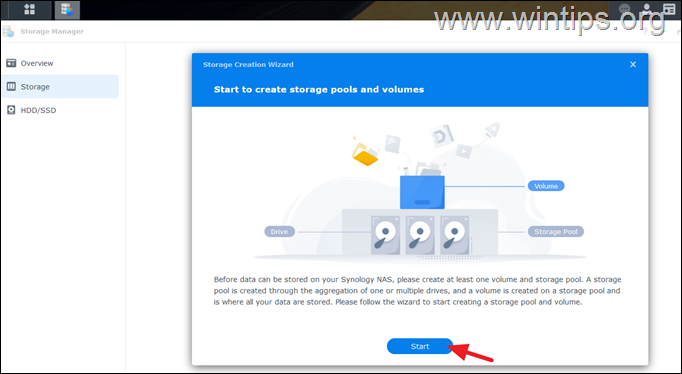
14. Then click the Start button to create storage pools and volumes.
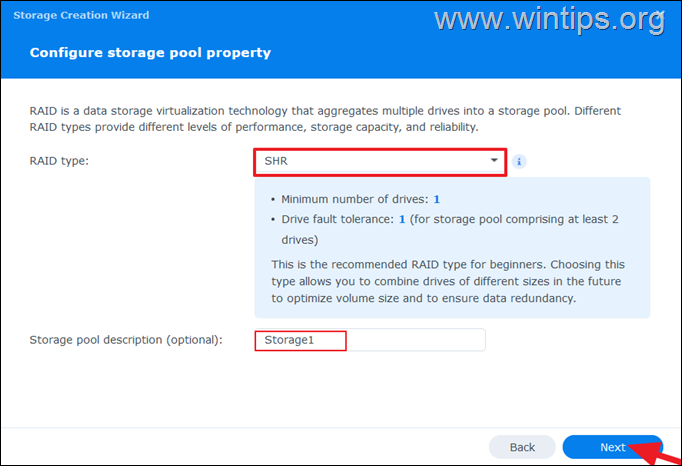
15. At the next screen:
a. Leave the RAID Type to SHR (Synology Hybrid RAID), which is the recommended for beginners. (If you want to learn more for the available RAID types, see this article).
b. Type if you want a name for the storage pool and click Next.
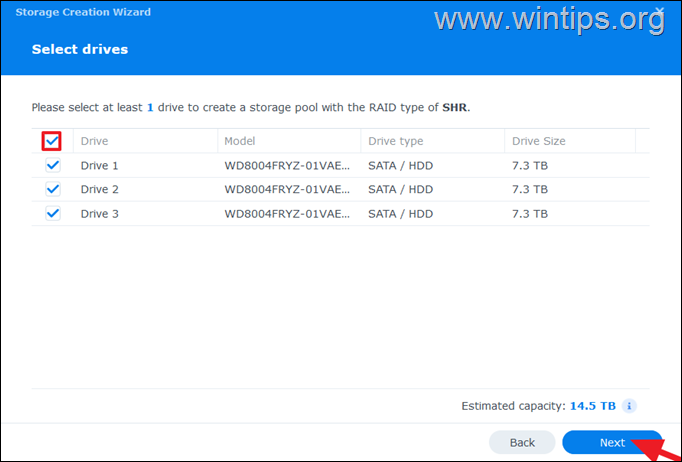
16. Then assign all the drives (disks) to storage pool and click Next.
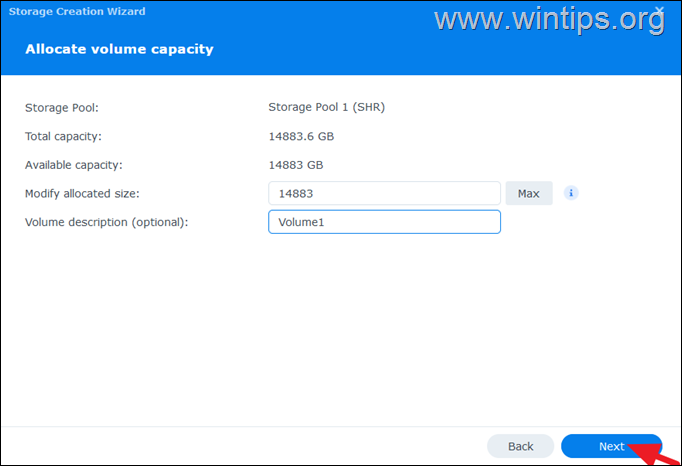
17. At next screen:
a. Specify the maximum size in GB for the new volume, or click Max to assign the total capacity.
b. Optionally, type a Volume name and click Next.
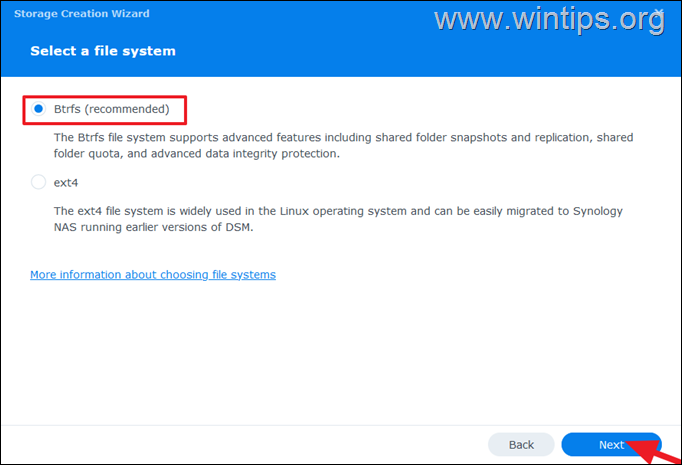
18. Leave checked the "Btrfs (recommended)" file system because it supports advanced features and click Next.
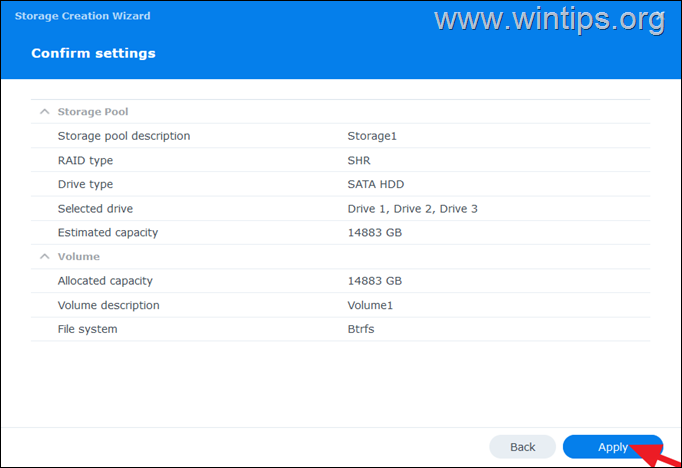
19. Review your settings and click Apply.
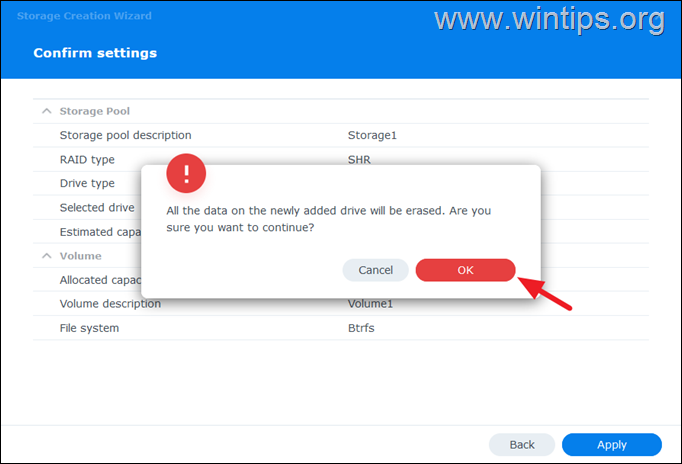
20. Finally, click OK to erase all data on the disks and then wait until the storage pool and volume are created.
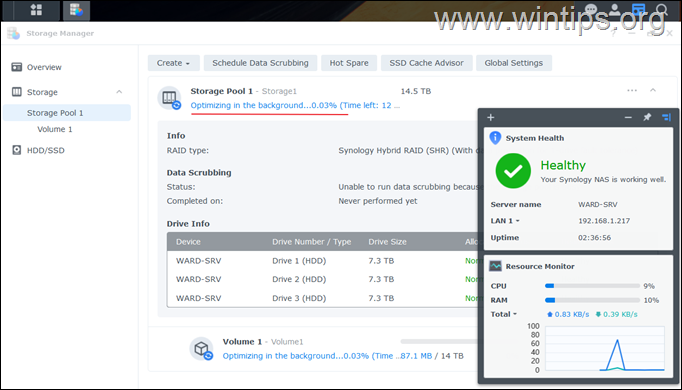
21. When this done, the system will start to optimize the Storage pool in the background. At this point, you can wait for the optimization to complete or start using the NAS immediately.
22. You're done! You have finished the initial setup of your Synology NAS device.
Read next: How to connect to Synology NAS with QuickConnect ID.
That's it! Let me know if this guide has helped you by leaving your comment about your experience. Please like and share this guide to help others.
We're hiring
We're looking for part-time or full-time technical writers to join our team! It's about a remote position that qualified tech writers from anywhere in the world can apply. Click here for more details.
- How to Disable or Remove BitLocker from Windows RE. - April 24, 2024
- FIX: Error 0x8007025d in Windows 10 Update. - April 22, 2024
- How to Disable Device Encryption in Windows 11/10. - April 17, 2024


