How to Setup QuickConnect in Synology NAS.
In this guide you'll find instructions on how to setup QuickConnect and how to use the QuickConnect ID to connect to your Synology NAS.
The "QuickConnect" is a feature provided by Synology, a company specializing in network attached storage (NAS) devices, which offers a convenient way to access your Synology NAS device from anywhere in the world via the Internet, without the need of complicated network settings, port forwarding rules or static IP addresses.
Nowadays, Network Attached Storage (NAS) systems help small and medium-sized businesses to have very large storage spaces for their data, without high costs. Therefore, being able to securely access this data from anywhere at any time is crucial, and this is where Synology comes in with QuickConnect to provide a solution.
With QuickConnect, you can easily connect to your Synology NAS using a unique QuickConnect ID or URL provided by Synology, from any desktop computer or mobile device. This ID acts as a personalized address that allows you to access your NAS and its services securely from a distance.
After connecting to your Synology NAS device with QuickConnect, you'll be able to access files, stream media, or manage your NAS remotely, over a secure and encrypted connection to ensure the privacy and security of your data.
How to Set Up QuickConnect & Connect to Synology NAS.
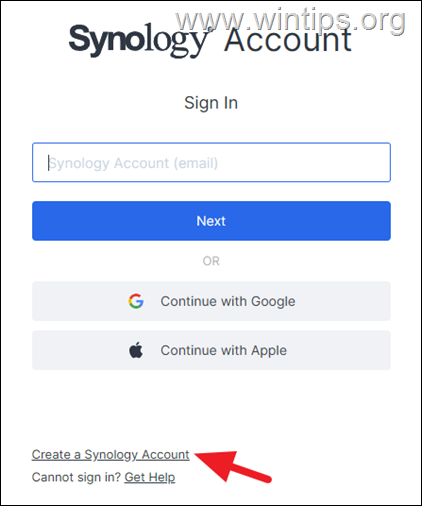
1. Navigate to Synology Account webpage and create a Synology Account.
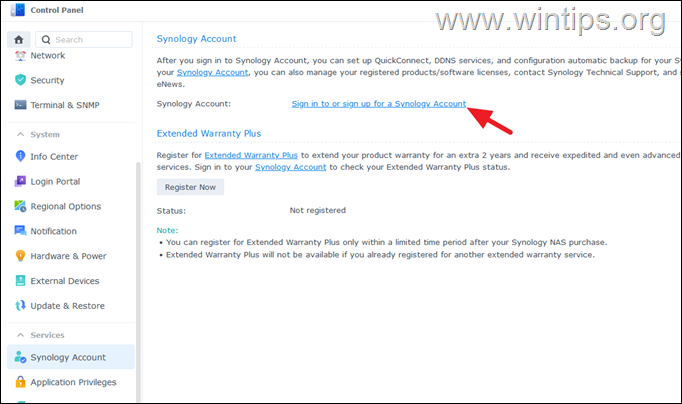
2. After creating you Synology Account, open the DSM Control Panel, select Synology Account on the left and then click Sign in to or sign up for a Synology account.
3. Type you Synology Account name and password to sign-in.
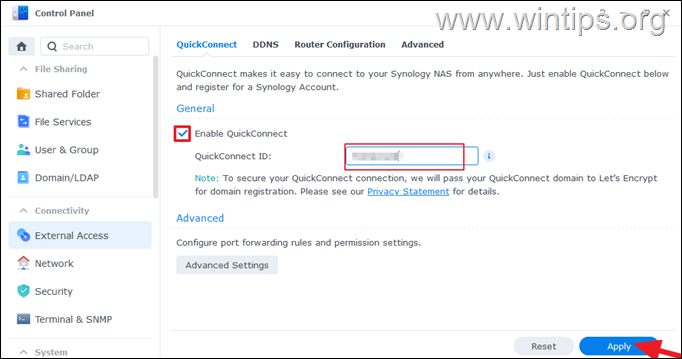
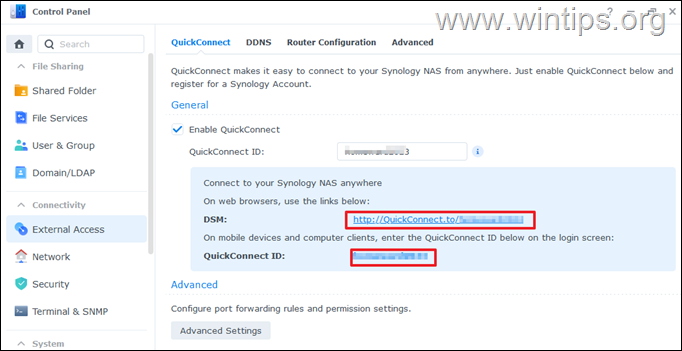
4a. Next, click External Access on the left and at the right check the Enable QuickConnect option.
4b. Type a QuickConnect ID and click Apply.
5a. Wait for the system to check the availability of the QuickConnect ID you entered and to setup the service.
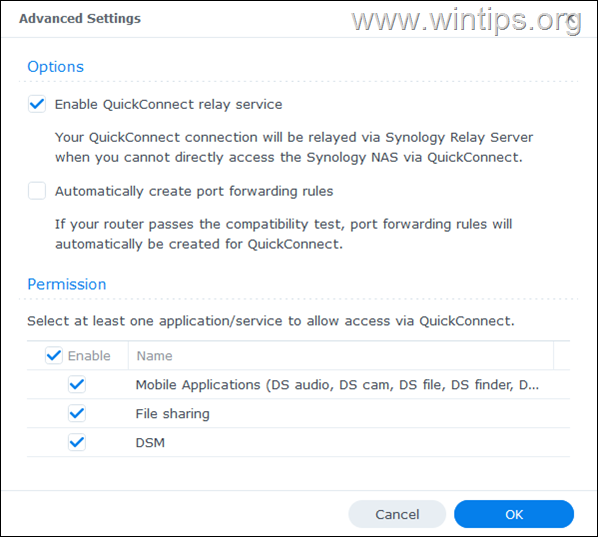
5b. When this is done, click on the Advanced Settings button and check the services/applications that are allowed to be accessed through QuickConnect and disable those you don't need. Also I suggest to disable the option to Automatically create port forwarding rules to keep your Network secure.
6. From now on, you can use the QuickConnect ID or the QuickConnect URL address, to access your Synology NAS device, from any device outside of your local network.
How to connect to Synology NAS with QuickConnect ID.
To connect to your NAS device using QuickConnect ID, open a web browser and use one of the following ways:
1. Type the QuickConnect URL address on the address bar or press Enter.
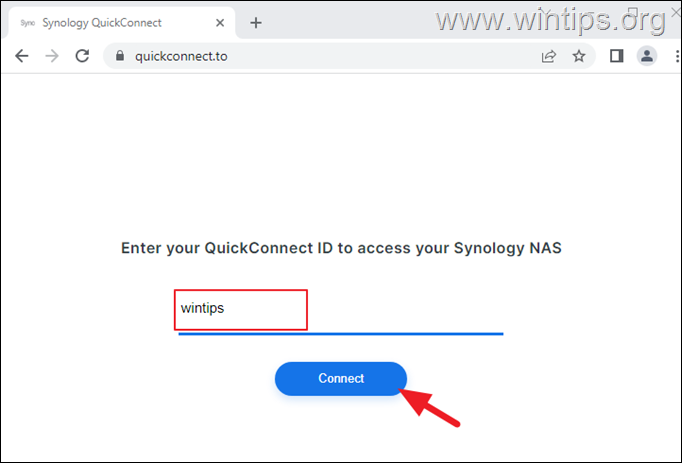
2. Navigate to quickconnect.to and type your QuickConnect ID.
How to Share Files using QuickConnect.
With QuickConnect ID you can shares files from your Synology NAS device to others, easily, by doing the following:
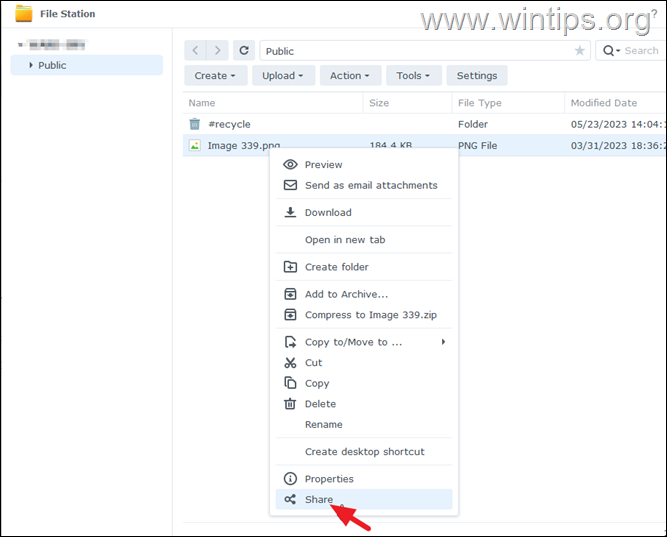
1. Open File Station and right-click on the file or
folder that you want to share.
2. Click Share file links from the context menu.
3. A file sharing link is generated. Simply share this link to the people you want to download the shared folder/file and click Save.*
* Notes:
1. If you want to share a file with another DSM user, Enable secure sharing and select the DSM user with whom you want to share the file.
2. If you want the shared link to be valid for a specific date/time, click on the advanced options.
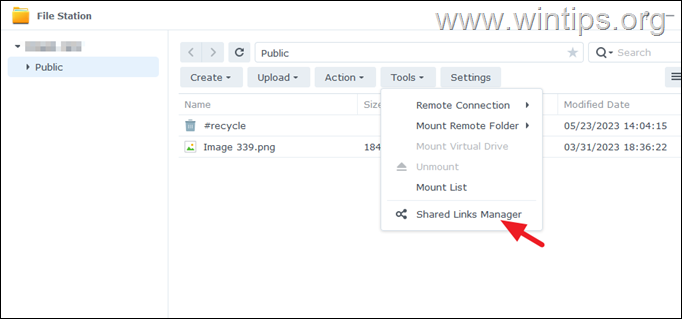
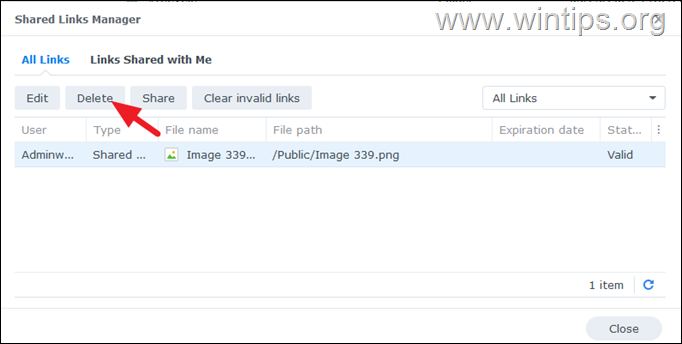
4a. To stop the sharing of a file, click the Tools menu and open the Shared Links Manager.
4b. Select the shared file and click the Delete button.
That's it! Let me know if this guide has helped you by leaving your comment about your experience. Please like and share this guide to help others.
We're hiring
We're looking for part-time or full-time technical writers to join our team! It's about a remote position that qualified tech writers from anywhere in the world can apply. Click here for more details.
- FIX: Numeric keypad Not Working on Windows 10/11 - July 24, 2024
- How to Share Files or Printers in Hyper-V? - July 22, 2024
- How to invoke Hyper-V Screen resolution prompt? - July 17, 2024

