How to Install VMware ESXi on VirtualBox.
This tutorial contains step-by-step instructions to install VMware ESXi vSphere Hypervisor 6.7 on a VirtualBox host. The purpose of installing ESXi on VirtualBox, is only for testing and experiment with the vSphere features and not production reasons.
Important: Keep in mind, that if you own an Intel CPU, you will not be able to start a new VM machine from the VM ESXi host, running on VirtualBox. This is happens, because the VirtualBox doesn't support nested virtualization for Intel CPUs. (you will receive the error "This host does not support Intel VT-x." if you try to start the VM machine.). So, if you own an Intel CPU, it's better to install ESXi on the VMware player.
Hardware Requirements to install ESXi VSphere Hypervisor on VirtualBox:
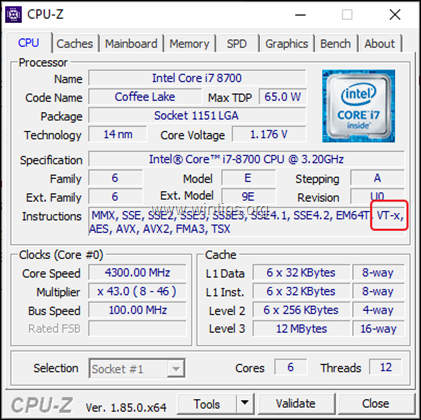
CPU: The host machine must have at least two CPU cores and the CPU must support hardware virtualization features (Intel VT-x or AMD RVI). To check if your system supports virtualization use the CPUID CPU-Z utility. *
* Notes:
1. To enable the virtualization support, navigate to your BIOS settings and Enable the Intel-VD (Intel VT-x) or the AMD VT technology/feature.2. if you running Windows 10, and you receive that "VT-x is not available" error in VirtualBox, and the VT setting is enabled in BIOS, then navigate in Control Panel > Programs and features > Turn Windows Features on or off > and disable the Hyper-V feature.
RAM: ESXi requires a minimum of 2GB of physical RAM. To install ESXi on VirtualBox you need to allocate at least 4GB (4096MB) of RAM.
Software Requirements to install ESXi VSphere Hypervisor 6.7 on VirtualBox.
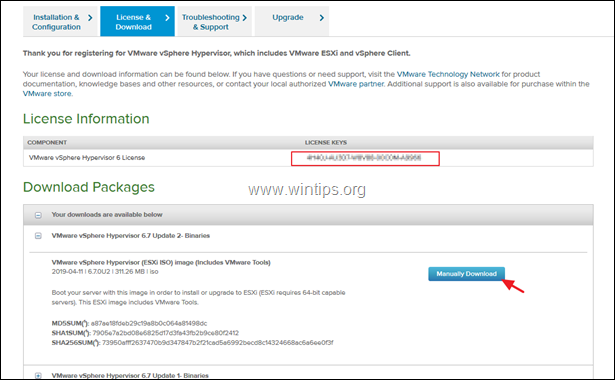
1. Navigate to this link and Create a VMware account (If you haven't already have one).
2. Download the VMware vSphere Hypervisor (ESXi ISO) image (Includes VMware Tools) image.3. Note and record the VMware vSphere Hypervisor 6 License key, because you 'll need it at the end of the trial period, to convert the Evaluation License (60-days) to Free (Never expires). (see the end of the article).
4. If you want to to install ESXi VSphere Hypervisor on a VirtualBox, then you have to download and install the latest release of Virtualbox for Windows hosts from here.
How to Install VMware vSphere Hypervisor (ESXi Server) on VirtualBox host.
Step 1. Create & Configure a Virtual Machine for ESXI. *
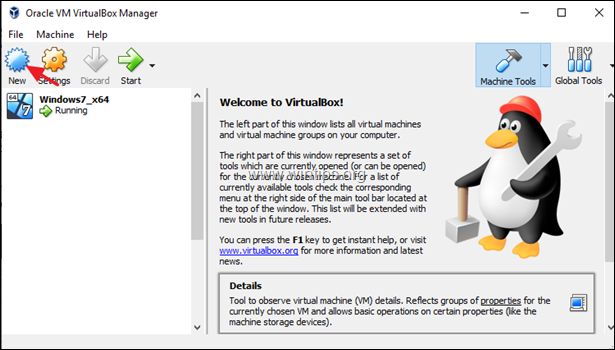
1. Launch Oracle VM Virtual Box Manager and click New.
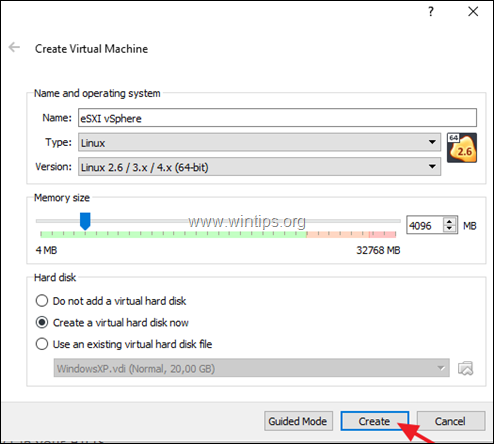
2. Give a name for the virtual machine (e.g. "eSXI vSphere"), and select:
Type: Linux
Version: Linux 2.6/3.x/4.x (64-bit)
Memory Size: 4096MB
Hard Disk: Create a virtual disk now
3. When done click Create.
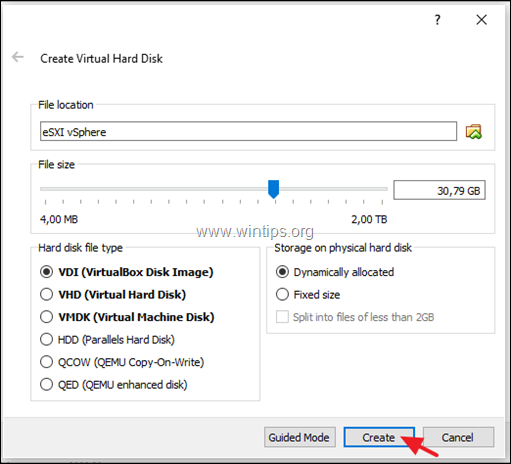
4. At the next screen specify a disk size according your choice (e.g. 30GB), leave the default options at 'Hard disk file type': VDI (VirtualBox Disk Image) and at 'Storage on physical hard disk': Dynamically allocated and click Create.
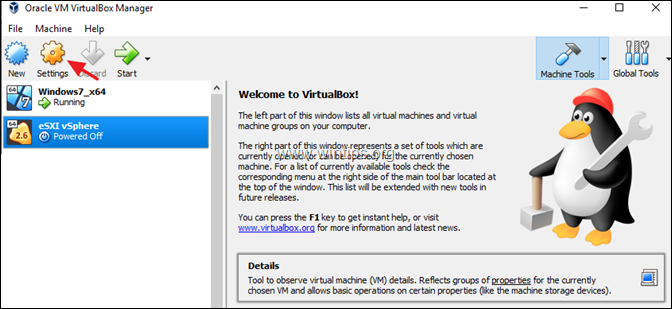
5. Now highlight the new virtual machine and click Settings.
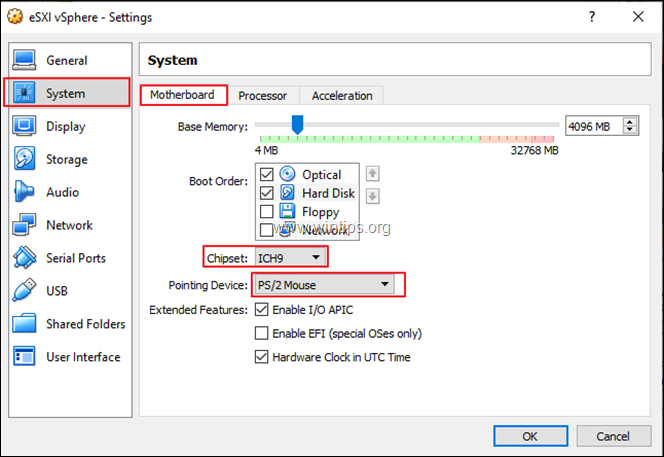
6a. Select System on the left and at Motherboard tab, select:
- Chipset: ICH9
- Pointing Device: PS/2 Mouse
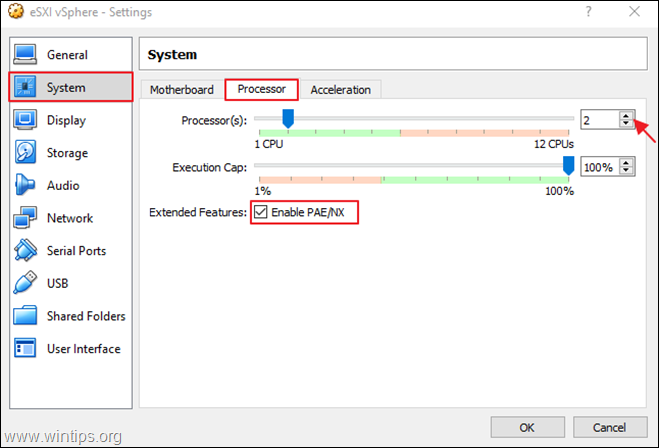
6b. Then select the Processor tab, and…
- Assign two (2) CPUs.
- Check Enable PAE/NX
7. Then select Storage and click the Add Optical Drive symbol.
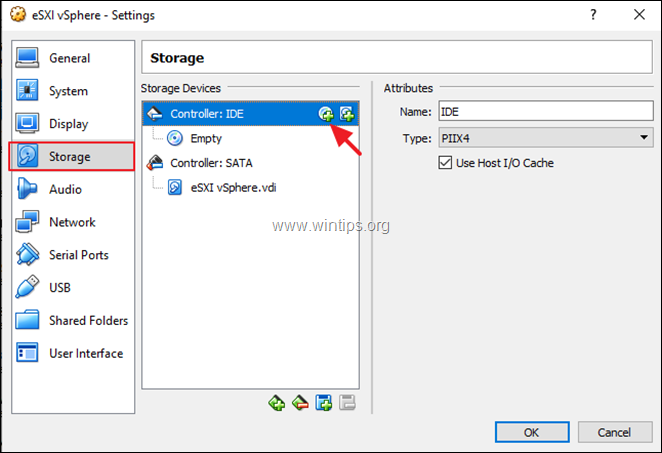
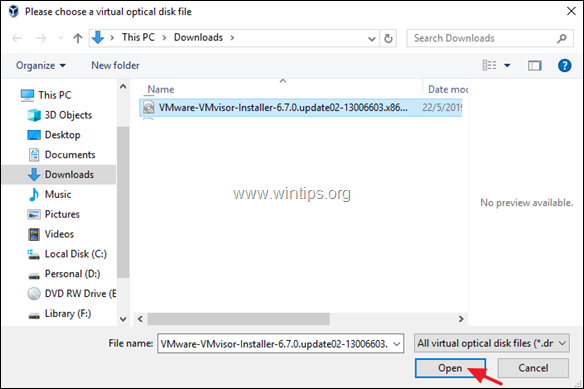
8. Select Choose disk and then select the 'vSphere Hypervisor (ESXi ISO)' file you downloaded.
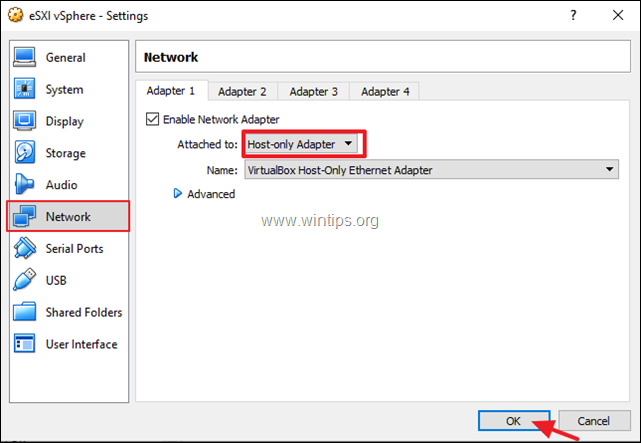
9. Finally select Network, choose Host-only Adapter and then click OK.
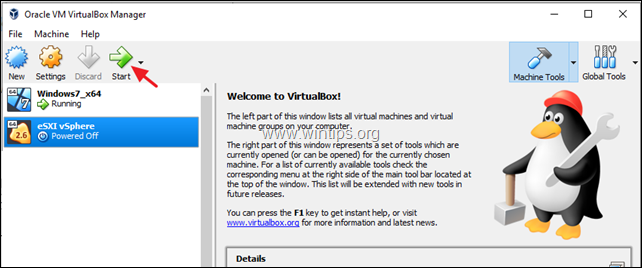
10. Click the Start button and proceed below to install the ESXi vSphere Hypervisor on the virtual machine.
Step 2. Install VMware ESXi vSphere Hypervisor 6.7 on VirtualBox VM Machine.
* Note: If you install the ESXi vSphere Hypervisor on a physical machine, then boot the machine from the ESXi vSphere Hypervisor install CD media.
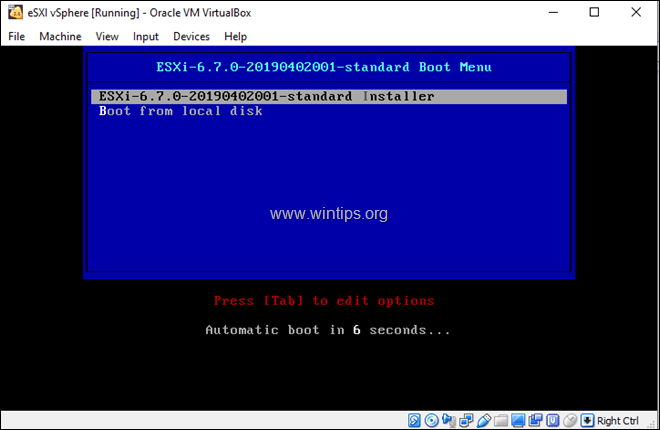
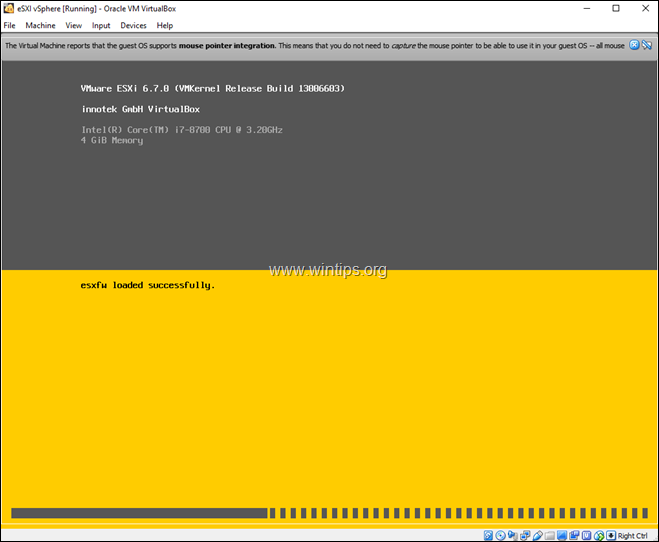
1. Press Enter at the first screen to start the installation.
2. The VMware ESXI installer should start…
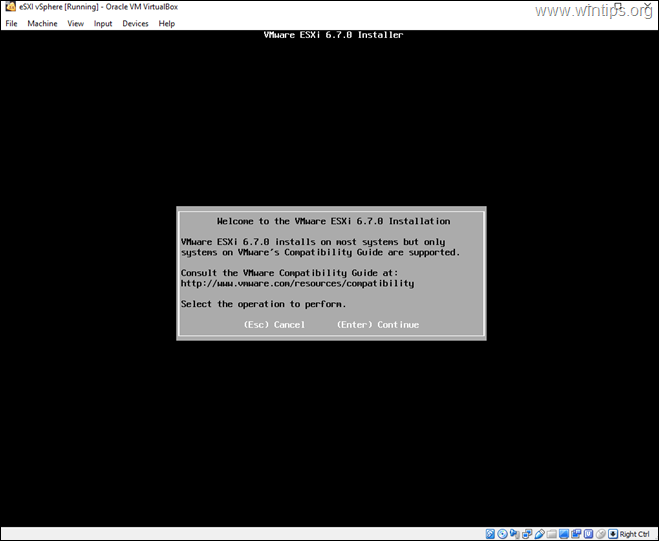
3. Press Enter at the Welcome screen.
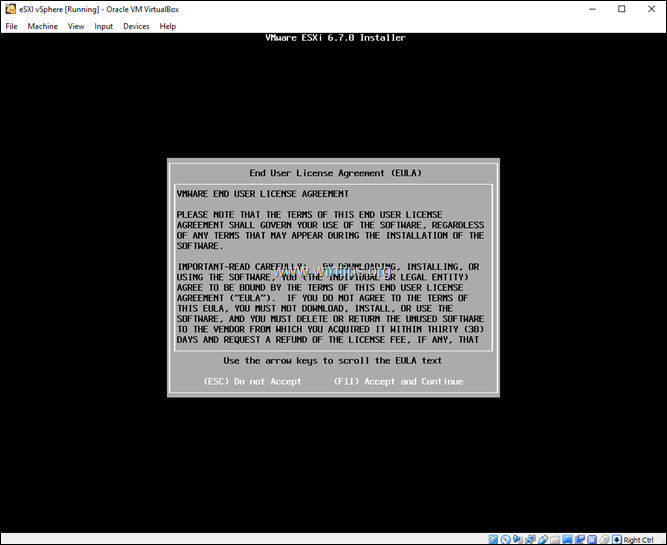
4. Press F11 to accept the license agreement.
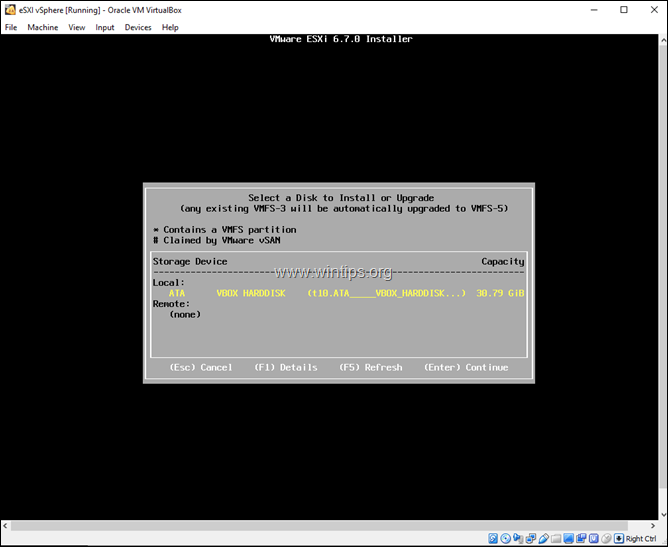
5. At Storage options press Enter.
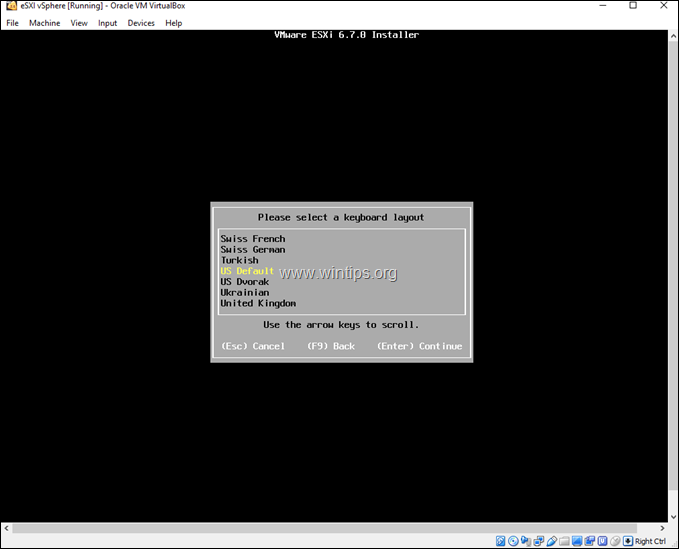
6. Select your preferred keyboard layout or leave the default (US) and press Enter.
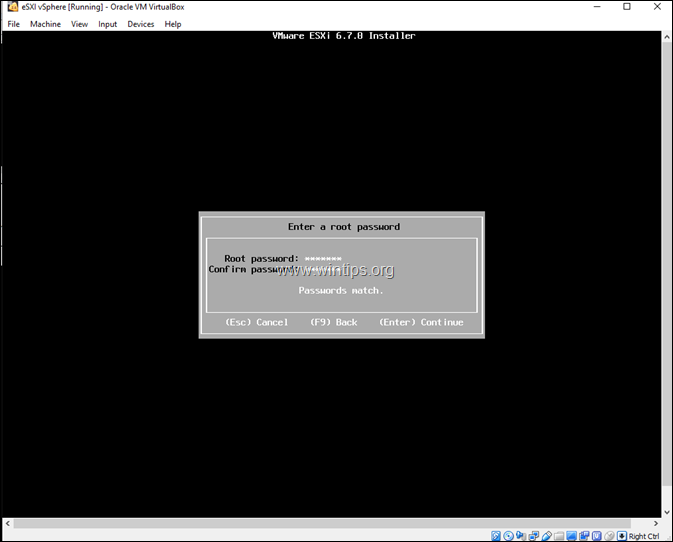
7. Now type twice a desired password* and press Enter.
* Note: Password must be at least 7 characters long and a combination of normal and capital letters, symbols and numbers.
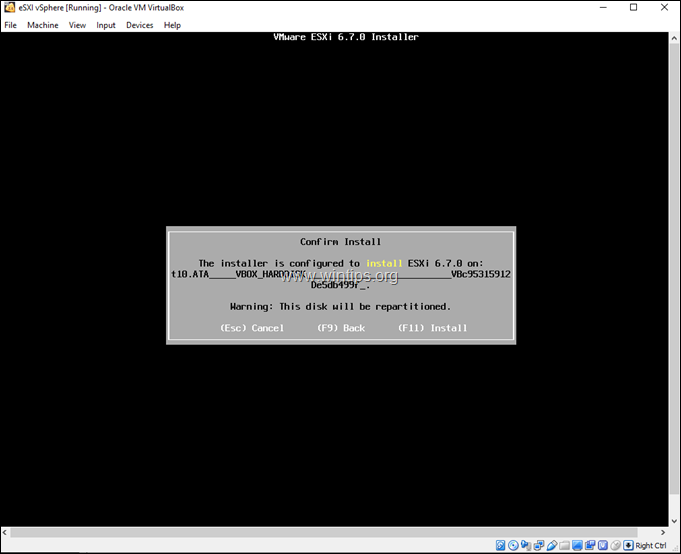
8. Finally press F11 to stall the installation. *
* Note for VirtualBox Install: At this point of the ESXi installation, and if you own an Intel processor, you 'll receive the following warning message on your screen: "Hardware Virtualization Warning: Hardware Virtualization is not a feature of this CPU or is not enabled in BIOS". Just ignore this message and press Enter to continue. (This message appears, because as I say at the start of this article, VirtualBox doesn't support nested virtualization for Intel processors).
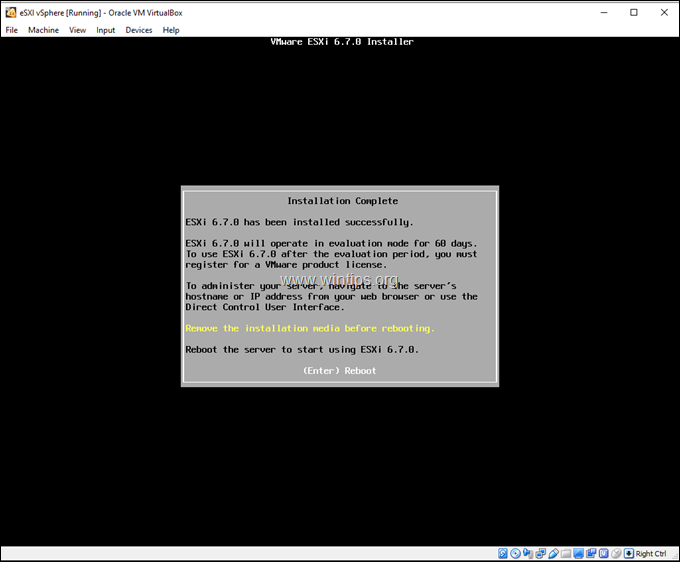
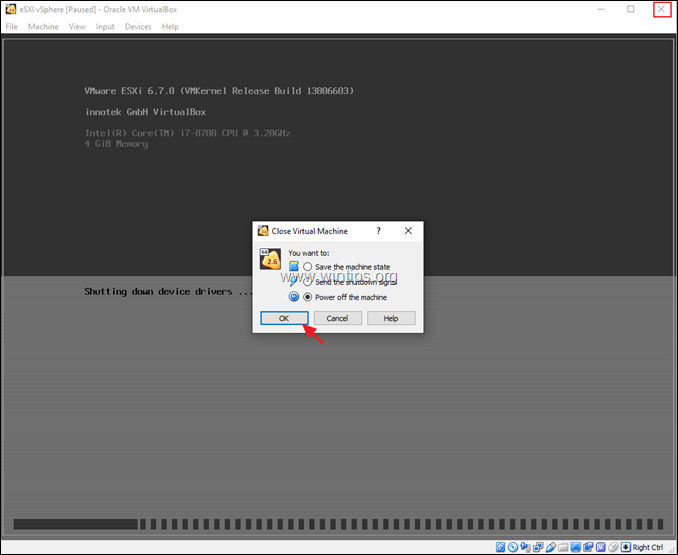
9. When the installation is complete, remove the installation media & press Enter to reboot the machine. *
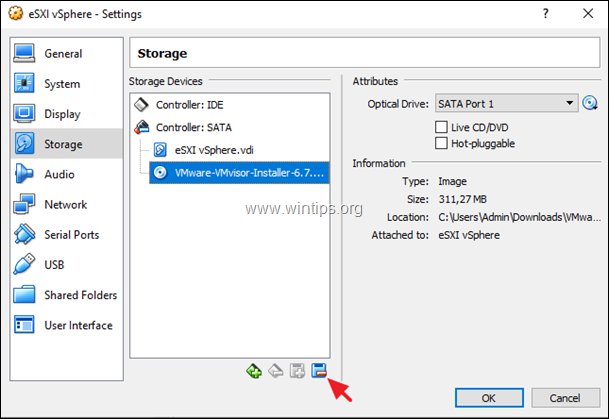
* Note: To remove the ESXi installation media (.ISO file) in VirtualBox:
a. After reboot close the VM window and Power off the machine.
b. Then open the VM machine Storage settings, remove the ISO file and click OK.
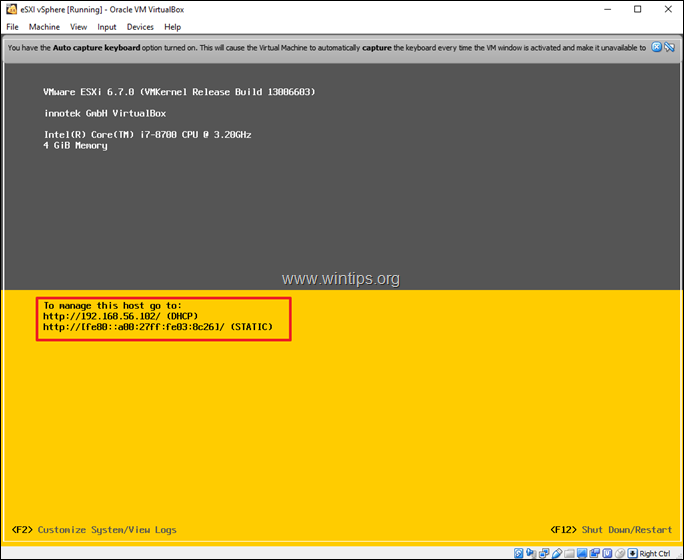
c. Finally click the Start button to start the VMware ESXi machine.
10. When the VMware ESXi server starts, it "takes" an IP address assigned from DHCP. You can use this IP address for the ESXi server, or to set a new static IP address, by following the instructions below.
11. To change the IP address, on ESXi, press F2 at the above screen.
12. Type the root password and press Enter.
13. By using the arrows keys, navigate to Configure Management Network and press Enter.
14. Navigate to IPv4 Configuration and press Enter.
15. Navigate to Set static IPv4 address and network configuration and hit Space to select it.
16. Type the static IP Address, the Subnet mask and the Gateway and press Enter.
17. Then select the DNS Configuration and hit Enter.
18. Navigate to Use the following DNS server addresses and hostname and hit Space to select it.
19. Type the DNS server address and optionally specify a different Hostname. Press Enter when done.
20. Press ESC to exit, and then press Y to apply changes and to restart the management network.
21. Then press ESC to Logout and then press F12 and Shutdown the ESXi server.
22. On VirtualBox Manager, highlight the new virtual machine and click Settings.
23. At Network options, select Attached to: Bridged Adapter and click OK
24. Start the VM ESXi machine.
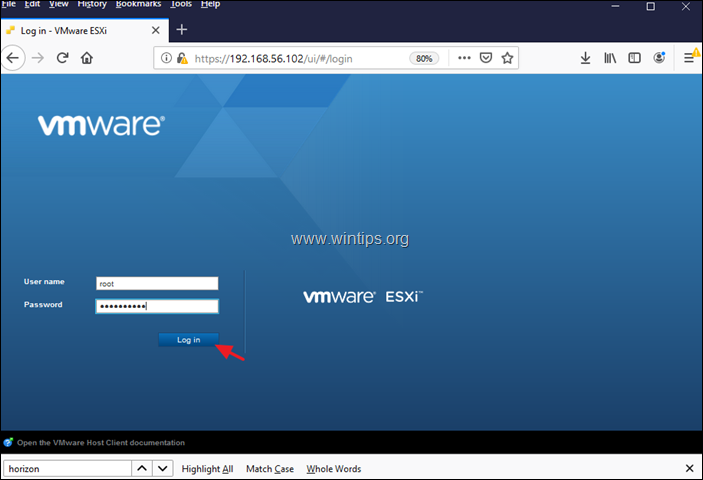
25. When the ESXi server starts, open a web browser (on the host computer) and navigate to the ESXi server's IP address to start managing your VMWare ESXi vShere server.
Additional help: To convert the VMware ESXi Hypervisor Evaluation License to FREE.
* Note: You can explore and test all the features of ESXi for 60-days (until the Evaluation period ends). So, do not convert the Evaluation license to Free, before the evaluation period ends.
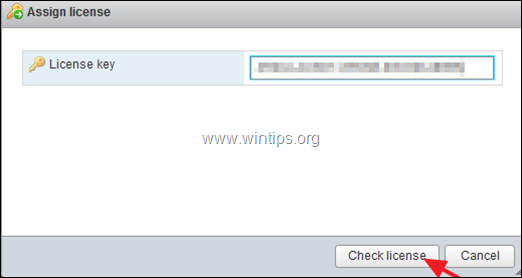
1. Go to Manage -> Licensing and then click Assign license.
2. Copy and paste the vSphere Hypervisor 6 License key and then click Check License
3. Finally click Assign License
4. Now, you should see on the screen that the 'Expiration date' status is "Never".
That's it!
Let me know if this guide has helped you by leaving your comment about your experience. Please like and share this guide to help others.
We're hiring
We're looking for part-time or full-time technical writers to join our team! It's about a remote position that qualified tech writers from anywhere in the world can apply. Click here for more details.
- How to Disable or Remove BitLocker from Windows RE. - April 24, 2024
- FIX: Error 0x8007025d in Windows 10 Update. - April 22, 2024
- How to Disable Device Encryption in Windows 11/10. - April 17, 2024

![image_thumb[1]_thumb[2] image_thumb[1]_thumb[2]](https://www.wintips.org/wp-content/uploads/2019/06/image_thumb1_thumb2_thumb.png)
![image_thumb[3]_thumb[3] image_thumb[3]_thumb[3]](https://www.wintips.org/wp-content/uploads/2019/06/image_thumb3_thumb3_thumb.png)
![image_thumb[5]_thumb[3] image_thumb[5]_thumb[3]](https://www.wintips.org/wp-content/uploads/2019/06/image_thumb5_thumb3_thumb.png)
![image_thumb[7]_thumb[3] image_thumb[7]_thumb[3]](https://www.wintips.org/wp-content/uploads/2019/06/image_thumb7_thumb3_thumb.png)
![image_thumb[9]_thumb[1] image_thumb[9]_thumb[1]](https://www.wintips.org/wp-content/uploads/2019/06/image_thumb9_thumb1_thumb.png)
![image_thumb[11]_thumb[1] image_thumb[11]_thumb[1]](https://www.wintips.org/wp-content/uploads/2019/06/image_thumb11_thumb1_thumb.png)


![image_thumb17_thumb[2] image_thumb17_thumb[2]](https://www.wintips.org/wp-content/uploads/2019/06/image_thumb17_thumb2_thumb.png)
![image_thumb16_thumb[1] image_thumb16_thumb[1]](https://www.wintips.org/wp-content/uploads/2019/06/image_thumb16_thumb1_thumb.png)
![image_thumb18_thumb[2] image_thumb18_thumb[2]](https://www.wintips.org/wp-content/uploads/2019/06/image_thumb18_thumb2_thumb.png)

