How to Print Labels from Excel.
Microsoft Excel is a great tool for storing customer contact and address information, making it an ideal choice for creating and organizing an mailing address list of your contacts. However, if you want to print labels for envelopes, greeting cards, etc., from an address list your created in Microsoft Excel, you must use the "Mail Merge" feature of Microsoft Word.
More Specifically, Microsoft Word offers the powerful feature called "Mail Merge" that makes it easy to create and print labels from an Excel worksheet.
In this guide we will show you step by step how to create a mailing address list in Microsoft Excel and how to print labels from this list using the "Mail Merge" feature of Microsoft Word.
How to Print Labels from an Excel Address List File using Word Mail Merge.
Step 1. Prepare the Mailing List in Excel for Label Printing.
Before creating and printing mailing labels, you need to set up your address list in Excel correctly. This involves entering column headers for each requirement element you want to add to the labels, such as first name, last name, address, postal code, etc.
Let's see how to make an address list in Excel for printing mailing labels:
1. Open Microsoft Excel and create a new workbook.
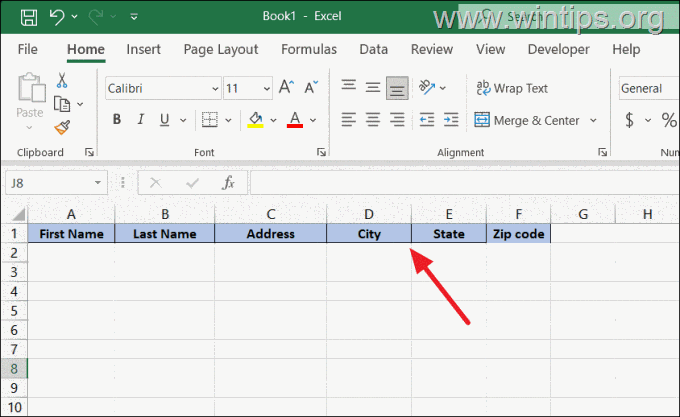
2. Enter the following column headers for each item that the recipient address should include:
- First Name
- Last Name
- Street Address
- City
- State
- ZIP Code
3. Now fill in the respective information under each column header.
4. When done, ensure there are no empty rows or columns, and save the worksheet.
Step 2. Name the Mailing list (Optional).
After creating your mailing list in Excel, it's helpful to give it a name. By naming the data set, you can easily refer to it when connecting it to the Word document for mail merging.
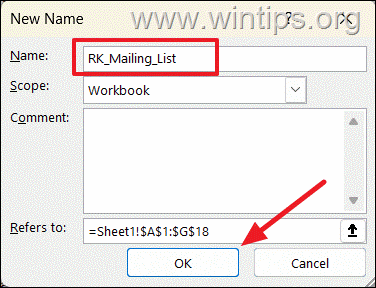
1. To name the mailing list, select the list of addresses, including the headers.
2. Go to the Formulas tab and click on Define Name from the Defined Names group.
3. Enter a name for the table in the Name box and click OK.*
* Note: If a name consists of multiple words, use an underscore "_" between them and avoid using spaces or hyphens.
4. Save and close Microsoft Excel.
Step 3. Set up a Mail Merge Document in Word.
Now it's time to set up a Mail Merge document in Microsoft Word, to print your labels.
1. Open a blank Word document.
2. From the Mailings tab, click Start Mail Merge and select the Labels option from the drop-down menu.
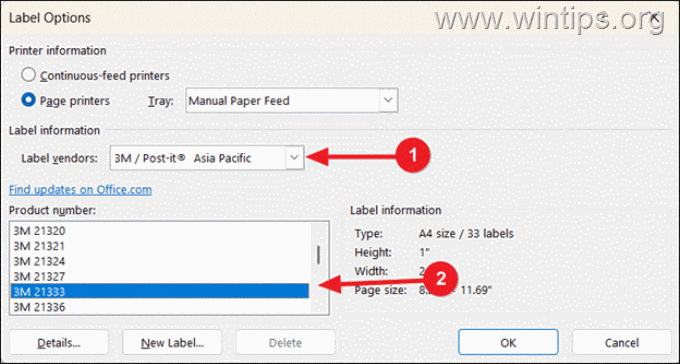
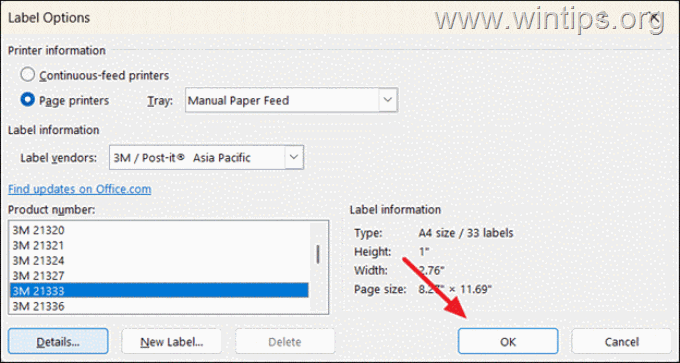
3. Choose your label vendor and product number in the Label Options dialog window.
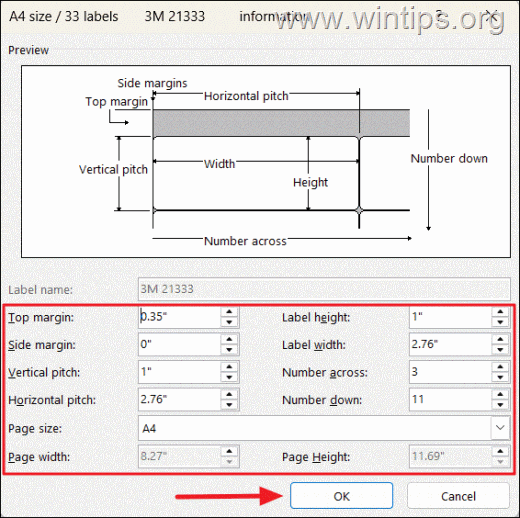
4. Next, click on the Details button at the bottom-left corner of the window.
5. Proceed to adjust the label margins, height, width, pitch, and size if you need to and click OK.
6. After that, click OK in the Label Options dialog to save the changes.
Step 4. Enable File Format Conversion between Excel and Word.
To connect your Word document to the Excel worksheet with the address list, you need to ensure that the file format conversion between the two Microsoft programs is enabled.
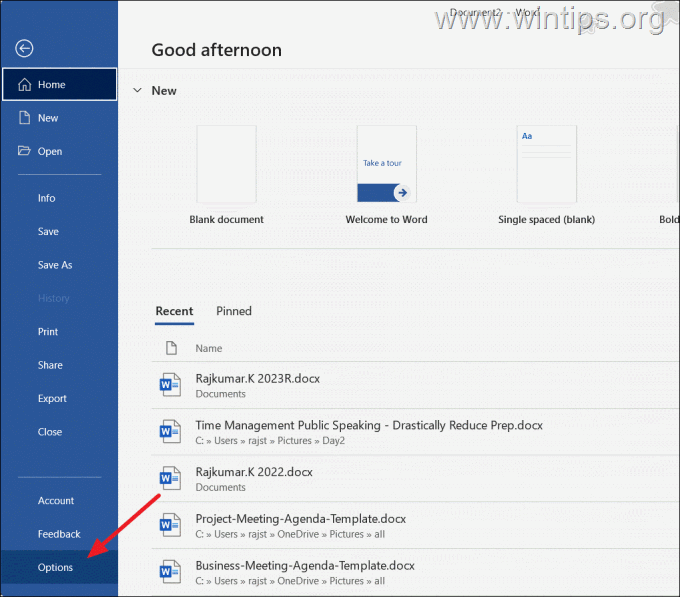
1. In Word, click on the File tab, then select Options at the bottom of the left sidebar.
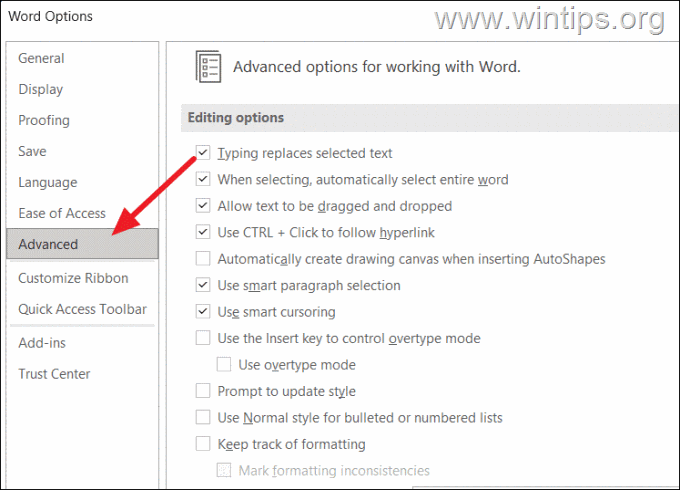
2. In the Word Options window, select the Advanced in the left pane.
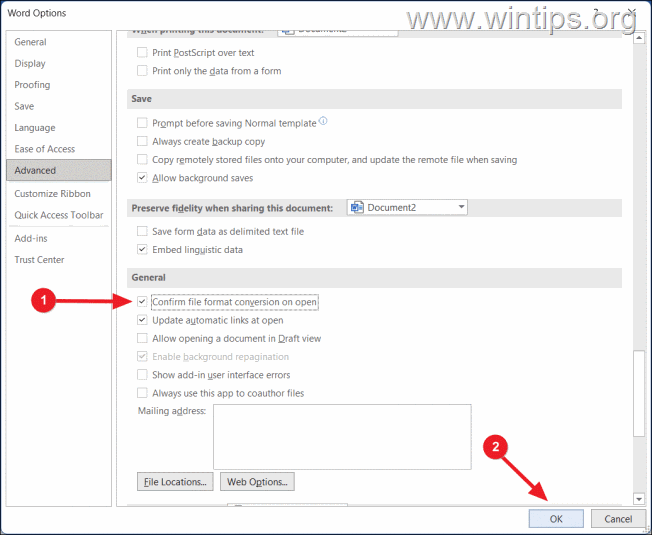
3. Now, scroll down to the General section, check the Confirm file format conversion on open option, and click OK.
Step 5. Select the Excel Address list for your Labels.
Now proceed to "link" the Word document with your Excel address list.
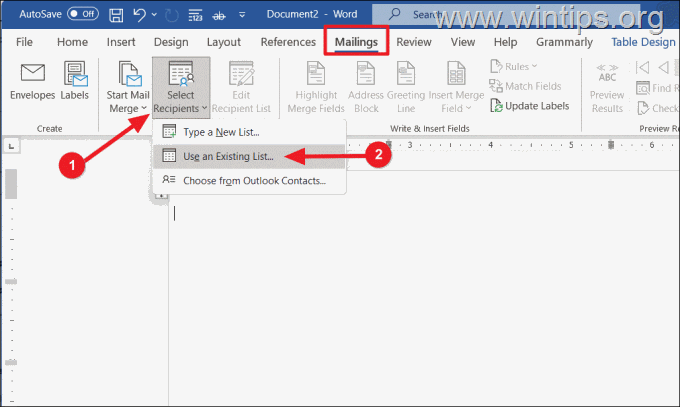
1. In the Word document, go to the Mailings tab again, click Select Recipients and then choose Use an Existing List from the drop-down menu.
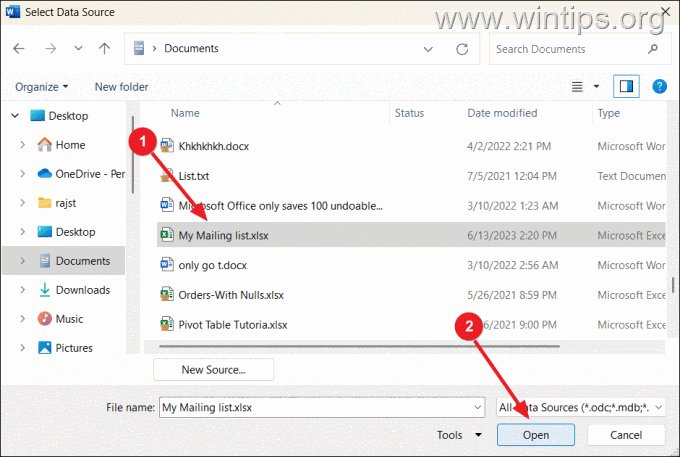
2. Locate and select the Excel file containing the mailing list and then click Open.
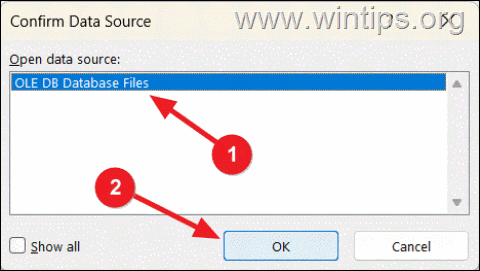
3. In the Confirm Data Source dialog box, select OLE DB Database Files and click OK.
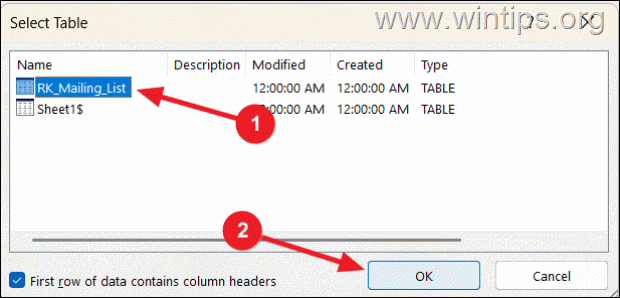
4. Then, select the named mailing list or the worksheet containing the address list and click OK.
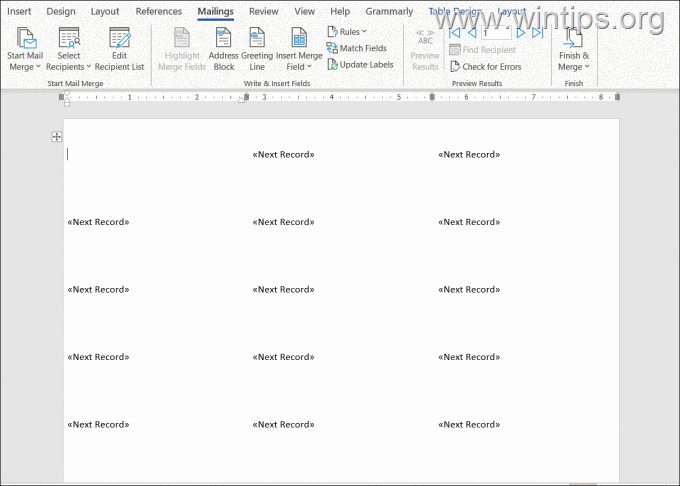
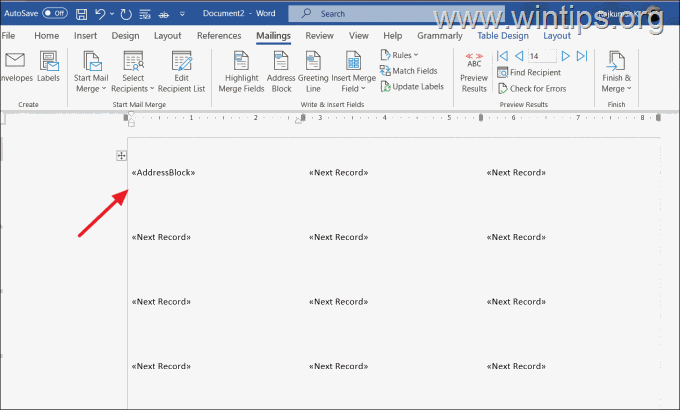
5. The Word document is now populated with address labels indicating "Next Record".
Step 6. Edit the Recipient List for Mail Merge.
Once the Word document has been linked to the Excel mailing list, proceed to review and edit, if necessary, the recipient list before the final merge.
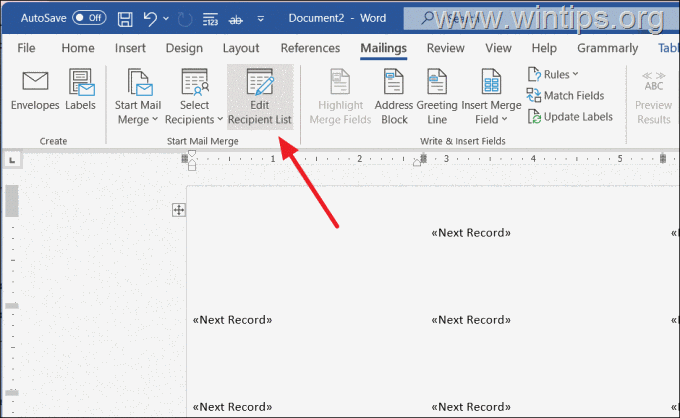
1. In Mailings tab, click Edit Recipient List.
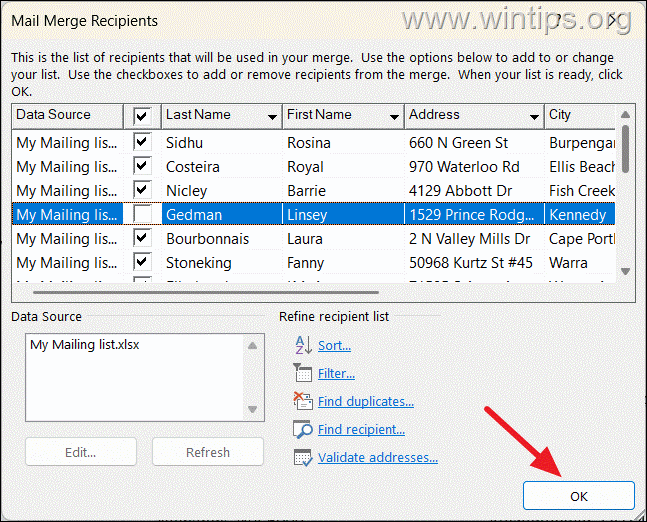
2. The "Mail Merge Recipients" window will display all the recipients from your address list. Proceed to sort, filter, or remove recipients if needed by clearing the checkbox next to any recipient you don't want to include. Then, click OK to confirm.
Step 7. Customize Mail Merge Fields (Label items)
Now, proceed to customize the label items and their appearance according your needs.
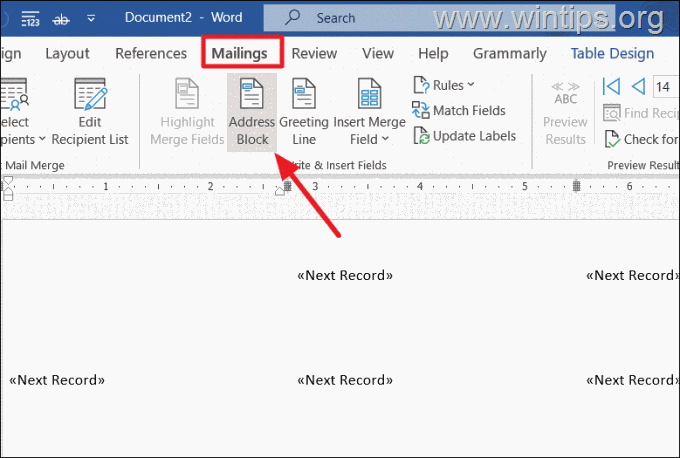
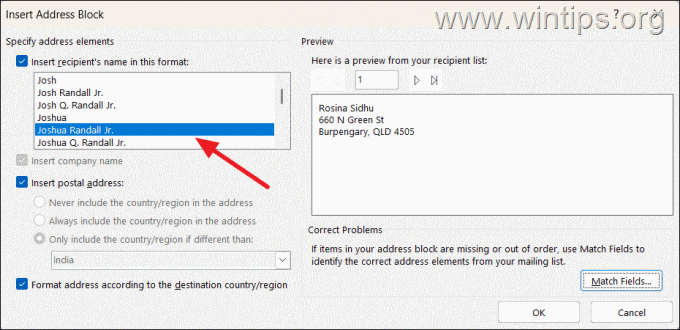
1. Click on the Address Block option in the Mailings tab's "Write & Insert Fields" group.
2. Proceed and specify the format of the recipient's name, by choosing the one you want from the list of available options under "Insert recipient's name in this format".
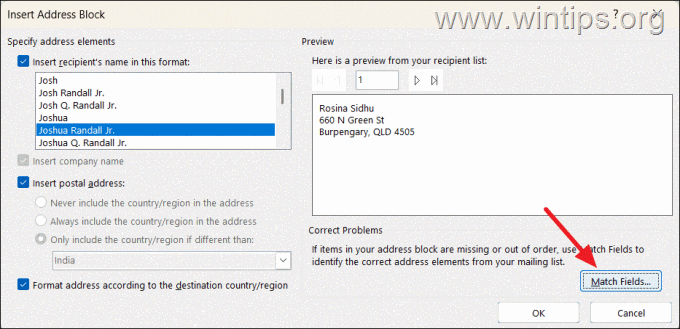
3. Next, click the Match Fields button to match the right fields from the Excel address list.
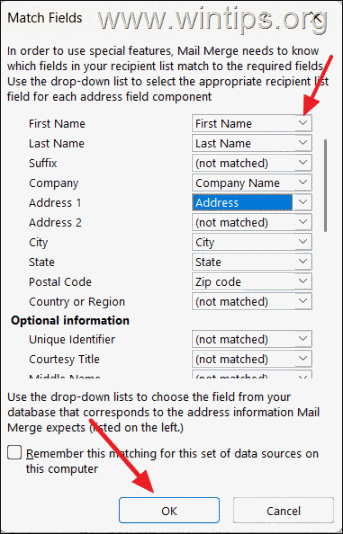
4. In the "Match Fields" window, ensure that the required fields for the labels are correctly mapped to the corresponding fields (column headers) in the Excel address list.
If they don't match, use the drop-down button next to each field and select the correct column heading of the Excel address list. Then, click OK to confirm the matches.
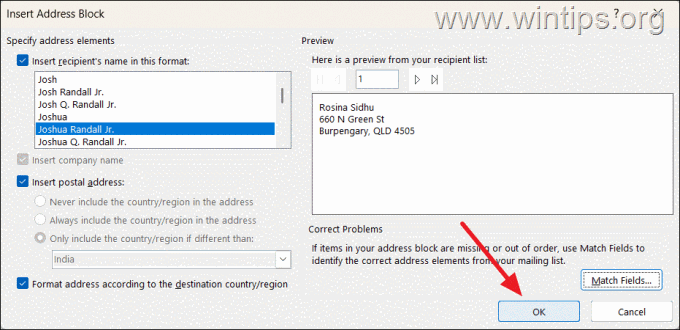
5. Then click OK again to apply the changes.
6. Now, the «AddressBlock» placeholder will appear on the first label.
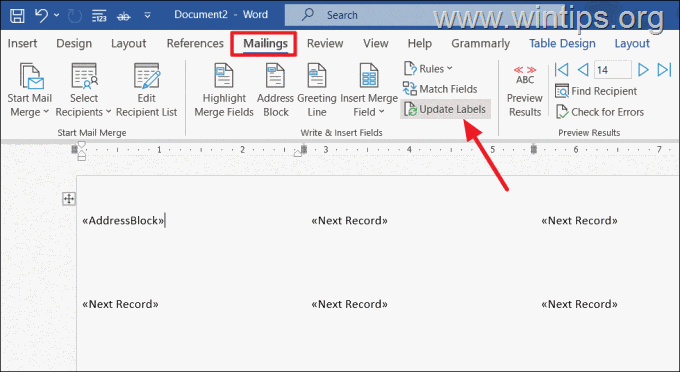
7. Click Update Labels (on the Mailings tab) to update all other labels in the Word document.
Step 8. Preview your Labels & Finish Mail Merge.
Now, let's see how the labels will look once printed.
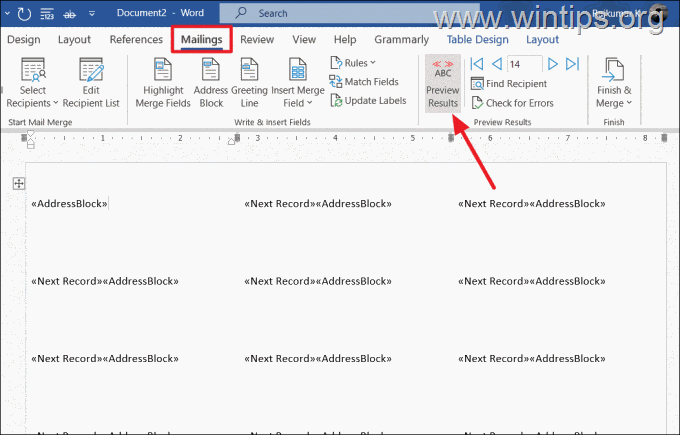
1. In Mailing tab, click the Preview Results button.
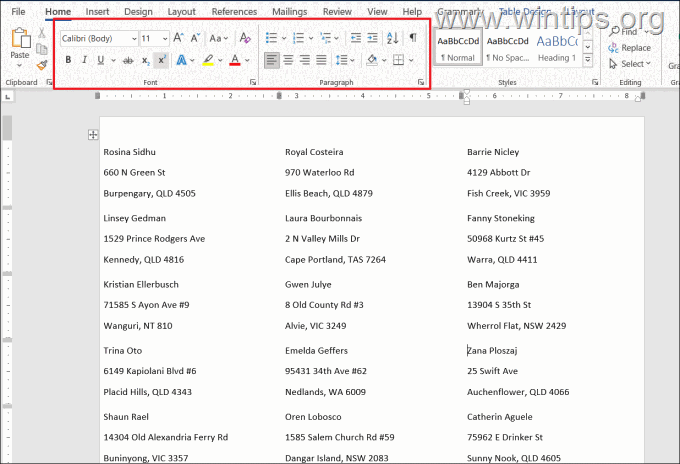
2. Now look how the labels will appear if printed. If you want to change their appearance select the first label and use the Format text tools in Home tab. When done, click Update Labels in Mailings to apply the formatting to all labels.
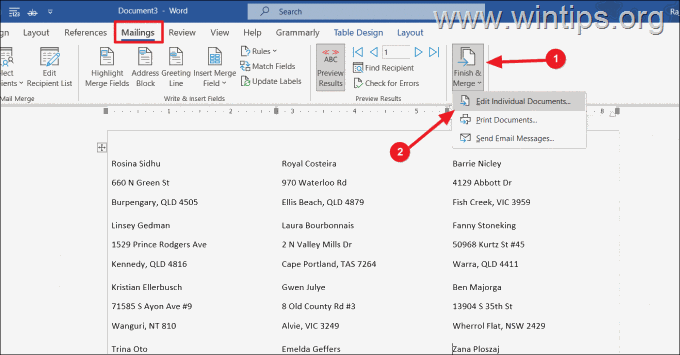
3. If everything looks OK, go to the Mailings tab, click the Finish & Merge option and select Edit Individual Documents from the drop-down menu.
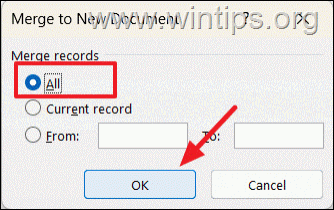
4. In the Merge to New Document window, select All under Merge records and click OK.
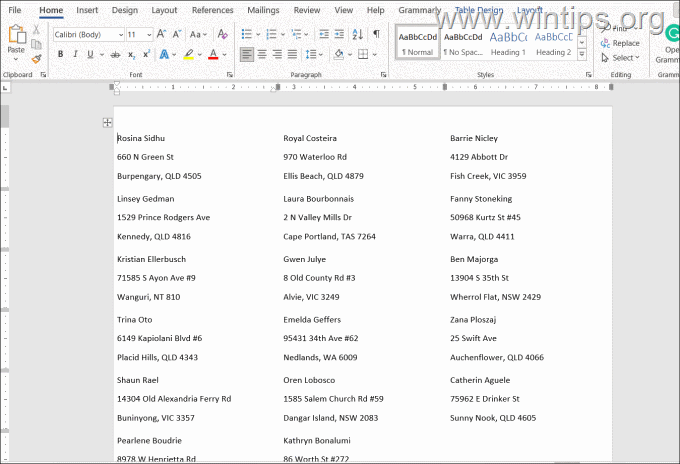
5. A new document will appear with the mailing labels generated from your Excel address list and you can edit, format, print, and save this document as you would with any other Word document.
Step 9. Bonus Tip: Add Borders to the Labels. (Optional)
To make it easier to cut the labels (if they are not already cut), add borders to them.
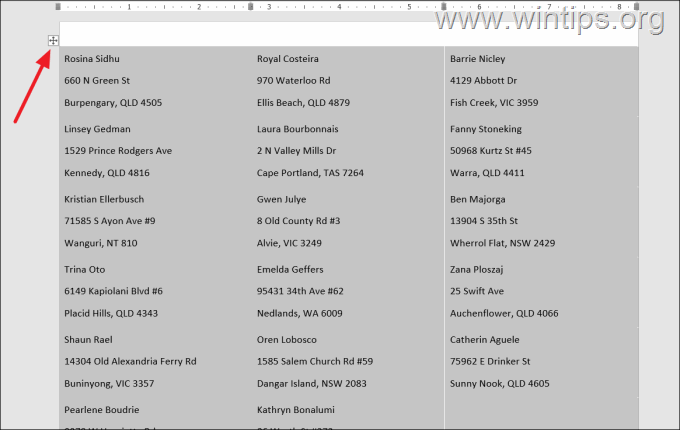
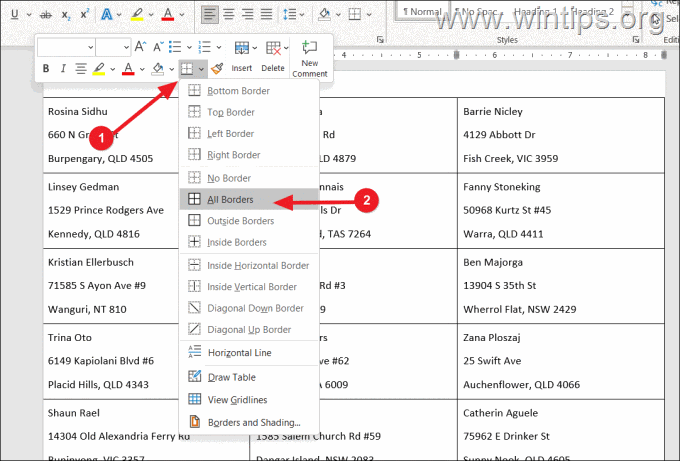
1. Click the plus (+) icon on the upper-left side of the document to select all labels.
2. Then, click the Border icon on the floating menu and choose All Borders from the options.
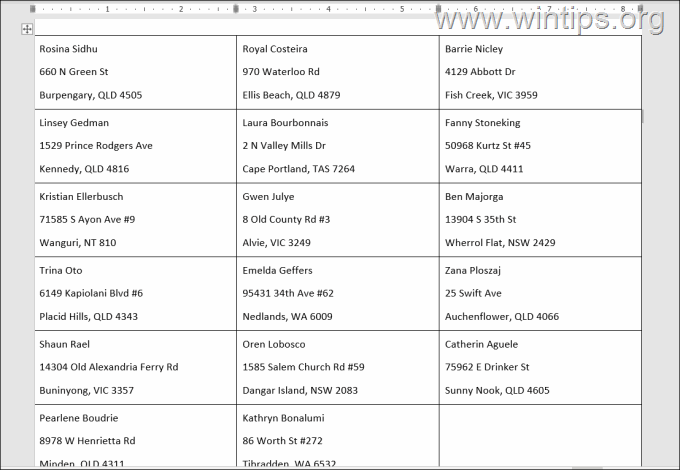
3. Borders will be added between each label making them easy to cut.
4. Now, your labels are ready to print.
That's it! Let me know if this guide has helped you by leaving your comment about your experience. Please like and share this guide to help others.
We're hiring
We're looking for part-time or full-time technical writers to join our team! It's about a remote position that qualified tech writers from anywhere in the world can apply. Click here for more details.
- FIX: Numeric keypad Not Working on Windows 10/11 - July 24, 2024
- How to Share Files or Printers in Hyper-V? - July 22, 2024
- How to invoke Hyper-V Screen resolution prompt? - July 17, 2024

