How to Create Users and Shared Folders on Synology NAS.
After setting up you Synology NAS device for first time, the next step is to create the NAS users and the shared folders for your files. Shared Folders on Synology NAS are the main directories that need to be created so you can store and manage your files. This means that before you can store and share folders and files on your Synology NAS, you must first create at least one shared folder in DSM (DiskStation Manager).
After creating your first shared folder in DSM, the next step is to create any other Synology accounts you want, that is, the users who will have access to the Shared folder and its content.
The final step is to either copy the folders/files you want to the Synology NAS and assign the sharing permissions to NAS users, or create separate folders for each user to store their files and set the permissions on those folders.
Whether you are a home user or an IT administrator who wants to create shared folders and assign permissions to user accounts on your Synology NAS, this guide will help you with this task.
How to Create Shared Folders, Users and Assign Permissions on Synology NAS.*
* Some info about the steps of this guide: In the first step of this guide, we show how to create a new main shared folder on your Synology NAS and grant it "Read Only" or "Full access" (Read/Write) permissions to all NAS users.
In the second step, we show how to create a new user account on the Synology NAS and how you can modify its permissions on the main Shared folder.
Finally, at the end of this guide we show how you can create a shared folder inside the main Shared folder, and change the access permissions on it for each Synology user.
Step 1. How to Create Shared Folders on Synology NAS.
A Synology Shared folder is a main directory that serves as a central storage location where files and data can be stored, organized, and accessed by authorized individuals or groups. To create a new Shared folder on your Synology NAS:
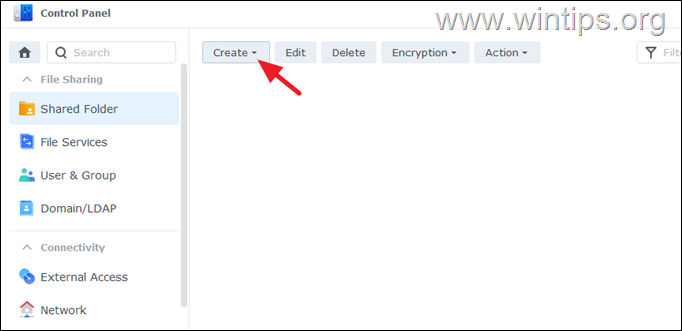
1. Navigate to Control Panel > Shared Folder and click Create.
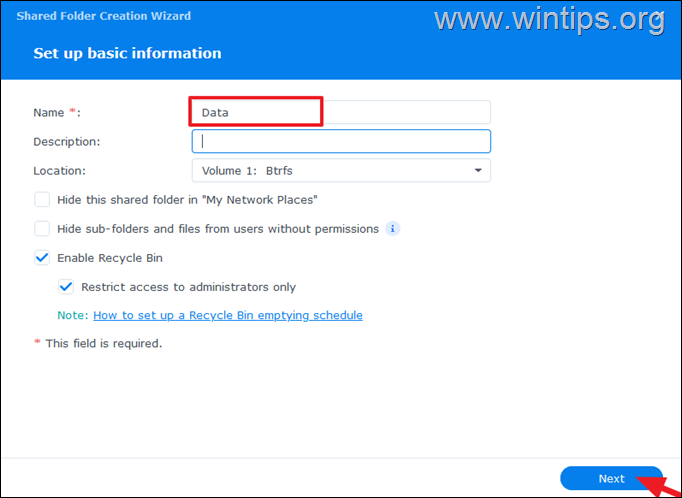
2. At the Set up basic information screen, type a name for the new shared folder (e.g. "Data") and click Next.*
* Note: On this screen you have also the following options, which are optional:
- Hide the Shared Folder: If you want to hide the Shared folder in "My Network Places"
- Hide sub-folders and files from users without permissions.
- Enable Recycle bin and Restrict Access to it to administrators only.
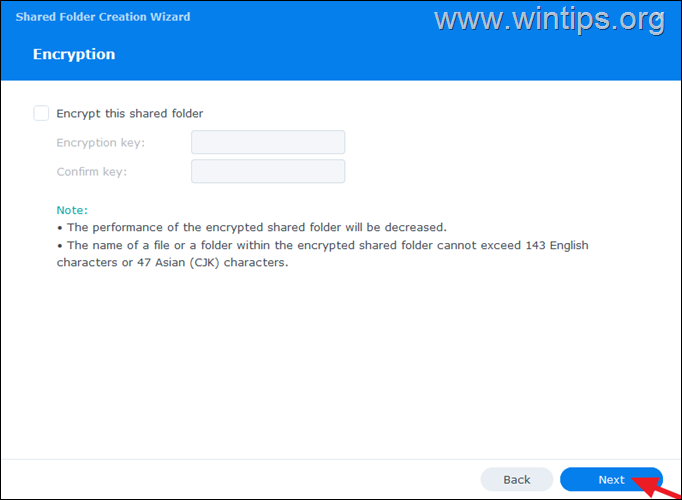
3. At Encryption settings click Next if you don't want to encrypt the contents of the shared folder, otherwise choose "Encrypt this shared folder" and then specify a password that will be required to open the contents of the folder.
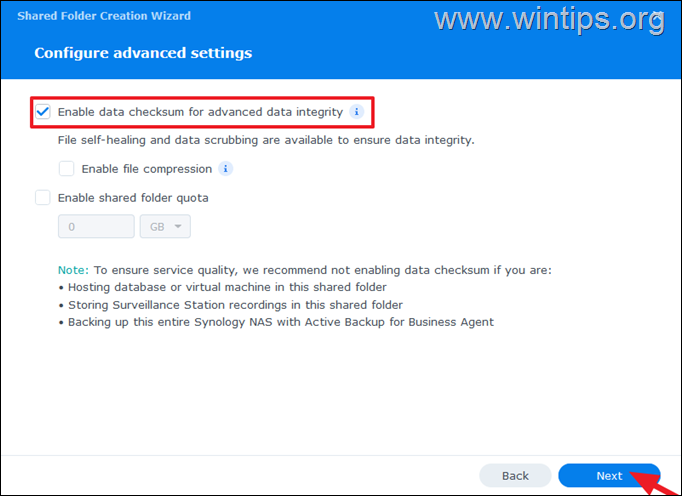
4. At the Configure advanced settings screen, I suggest to Enable data checksum for advanced integrity, and (optionally) enable the file compression and the shared folder quota. When done, click Next.
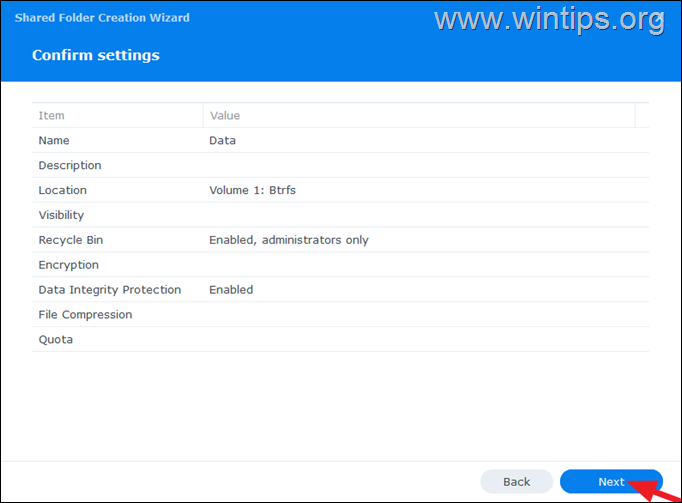
5. Confirm your settings and click Next.
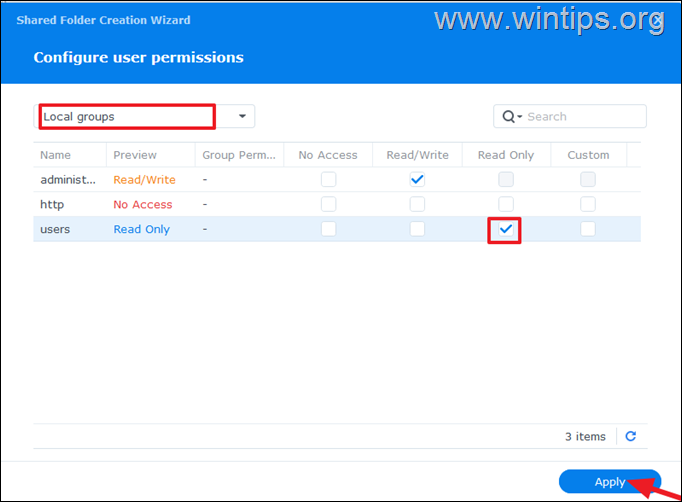
6. At Configure user permissions, select Local groups and give to "users" group Full (Read/Write), or Read Only access according your will. Then click Apply to save the settings and close the wizard.
7. You're done. Repeat the same steps to create other shared folders if desired. When done, continue to next step to create the NAS users.*
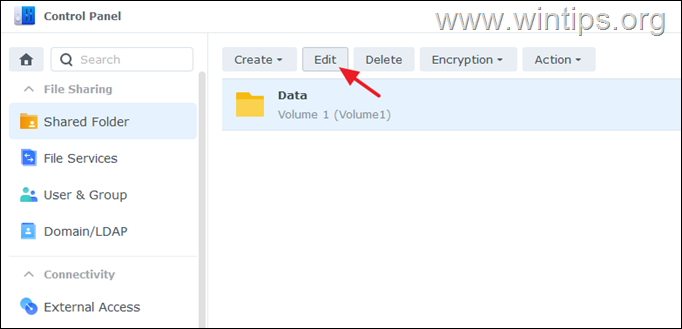
* Note: If you want to review or modify the access permissions or other folder settings on the Shared folder, click the Edit button.
Step 2. How to Create Users on Synology NAS.
A Synology user is an individual account created for each person who needs access to the Synology NAS. To create a new user account on your Synology NAS:
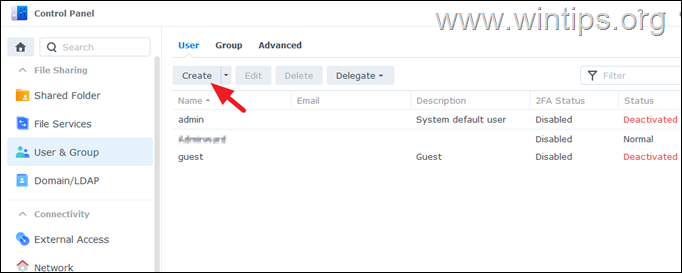
1. In Control Panel > User & Group, click Create.
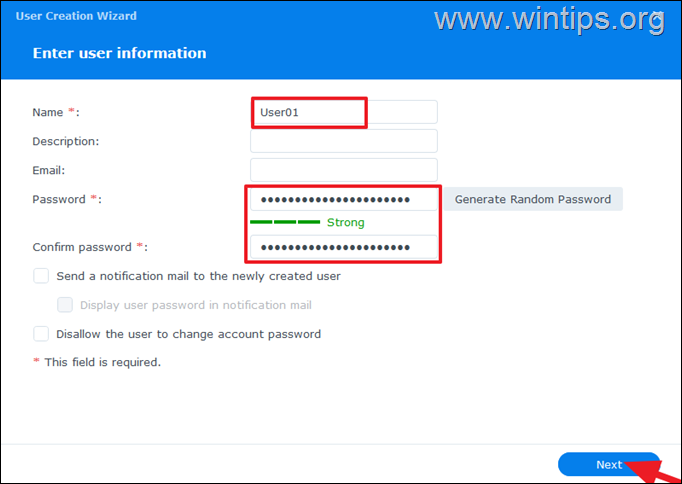
2. At Enter user information screen, type the Username of the new user and optionally write a description below. Then specify a strong password and click Next.
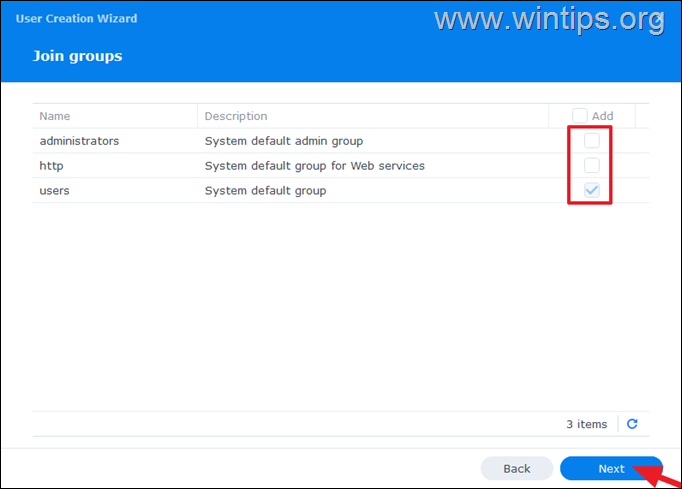
3. At the next screen join the new user to a group (e.g. to "users") and then click Next.
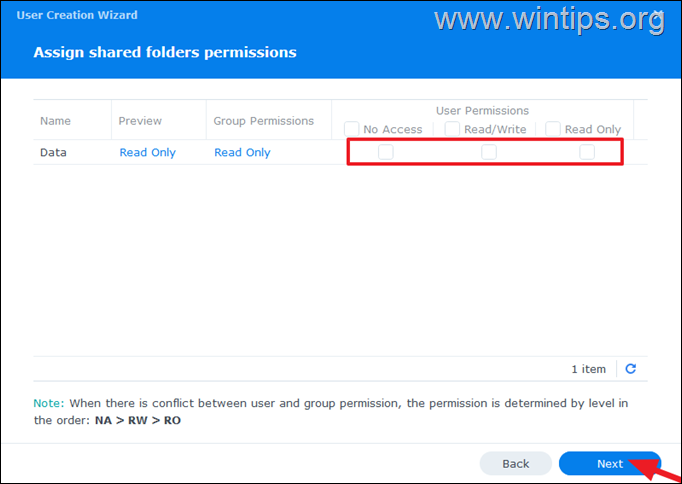
4. At Assign shared folder permissions screen, if you want to modify the default user permission (Read Only) on the shared folder, select the corresponding check box, and then click Next.
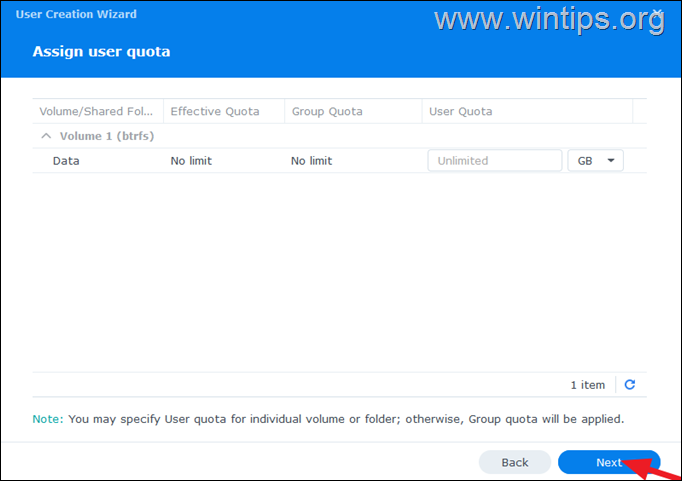
5. At Assign user quota, specify a quota limit if you want and click Next.
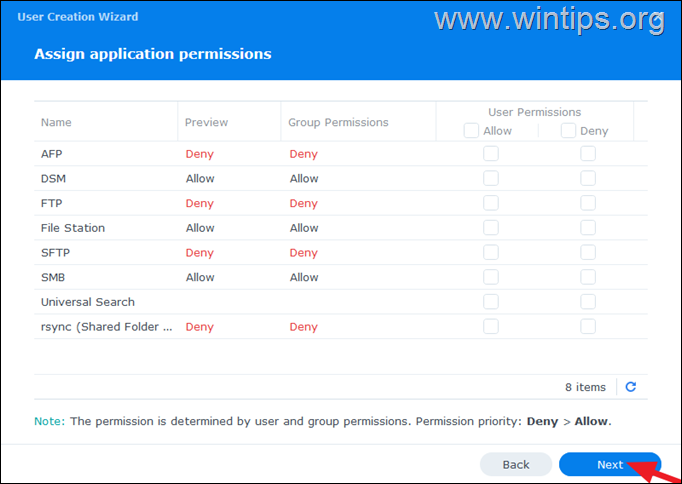
6. At Assign application permissions, check and modify (if desired) the applications to which the user will have access (or not) by checking the corresponding checkbox. When done, click Next.
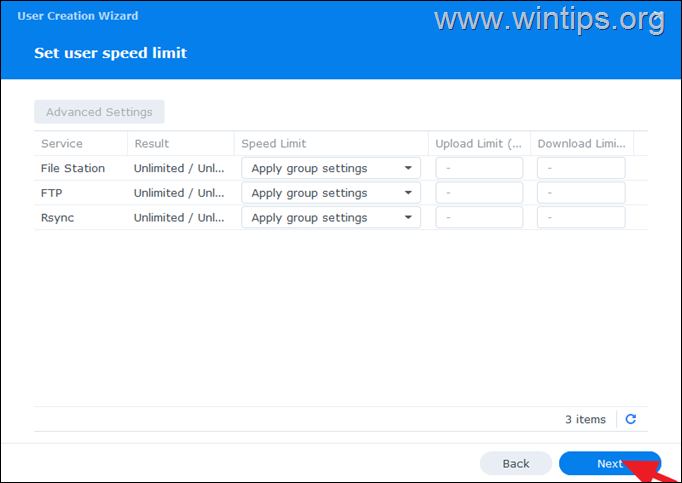
7. At Set user speed limit settings, modify the speed limit according you will, or click Next to continue.
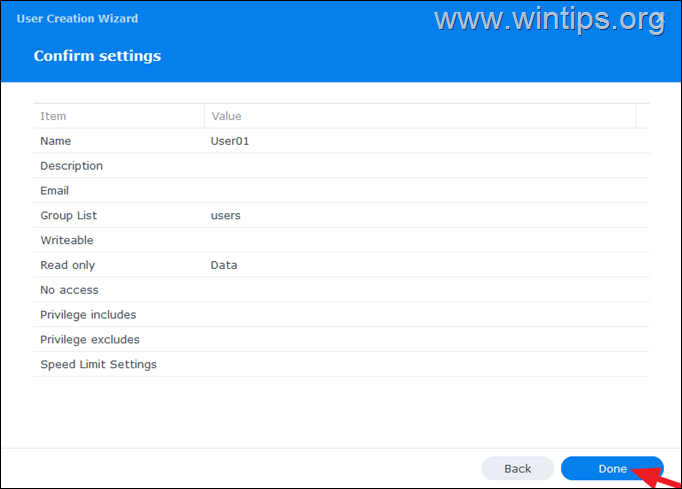
8. Finally, review and confirm the new user's settings by clicking Done.
Step 3. How to Create Subfolders and Assign Permissions to Users on Synology NAS.
After creating the main shared folder on your Synology NAS (step-1), and the NAS users (step-2), you may need to create other folders inside the Shared folder (subfolders) and to assign different permissions for each user. To do that:
1. In DSM, open File Station.
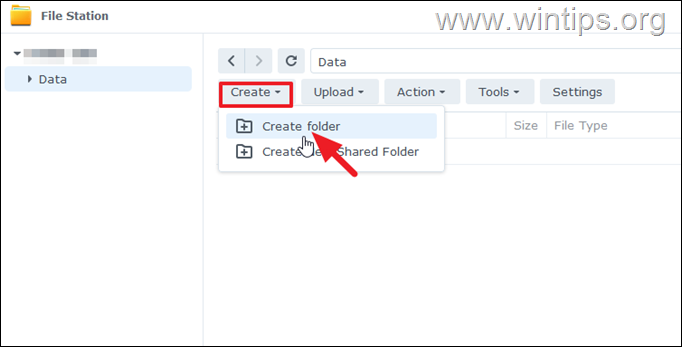
2. In the left select the Shared folder in which you want to create a subfolder, and at the right go to Create > Create folder.
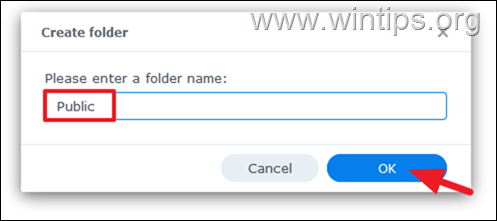
3. Type a folder name (e.g. "Public") and click OK.
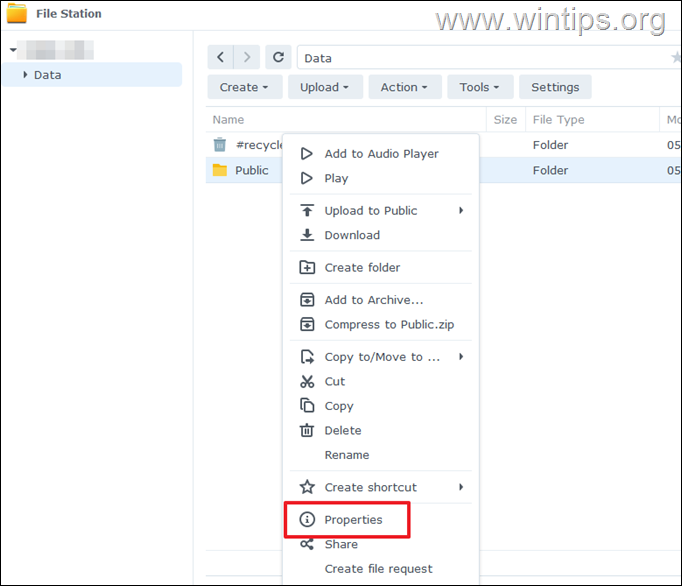
4. After the folder is created, right-click on it and click Properties.
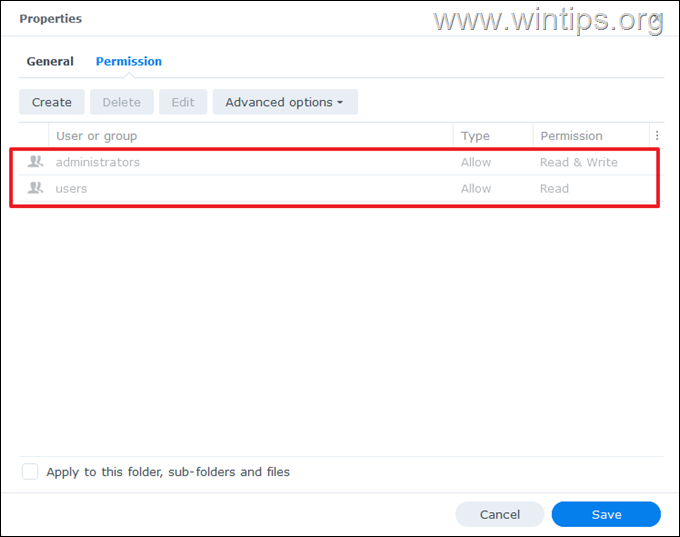
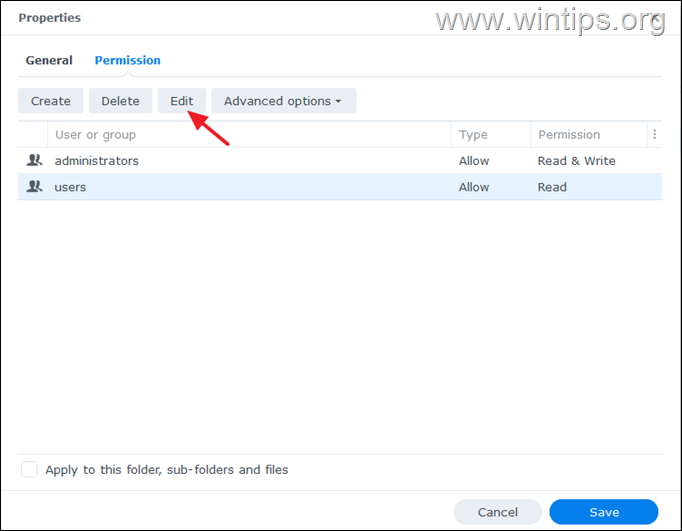
5. Navigate to Permissions tab, to view the permissions assigned to the folder. These are the default permissions that are automatically granted by the parent folder (in this case, of the shared "Data" folder we created in step 1 of this guide).
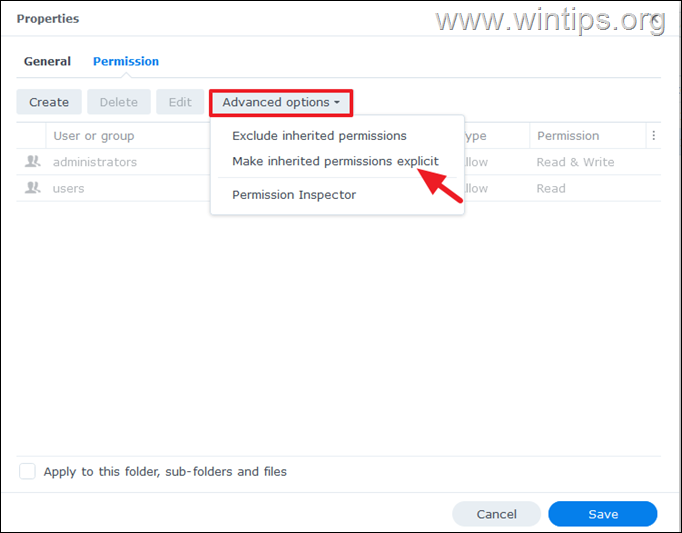
6. To modify the default assigned permissions of the parent shared folder, click Advanced options, and choose one of the following according your will:
- Exclude Permissions: if you want to remove the parent folder's permissions and specify the folder's permissions from scratch.
- Make inherited permissions explicit: If you want to modify the current assigned permissions. *
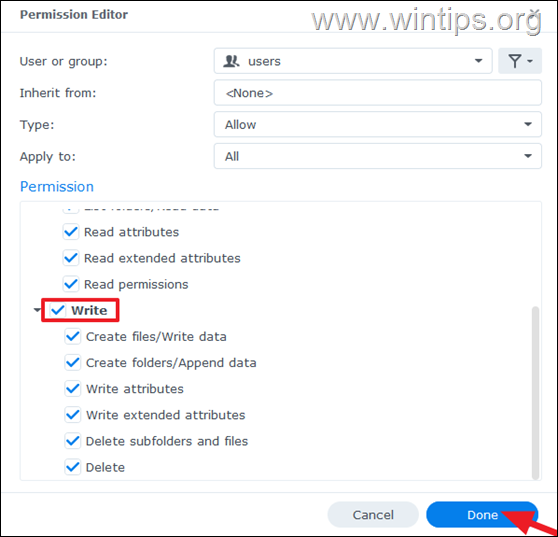
* Example: To give to "users" group full permissions on the selected folder:
a. Choose Make inherited permissions explicit from the Advanced options menu.
b. Select the users group and then click Edit.
c. Check the Write checkbox, click Done and then Save.
That's it! Let me know if this guide has helped you by leaving your comment about your experience. Please like and share this guide to help others.
We're hiring
We're looking for part-time or full-time technical writers to join our team! It's about a remote position that qualified tech writers from anywhere in the world can apply. Click here for more details.

