How to Set Ethernet & Wi-Fi Connections as Metered to Limit Updates in Windows 10/8/8.1
This tutorial contains instructions on how to set Network Connection(s) as metered, in order to limit updates in Windows 10. As you may know, in Windows 10, all updates are automatically downloaded and installed when available, and unlike the previous versions of Windows, Windows 10 doesn't give the option to the user to disable the automatic update.
In fact, once a Windows 10 PC is connected to the Internet, the update process starts automatically in the background and downloads and installs all the available updates directly, without notifying the user at all. But this service can be a serious problem, especially if you connect your PC to the Internet over Wi-Fi or 3G/4G.
To bypass this problem, Microsoft (thankfully), gives the user the option to set the Ethernet , the Wi-Fi or the 3G/4G connection as Metered, in order to prevent the automatic update download and to save bandwidth over these connections.
In this article I will show you how to set all the network connections on your computer as Metered by taking advantage of the above option, in order to disable the automatic update download of the most updates. *
* Notes:
1. Keep in mind, that after setting all the network connections connections as metered, the following will happen:
- Windows Update will not download automatically the most updates but will continue to download only the most critical updates.
- Apps updates downloading from the Windows Store might be stopped.
- Start screen tiles might stop updating.
- Offline files might not sync automatically.
2. If you want to permanently disable all Windows Updates, follow the instructions in this article: How To Turn Off Windows 10 Updates Permanently.
How to Set all Network Connections as Metered in Windows 10.
Method 1. Set the Wi-Fi, Ethernet, 3G/4G connection as Metered from Windows.
Method 2. Set all Network Connections as Metered from Registry.
Method 1. How to Set the Ethernet, Wireless & 3G/4G connection as Metered in Windows 10.
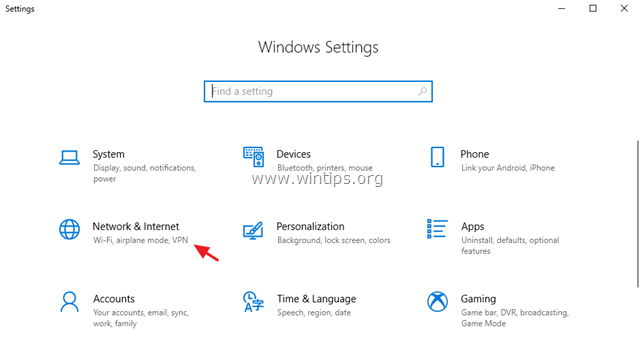
1. From Start ![]() menu, select Settings
menu, select Settings ![]() and then open Network and Internet.
and then open Network and Internet.
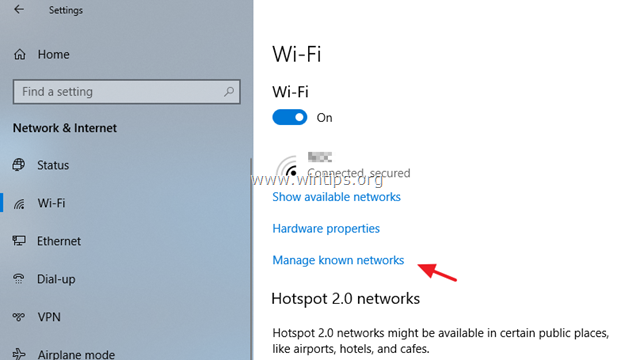
2. Select the Wi-Fi (or the 3G/4G) connection from the left and then click at Manage known Networks.
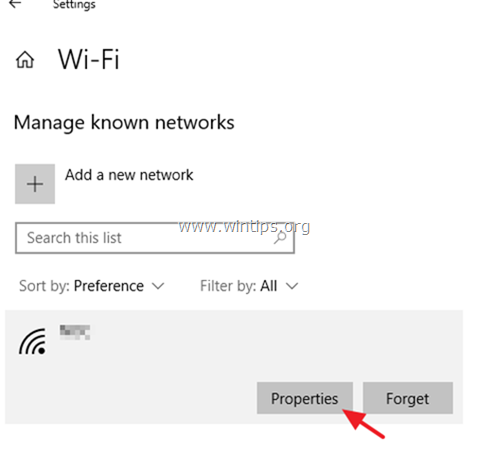
3. Highlight the Wireless connection you 're connected to, and click Properties.
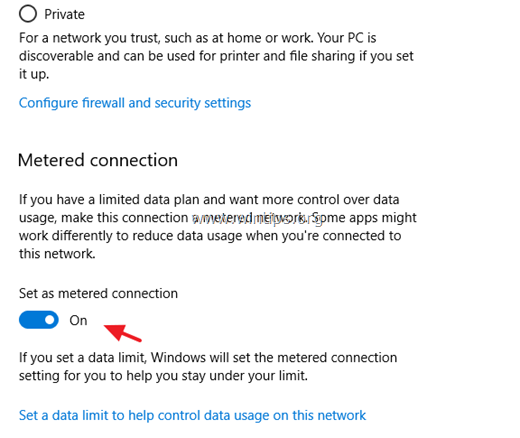
4. Drag the Set as metered connection switch to ON.
5. Repeat the same steps to set the Ethernet connection or the 3G/4G connection as metered. *
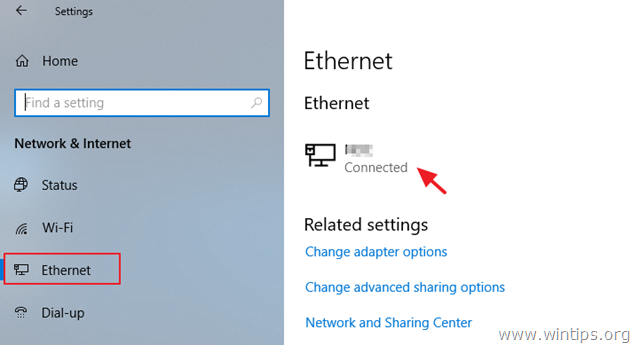
* Note: For the Ethernet connection, select 'Ethernet' from the left and then click at 'Connected' at the right pane to view the metered connection options.
Method 2. Set All Network Connections as Metered using Registry. (Windows 10, 8/8.1)
If you want to set all the available connections as Metered, by modifying registry, then follow the steps below:
1. Simultaneously press the Windows ![]() + R keys to open run command box.
+ R keys to open run command box.
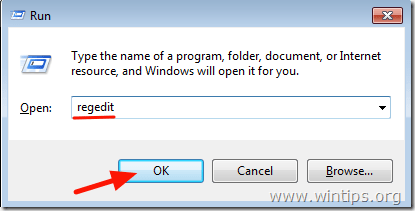
2. Type regedit and press Enter.
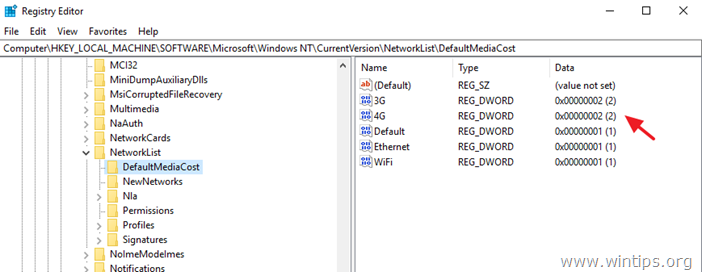
3. At the left pane, navigate to this key: *
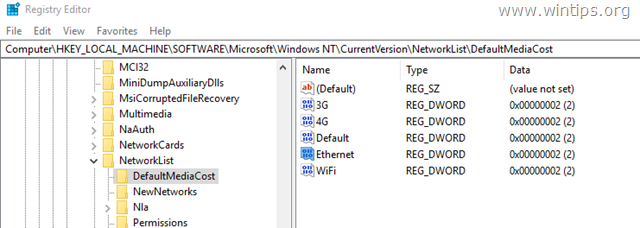
- HKEY_LOCAL_MACHINE\SOFTWARE\Microsoft\Windows NT\CurrentVersion\NetworkList\DefaultMediaCost
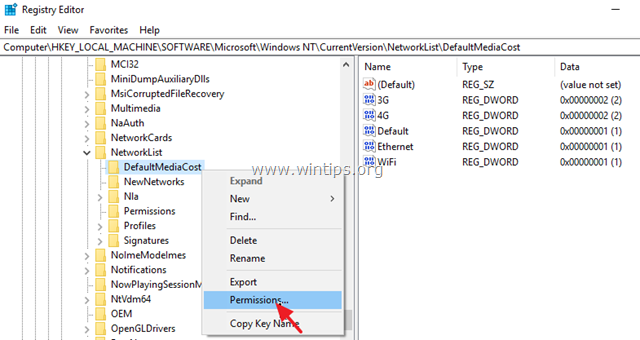
4. As you can see, at the right pane, where all the available network connections are listed, the default DWORD value in the 3G and the 4G connection, is "2". The value "2" means that the connection is metered.
5. Important: Before proceeding to modify Windows registry, first take a backup of the current settings of the "DefaultMediaCost" registry key. To do that:
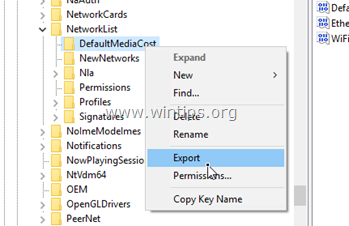
1. Right click at "DefaultMediaCost" key and select Export.
2. Save the exported registry file on your Desktop. *
* Note: If something goes wrong, or you want to restore the default registry key settings, just double click on the exported registry file and merge its contents to the registry.
6. Right click at the DefaultMediaCost registry key and select Permissions…
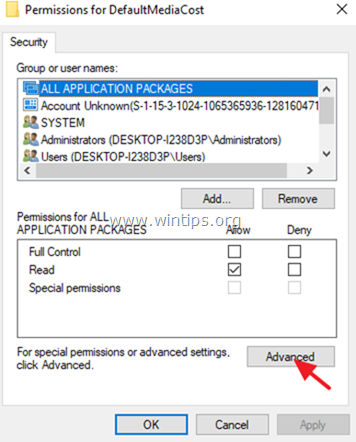
7. At 'Permissions' window, click Advanced.
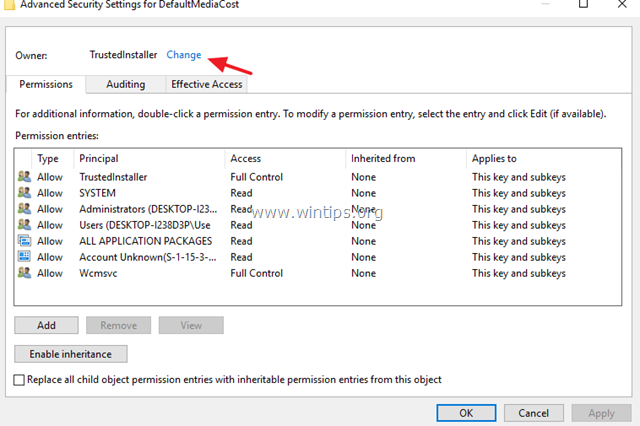
8. Click Change Owner.
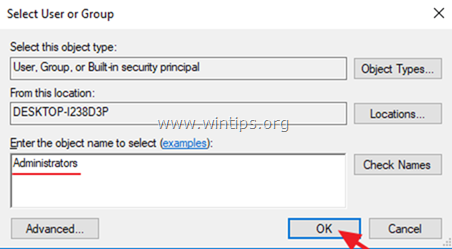
9. Type Administrators and press OK. *
* Note: If you want to give full permission to your user account only, then type your account name in the box.
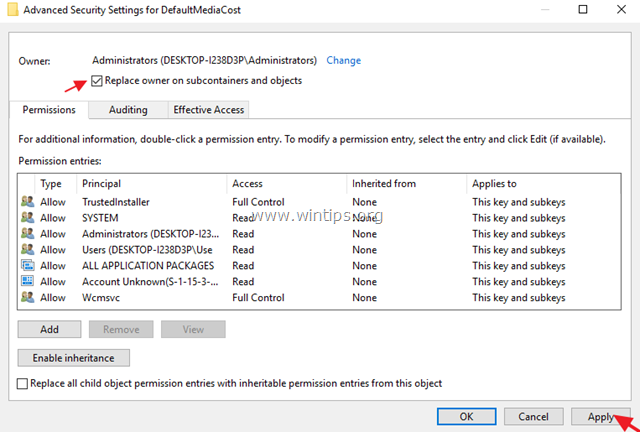
10. Check the Replace owner on subcontainers and objects checkbox and click Apply.
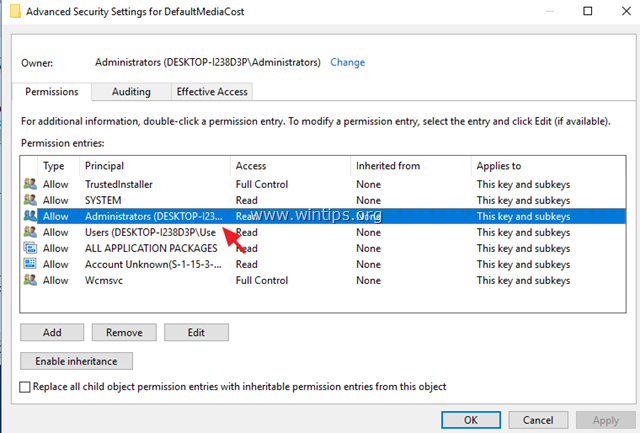
11. Then double-click to open Administrators entry.
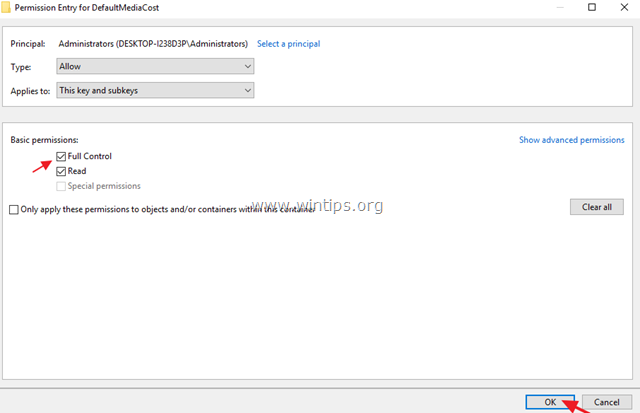
12. Check the Full Control checkbox and press OK three (3) times, to return back to registry.
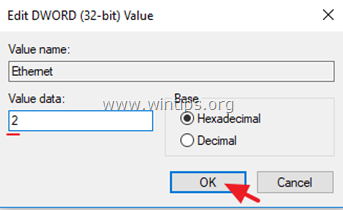
13. Now at the right pane of "DefaultMediaCost", double click at Ethernet and change its value data from 1 to 2. *
14. Repeat the same step and change the value data from 1 to 2 to all registry keys (3G, 4G, Default & WiFI).
15. After changing the value data, to all keys, you should see a similar screen:
15. Close registry editor and restart your computer. *
* Note: If you change your decision and you want Windows to automatically download and install updates, just change the values back to 1, or just double click at the exported registry (.reg) file on you desktop and merge it contents to the registry.
That’s it! Let me know if this guide has helped you by leaving your comment about your experience. Please like and share this guide to help others.
We're hiring
We're looking for part-time or full-time technical writers to join our team! It's about a remote position that qualified tech writers from anywhere in the world can apply. Click here for more details.
- FIX: Numeric keypad Not Working on Windows 10/11 - July 24, 2024
- How to Share Files or Printers in Hyper-V? - July 22, 2024
- How to invoke Hyper-V Screen resolution prompt? - July 17, 2024


