How to Set Password Expiration Date on Windows 10 & Server 2016/2012 Standalone Servers.
If you want to set a password expiration date for accounts on Windows 10, continue reading below. To maintain your security it is a good idea to periodically change your password in Windows 10.
Depending your environment, its a best practice to set user's password to expire after 30 to 90 days in order to prevent attackers to crack a user's password and to have access to your computer and your network resources.
How to Change Password Expiration Date in Windows 10.
Method 1. Set Password Expiration Date through Group Policy
Method 2. Set Password Expiration Date using Command Prompt
Method 1. Set Password Expiration Date through Group Policy. *
* Note: This method works only on Windows 10 Professional versions and on Windows Server 2012 or Server 2016 Standalone versions. To change or disable the password expiration date on a Domain Server 2016/2012 read this article: How to Change or Disable Password Expiration on Domain 2012/2016.
Step 1. Enable Password Expiration.
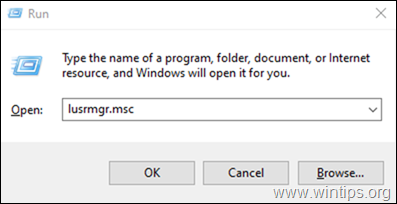
1. Open the 'Local Users and Groups' options. To do that:
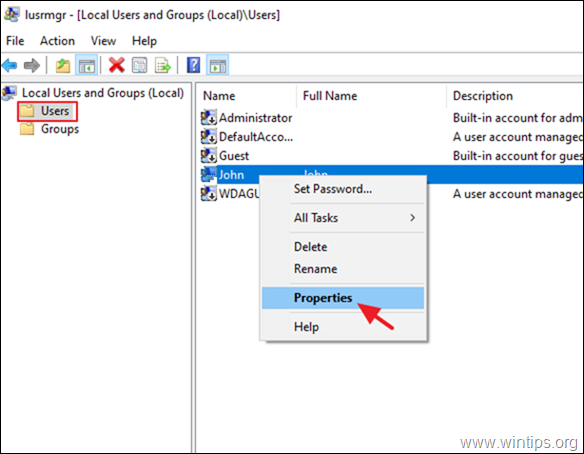
2. Select Users on the left pane, and then right-click on the user and click Properties.
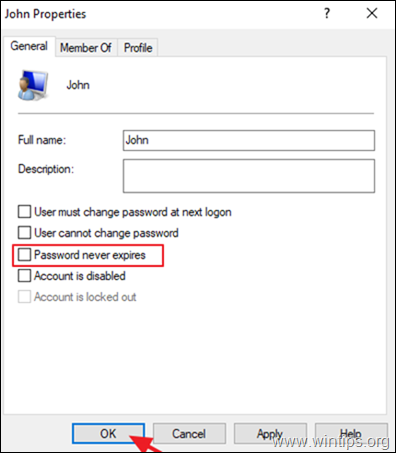
3. Uncheck Password never expires and click OK.
Step 2. Set the Maximum Password Age in Security Policy.
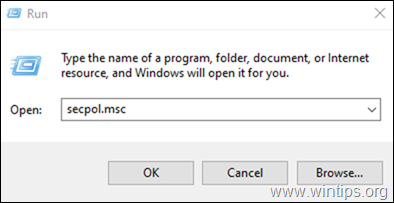
1. Open the local security policy editor. To do that: *
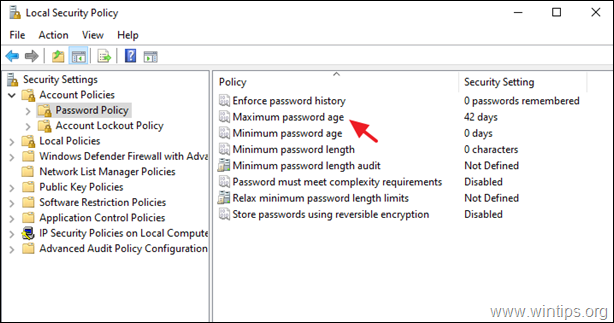
2. In Local Security Policy, navigate to:
- Security Settings -> Account Policy -> Password Policy
3. At the right pane, double click to open the policy: Maximum password age
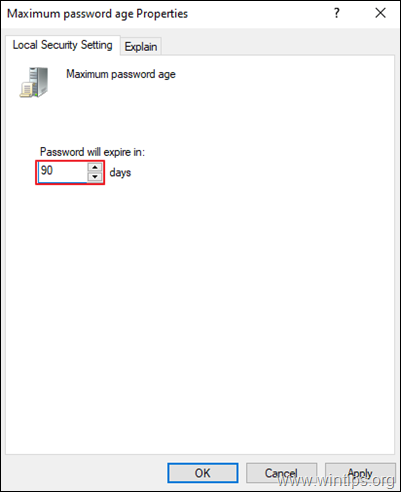
4. Change the default value "42" to the preferred period in days that you want the password to expire. *
* Note: This security setting determines the period of time (in days) that a password can be used before the system requires the user to change it. You can set passwords to expire after a number of days between 1 and 999, or you can specify that passwords never expire by setting the number of days to 0.
Method 2. Set Password Expiration Date using Command Prompt. *
Note: This method works in all Windows versions (Home & Pro) and in Windows Server versions.
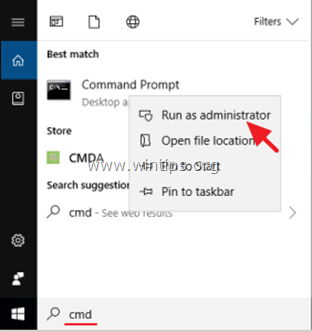
1. Open Command Prompt as Administrator. To do that:
-
- In the Search box type: cmd (or command prompt).
- Right click on the command prompt (result) and select Run as Administrator.
2. In command prompt give the following command to enable the password expiration:
-
wmic useraccount where "Name='UserAccountName'" set PasswordExpires=true
* Note: In the above command, change the UserAccountName value, with the name of the account that you want the password to expire. For example, if the account name is "John", the command will be:
-
wmic useraccount where "Name='John'" set PasswordExpires=true
3. Now give the following command the set the password expiration date to e.g. 90 days. *
-
net accounts /maxpwage:90
* Note: In the above command, change the number "90" to the number of days you want the password to expire.
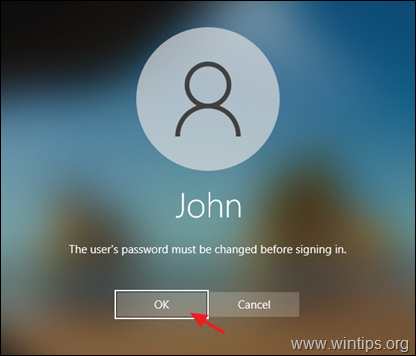
4. Close command prompt and restart the PC. *
* Note: After restarting, if the user does not already have a password, they will be prompted to create one. At this point, click OK, type the new password twice, and press Enter.
Additional help: If you want to remove the password expiration period, type the following command in Admin command prompt to set password to never expire for all your user accounts.
-
net accounts /maxpwage:unlimited
That’s it! Let me know if this guide has helped you by leaving your comment about your experience. Please like and share this guide to help others.
We're hiring
We're looking for part-time or full-time technical writers to join our team! It's about a remote position that qualified tech writers from anywhere in the world can apply. Click here for more details.
- How to Disable or Remove BitLocker from Windows RE. - April 24, 2024
- FIX: Error 0x8007025d in Windows 10 Update. - April 22, 2024
- How to Disable Device Encryption in Windows 11/10. - April 17, 2024

