How to Setup a Hyper-V Virtual Machine in Windows 11/10.
If you want to setup a Hyper-V Virtual Machine on Windows 11/10 for testing or other purposes, continue reading below to learn how to enable Hyper-V feature on Windows 10/11 and how to create and configure a new Virtual Machine in Hyper-V Manager.
Microsoft has integrated Hyper-V technology into Windows Server 2008 and later versions of Windows Server. Today, Hyper-V is also included in Windows 10 & 11 operating systems, allowing even ordinary users to run multiple operating systems in virtual machines (aka "VMs" or "Guest Machines"), without affecting the OS of the main machine (aka "Host" machine).
In fact, Microsoft Hyper-V is a native hypervisor that allows you to run on a virtual hardware a completely separate operating system (aka "Guest" OS), in order to test things, programs and debugging. Hyper-V is designed to offer the same premium functionality and performance as VirtualBox and VMWare hypervisors which are the leading virtualization tools.
In this article, we will show you in detail the steps required to enable Hyper-V in Windows 11/10 and how to setup a virtual machine in Hyper-V Manager.
How to Create a Hyper-V Virtual Machine in Windows 11/10.
- Step 1. Hyper-V Requirements.
- Step 2. Enable Hyper-V feature.
- Step 3. Create Virtual Machine in Hyper-V.
- Step 4. Install the Operating System in the Hyper-V machine.
Step 1. Check Hyper-V Requirements.
Certain requirements are expected to be met before a device can run Hyper-V. As a Windows 10/11 user, you must ensure that the following requirements are met before enabling the Hyper-V feature:
1. The physical RAM on your computer must be at least 4 GB. To prevent your PC from lagging when you configure a virtual machine, upgrading your RAM to 8GB or more will offer the best experience.
2. Your PC must be running any of these Windows 10/11 editions: Professional, Enterprise or Education. Hyper-V cannot work with Windows 10 Home devices.
3. You PC must have a 64-bit Processor (CPU) that supports Second Level Translation Address (SLAT). *
* Info: The "Second Level Address Translation" (SLAT), is a hardware mechanism which is supported when the Virtualization Technology is supported. If you own an Intel processor, go to your processor's specification page and look if the "Intel® Virtualization Technology (Intel® VT-x)" located under "Advanced Technology". Alternatively see if the "Virtualization Technology" feature is enabled in BIOS. (see 4 below)
4. The following items must be enabled in BIOS in order to run Hyper-V: *
- Virtualization Technology
- Hardware Enforced Data Execution Prevention (DEP)
* Notes:
1. To find out if the above items are already enabled on your system:
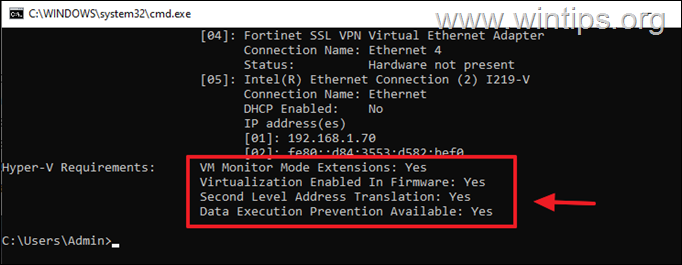
1. Open Command Prompt and type systeminfo.exe
2. Scroll at the end of the report to find out if the Hyper-V requirements are met. If not, proceed to enable them in Bios by using the instructions below.
2. To Enable Virtualization Technology & Data Execution Prevention (DEP) in BIOS:
1. Restart the computer and repeatedly press one of these keys: F2, F10, F8, F12 or Del* when the computer manufacturer's logo appears on the screen to enter the BIOS/UEFI settings (* The key may vary from manufacturer to manufacturer).
2. To Enable Virtualization in BIOS:
a. If you own an Intel CPU:
- Click the Advanced* tab and set the Virtualization (aka "Intel® Virtualization Technology (VT-x)" to Enable.
* Note: In some BIOS the "Virtualization" setting is located in Performance, or in System Configuration sections.
b. If you own an AMD CPU:
- Click the M.I.T. tab –> Advanced Frequency Settings –> Advanced Core settings and the set the SVM Mode (aka "Secure Virtual Machine") to Enable.
3. To Enable Data Execution Prevention (DEP) in BIOS:
Depending on your computer manufacturer, the option to enable the hardware DEP varies and can be located at Advanced or in Performance section and may be labeled as "Data Execution Prevention," "XD," "Execute Disable," or "NX".
Step 2. How to Enable Hyper-V feature in Windows 10/11.
Hyper-V can be installed by different methods. The most common method is to turn-on Hyper V in Windows features. It can also be installed using Powershell as well as with the Deployment Image Servicing and Management (DISM) tool. In this article we'll show you how to activate Hyper-V on Windows Features:
1. Type Turn Windows features on or off on search and click Open to launch the widget.
2. Check Hyper-V, then select OK.
3. Wait for Windows to install Hyper-V, and when prompted, restart your computer.
Step 3. How to Create & Configure a New Virtual Machine in Hyper-V.
After rebooting, you are ready to create your first Hyper-V virtual machine. To do this, you can use the Hyper-V Quick Create app or the Hyper-V Manager tool. In this tutorial, we will use Hyper-V Manager.
To Setup a Virtual Machine with Hyper-V Manager:
1. In the search bar, type Hyper-V Manager, then press Open or Run as administrator to launch the program.
2. Once Hyper-V Manager opens, select the name of your device to populate the action menu on the right.
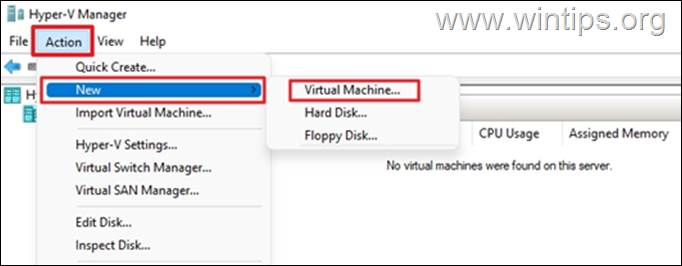
3. From the Action tab, click on New and choose Virtual machine.
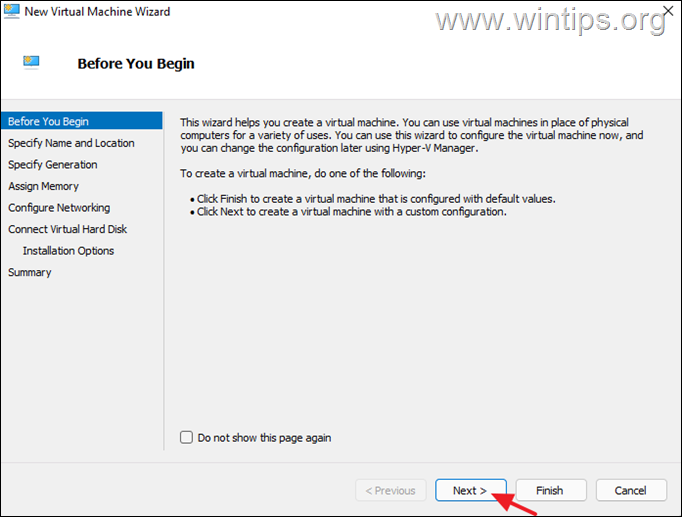
4. A new window with the virtual machine wizard will appear. On the left pane, it will list series of process to be undergone in other to create a virtual machine. Click Next to begin the process.
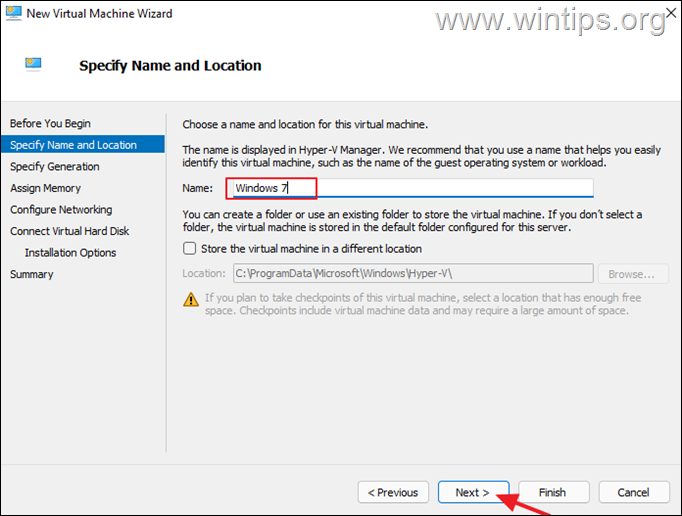
5. Specify a Name for the virtual machine you want to create, then click Next. This will help you identify it in case you are creating multiple virtual machines.*
* Note: As a beginner, don’t make any changes to the default location where the virtual machine will be saved.
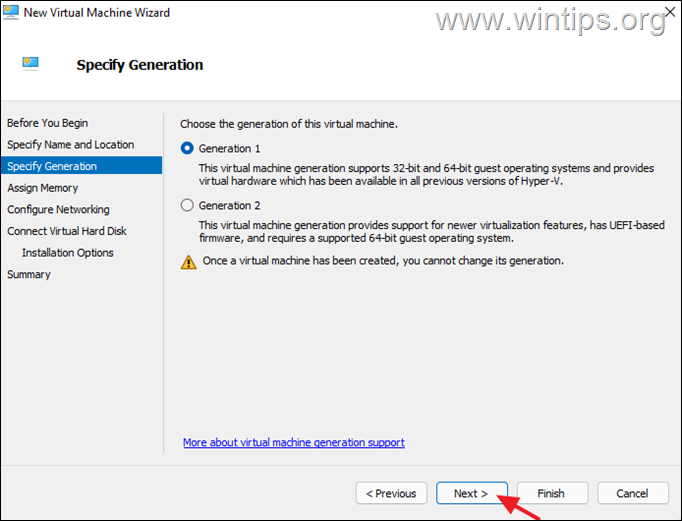
6. Specifying a generation depends on the purpose of the virtual machine. If you plan to use it for both legacy and new programs that run on 32-bit and 64-bit respectively, consider using Generation 1. However, if it is for advance programs that supports only 64-bit systems, select Generation 2. For the purpose of this guide, we will select Generation 1 and click Next.
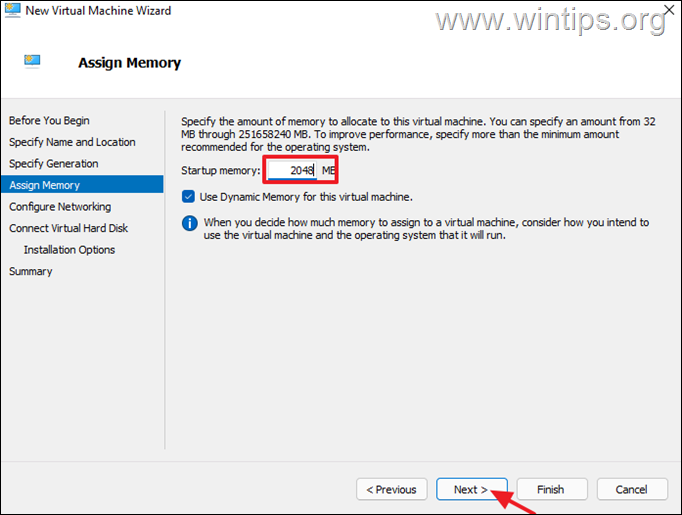
7. Now allocate memory to the virtual machine. The available physical RAM on your computer and the operating system (OS) you want to install will determine the minimum amount of memory to allocate to the virtual machine. Check the minimum memory requirements of the operating system you are installing (Linux, Windows Vista, Windows 7/8/10) and add some extra memory for better performance. In our case, we specify 2048 MB. When done, click Next.
8. If you want the virtual machine to access the network, select Default Switch and click Next. Otherwise leave the default option "Not Connected" and continue. (You can always configure the network when you finish setting up the virtual machine.
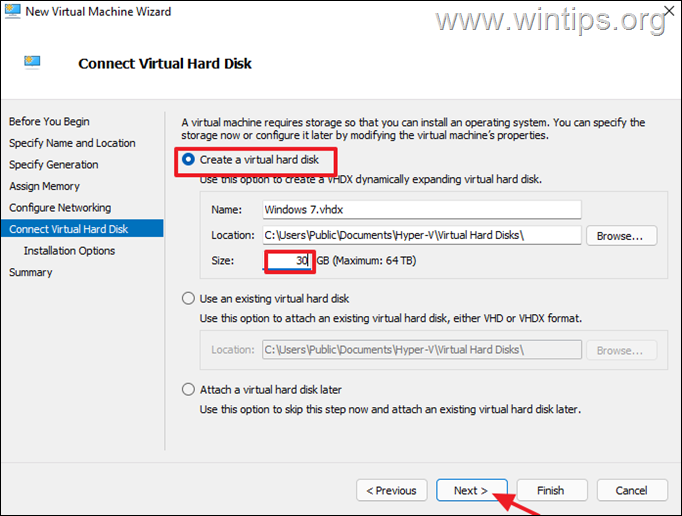
9. Now proceed and specify the storage space for the virtual disk (where the guest operating system will be installed). The size doesn’t have to be large. Select Create a virtual hard disk, allocate a fair size to the virtual hard disk, then click Next.
10. On the next screen, select when you want to install the operating system. If you want to install the operating system immediately after creating the virtual machine, as we will show here, you will need the installation media of the Guest OS in a CD/DVD or in an ISO image file. *
* Note: In this tutorial, will show you how to install the Windows 7 OS from an ISO image file.
a. Select Install an operating system from a bootable CD/DVD-ROM
b. Select Image file (.iso) and click Browse.
c. Select the ISO Installation media file and click Next.
11. At the Summary pane, review the configuration and if it's OK click Finish. If you need to make any changes, select Previous to modify the settings.
12. Let Hyper-V to create and configure the Virtual Machine and when this done, select it and click Connect from the right pane.
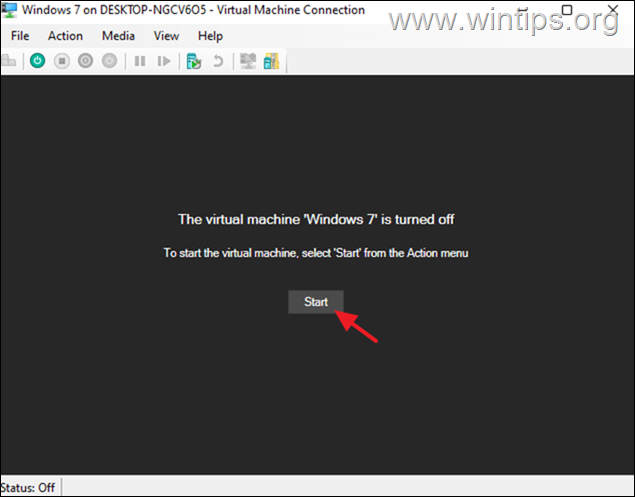
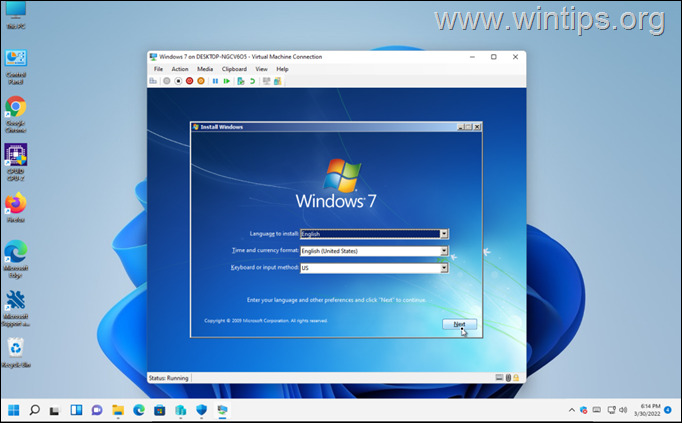
13. At the new window that pop up, click Start to begin the installation of the OS on the Virtual Machine.
Step 4. Install the Operating System in the Hyper-V machine.
Finally, go ahead and install the operating system on the virtual machine as you would on a physical machine.
That's it! Let me know if this guide has helped you by leaving your comment about your experience. Please like and share this guide to help others.
We're hiring
We're looking for part-time or full-time technical writers to join our team! It's about a remote position that qualified tech writers from anywhere in the world can apply. Click here for more details.
- How to Disable Device Encryption in Windows 11. - April 17, 2024
- How to View Permissions on Shared Folders on Windows 10/11. - April 15, 2024
- FIX 0x80070643 error in KB5034441 update (Solved) - April 10, 2024

