FIX: 0x800f0922 Windows 11 Update Error.
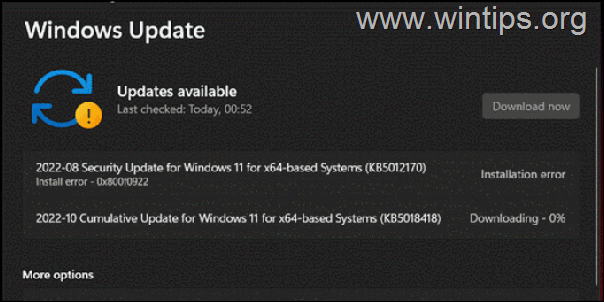
The Windows update install error 0x800f0922 usually occurs when the user tries to upgrade or install essential updates on their Windows 10/11 PC. For many users, this error happens right after Windows starts downloading the updates, while others experience it when the update is almost complete (98%).
There are several potential causes of this error, including insufficient disk space to install the update, essential Windows update services not running in the background, issues with the "SoftwareDistribution" folder, corrupted system files, and malware infection among others.
In this guide we have compiled a list of solutions that can help you fix the Windows Update installation error 0x800f0922 on Windows 10/11 computers.
How to fix Windows Update Install Error 0x800f0922 on Windows 11/10.
Method 1: FIX Install Error 0x800f0922 with Windows Update Troubleshooter
Windows 10 and 11 have a built-in troubleshooter that you can use to resolve Windows Update issue 0x800f0922 before moving on to more advanced solutions.
1. Go to Start > System > Troubleshoot.
2. At 'Troubleshoot' options, click on the Other troubleshooters tile.
3. Next, click the Run button next to Windows Update.
4. The Windows troubleshooter will begin scanning your computer for issues related to updates. If the troubleshooter recommends any solution, apply the fix to resolve the problem.
Method 2: FIX Windows Update Install Error 0x800f0922 by Repairing System Files.
The next method to solve the install error 0x800f0922 in Windows Update, is to repair the Windows System Files, using the steps below:
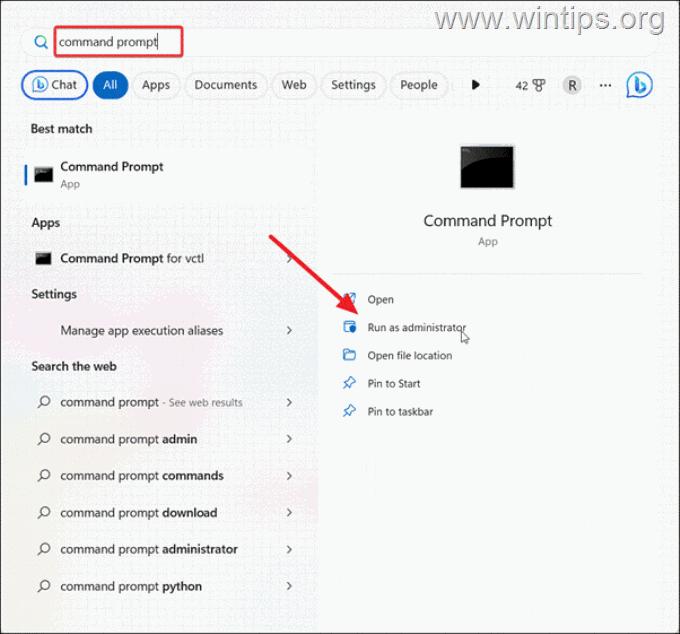
1. Click the Start button, type "command prompt" in the search box, and select Run as Administrator. *
* Note: Click Yes on the User Account Control (UAC) prompt.
2. In the Admin command prompt window, type the following command and press Enter.
- sfc /scannow
3. Once the verification is complete, run the following commands in order (press Enter after each command):
- DISM /Online /Cleanup-Image /ScanHealth
-
DISM /Online /Cleanup-Image /RestoreHealth
4. Wait for the scanning process to finish, then restart your PC and check if the Windows update error 0x800f0922 is resolved.
Method 3: Fix Windows Update 0x800f0922 Install error by installing Microsoft .NET Framework 3.5
.NET Framework 4.8 feature is enabled by default on Windows 11/10 PCs. However, if you are trying to install updates for some legacy programs that rely on .NET Framework 3.5 (.Net 2.0 and 3.0), you may need to install it on your system for the updates to install correctly.
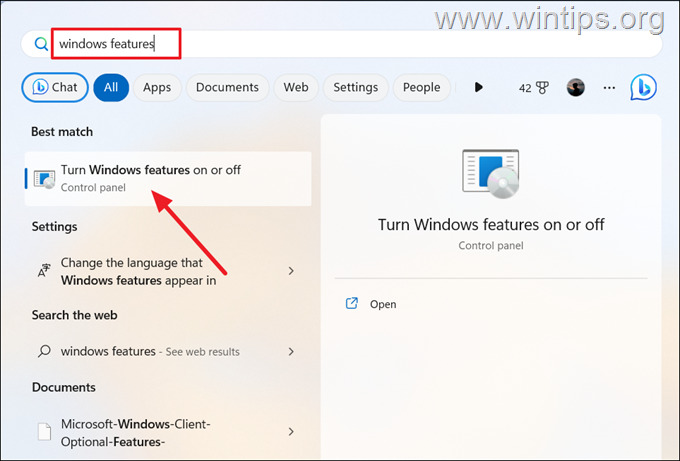
1. On the Search box type "windows features", and then click on Turn Windows features on or off.
2. On the "Window Features" window, check the .NET Framework 3.5 (includes .NET 2.0 and 3.0) checkbox and then check also the following features:
- Windows Communication Foundation HTTP Activation
- Windows Communication Foundation Non-HTTP Activation
3. When done, click OK to save the changes.
4. Now wait for Windows to install the selected features and then restart your computer.
5. After restarting try to re-install the update again.
Method 4: FIX Windows Update Error 0x800f0922 by enabling the App Readiness service
If the Application Readiness Service is disabled when you try to install a Windows update, error 0x800f0922 may occur. To enable it:
1. Press Windows ![]() + R keys to open the run command box.
+ R keys to open the run command box.
2. Type services.msc and hit Enter.
3. Locate the service name App Readiness and double-click on it to open its properties.
4. Change the Startup type to Automatic or Manual and then click the Start button to start the service.
5. When done, click Apply and OK to close the properties window.
6. Follow the same steps and confirm that the Startup type of the following services is set to Manual or Automatic.
- Geolocation
- App Optimization
- Windows Event Collector
7. When done, restart your PC and then try to update your system again.
Method 5: Reset Windows Update Components.
Update errors are often caused by corrupted Windows Update components. In some cases, resetting the Windows Update components alone may resolve the issues including Error 0x800f0922.
1. Open Command Prompt as Administrator
2. In the Command Prompt window, type the following commands in order (hit Enter after typing each command):
- net stop wuauserv
- net stop cryptSvc
- net stop bits
- net stop msiserver
- Ren %systemroot%\SoftwareDistribution SoftwareDistribution.old
- Ren %systemroot%\System32\catroot2 catroot2.old
- net start bits
- net start wuauserv
- net start appidsvc
- net start cryptsvc
3. After giving the above commands, restart your computer and see if you are able to install updates.
Method 6: Manually Install the Failed Windows Update to Fix error 0x800f0922
Another method to fix the update error 0x800f0922, is to download and install manually the failed update.
1. In Windows Update, notice the KB number of the failed update. (e.g. "KB5022845").
2. Then navigate to official Microsoft update catalog website and search for the KB number of the failed update.
3. From the list of updates, locate the one that corresponds to your Windows version and click on the Download button next to it.
4. On the popup window, click on the link to download the update.
5. When the download is completed, double-click at the downloaded file and follow the on-screen instructions to install the update.
Method 7. Additional Help to Fix Windows Update Install Error 0x800f0922.
If none of the above methods fixes the problem, apply these steps:
1. Make sure that the Date, Time & Regional settings are correct.
2. Disconnect all the peripheral devices that you don't need (e.g. USB Drives, SD Cards, USB Wireless Mouse or Keyboard Receiver, USB Wireless Network Card, Printer etc.).
3. Make sure that your computer is clean from viruses and malware. To accomplish this task you can use this Malware Scan and Removal Guide to check and remove viruses or/and malicious programs that may be running on your computer.
4. Make sure that you have enough free space on your disk (at least 30GB).
5. Delete the useless files with Disk Cleanup. by using the instructions in this tutorial: How to Free Up Disk Space with Disk Cleanup.
6. Update essential device drivers. Navigate to your hardware's vendor support site and download and install the latest drivers for the Chipset and the Graphics adapter (VGA). Additionally, sometimes there is the need to uninstall the VGA driver or to update the system BIOS in order to install an update.
7. Disable -or better- temporarily uninstall all non-Microsoft security software (antivirus, antimalware, firewall, etc.), to avoid compatibility issues with the latest Windows updates.
8. Try to manually reinstall the failed update (see Method-7 above), and if it fails again then proceed to repair upgrade Windows 10/11, by following the steps in this article: How to Repair Windows 10 with an In-Place Upgrade.
That's it! Which method worked for you?
Let me know if this guide has helped you by leaving your comment about your experience. Please like and share this guide to help others.
We're hiring
We're looking for part-time or full-time technical writers to join our team! It's about a remote position that qualified tech writers from anywhere in the world can apply. Click here for more details.
- FIX: Numeric keypad Not Working on Windows 10/11 - July 24, 2024
- How to Share Files or Printers in Hyper-V? - July 22, 2024
- How to invoke Hyper-V Screen resolution prompt? - July 17, 2024


