How to Move Windows to Another Hard Drive/Disk.
If you want to move Windows to another drive, continue reading below. Over time, computer hardware (like everything else) wears out. This of course also happens with hard drives, which over time their performance decreases and need to be replaced.
The hard disk is probably the most important device on the computer because it is used to store your work (documents, photos, videos, confidential data, etc.). Therefore, it is advisable to replace it after 3-5 years to avoid possible data loss and to extend the life and performance of the computer.
If you want to replace your Windows hard disk drive (HDD) with another HDD or SSD (Solid State Drive – which is at least 14 times faster than an average hard disk), you can do so in one of the following ways:
- Way 1: Backup your files to an external disk, and then proceed to a clean installation of Windows. After installation, install the necessary programs, restore your files and personalize your computer as before.
- Way 2: Move Windows and all your data (Files, Programs and Settings) to another HDD, without any hassle to reinstall your programs and restore your files and settings.
Of the above methods, as you can understand, the second one is the easiest, because it allows you to move Windows to another drive without the stress of reinstalling the operating system, programs and settings or to restore your files back!
In this tutorial you will find detailed instructions on how to transfer Windows along with your programs, files and settings to another drive.
How to Migrate Windows to Another Hard Drive (Windows 11/10/8.1).
To move (migrate) Windows to another drive, you can either use the built-in Windows Backup and Restore tool to create a System Image and then to restore that image to the new drive (Method-1), or to use a third-part disk cloning utility to copy your Windows disk to a new one (Method-2). Both methods are described below. *
* Important:
Before you start the process of moving Windows to another drive, apply the following steps:
1. Backup your personal files and data to another external storage device (e.g. USB Drive) in order to have a copy of your files if something goes wrong.
2. Perform a disk cleanup to delete the useless files and free up storage space.
Method 1. How to Clone/Migrate a Disk to a Larger Disk Using a System Image in Windows 10/11.
The built-in Windows System Image creation tool is the first and recommended method for transferring Windows, files, applications, and settings to another drive equal to or larger than the current drive. For example, if the current drive is 256GB, to use the System Image on Windows, the new drive must be larger than 256GB or equal in size. *
* Note: If the contents of your current disk (used space), can fit on a disk smaller in size than the current disk, follow the instructions on Method-2 to clone the drive by using a disk-cloning utility.
Requirements:
-
- A New Drive with Equal or Largest size (in Gigabytes) to the current Drive.
The process of moving Windows to another hard drive using Windows built-in system image tool require that the new drive must be larger in size or equal to the current drive. - A Secondary drive/disk (internal or external), to store the System Image. If you don't own a secondary drive, follow the instructions on Method-2 below.
- A USB Windows installation media.
In order to restore Windows to a new drive you have to start your PC from a USB installation media. If you don't own a Windows Installation media, follow these instructions to create one.
- A New Drive with Equal or Largest size (in Gigabytes) to the current Drive.
Step 1. Create a System Image.
To create a full backup of your Windows disk, (aka "System Image" backup):
1. Get a portable USB hard drive with enough free space and plug it into the PC. When done, ensure that it appears in Windows Explorer.
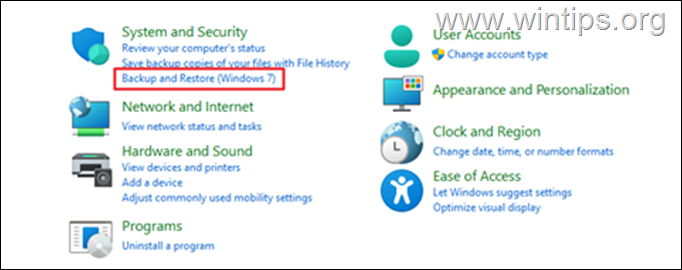
2. Click the Start menu, then type Control panel and select Open.
3. Select Backup and Restore (Windows 7)
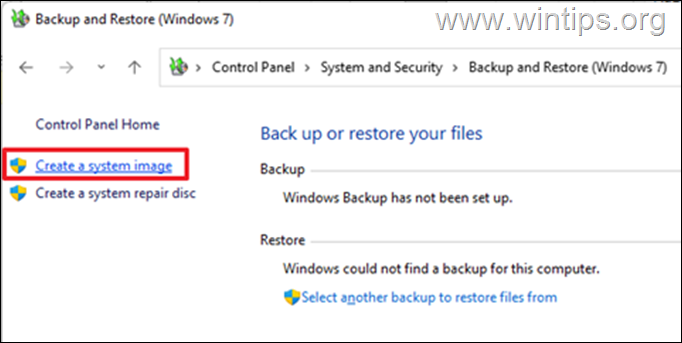
4. Click Create a system image
5. A dialog box will appear scanning your PC for backup devices. Click on the drop down below On a hard disk and select the USB hard drive you plugged in, then click Next.
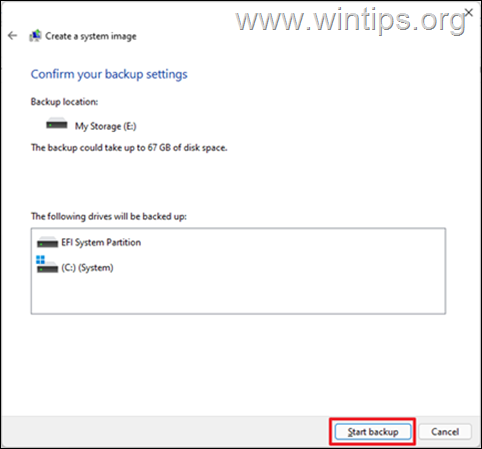
6. A window will appear with the size of the data that will be migrated to the USB hard drive. Select Start Backup to proceed.
7. A progress bar will appear indicating the duration of the process. Be patient until Windows saves the system image to the external disk. (This process will take some time depending on the size of the data and the speed of the hardware).
8. When the system image completes, you will be prompted to create a system repair disk. Click No to proceed and close all windows.
Step 2. Replace Hard Drive.
Once you have saved the system image and have the Windows USB installation media, proceed to restore Windows to the new disk as follows:
1. Shutdown your PC.
2. Remove the current Windows hard disk and disconnect (unplug) any other secondary disks (if any), to avoid mistakes.
3. Install the new hard disk.
4. Plug the external USB drive with the System Image.
Step 3. Restore System Image.
1. Turn on your PC and boot from the USB Windows Installation Media. (The common keys to access the boot order options are the Del, F9, F12)
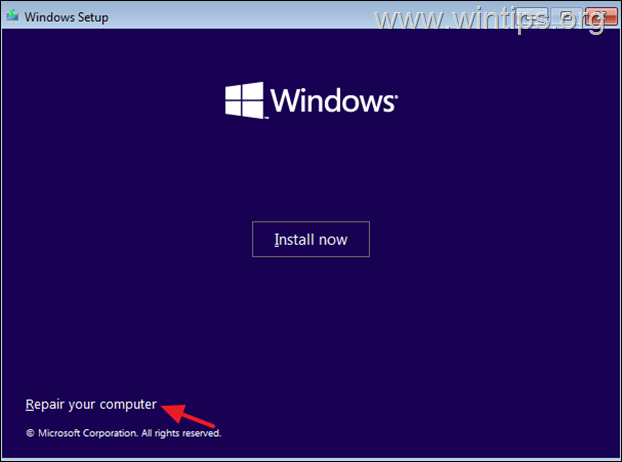
2. At the Windows Setup screen choose Next and then click Repair your computer.
3. Select Troubleshoot, then click System Image Recovery.
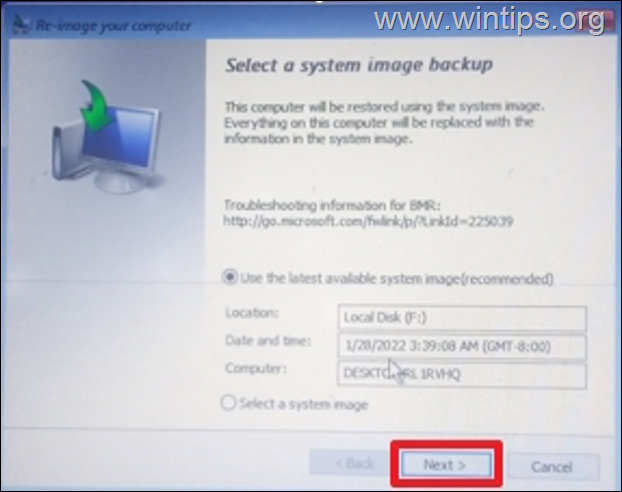
4. When the System Recovery tool detects the image you created, leave the "Use the latest available system image" option selected and click the Next button.
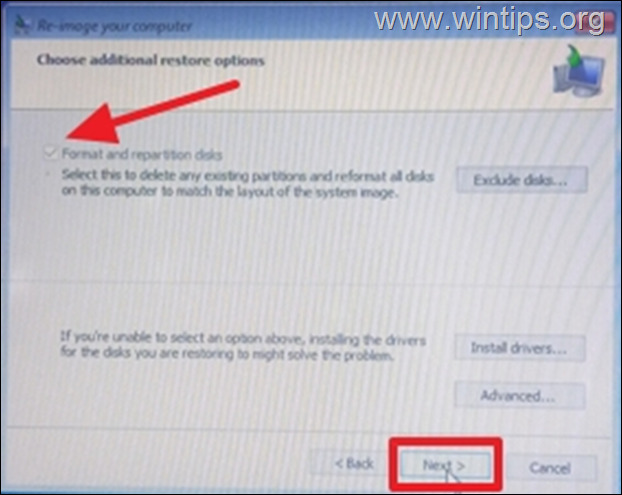
5. Ensure that Format and repartition disk* checkbox is checked and click Next.
* Attention: This will delete any existing partitions and data on the new hard drive and reformat it to match the layout of the system image.
6. Finally click Finish and then select Yes to confirm that you want to proceed with system image restoration. The process will take some minutes to complete depending on the volume of data on the system image.
7. Once the restoration is complete, the PC will automatically restart in 60 seconds. At this point, remove the USB Installation media and let the system to boot from the new drive. (In some cases you may need to go to BIOS/UEFI to set the computer to boot from the new hard disk).
Quick Tip: If the new hard is the same size as the previous hard drive, all the disk space will be allocated. However, if the new hard drive is larger than the previous hard drive, there will be unallocated space. In this case, you must expand the volume to take advantage of all available space on the new hard disk.
Method 2. How to Clone Hard Disk using a Third-Part Disk Cloning Utility.
The second method to copy your Windows drive to another, is by cloning your main disk to a new one, by using a third-party Disk Cloning Software/Utility. For this task, you can use one of the following reliable and FREE Disk Cloning Tools: *
* Note: For the purposes of this tutorial we demonstrate on how to clone a HDD to another (HDD or SSD), with EaseUs ToDo BackUp.
Requirements:
-
- A New Disk/Drive with Smaller,* Equal or Largest size (in Gigabytes) to the current Drive.
* Note: If you want to use a smaller disk to move the current Windows disk, you must ensure that the data (used space), on the current disk will fit on the new disk.
How to Clone your Hard Drive with EaseUs ToDo BackUp:
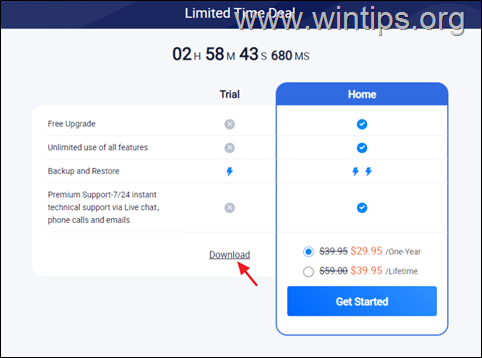
1. Download EaseUs ToDo BackUp Home. (Click the Free Trial button and click Download.)
2. When the download completes, go ahead and install the program.
3. Shutdown your PC.
4. Connect the new disk and disconnect (unplug) any other secondary disks (if any), to avoid mistakes. *
* Note: If you own a laptop, get a USB hard drive enclosure and insert the new drive and then plug it to your PC.
5. Turn on your PC and boot to Windows.
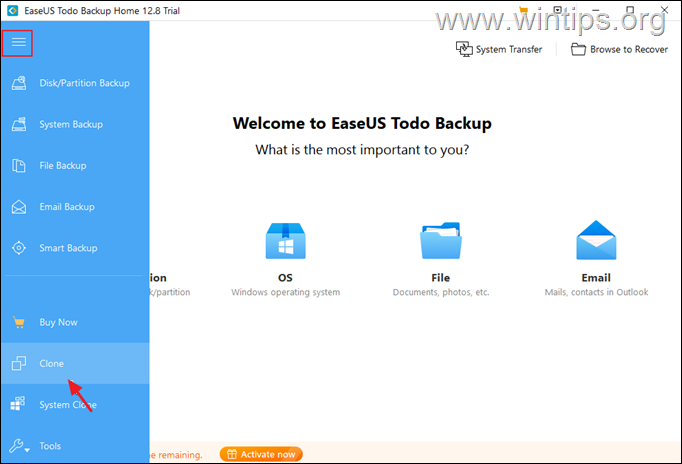
6. Launch EaseUs ToDo BackUp Home, and select Later at License screen.
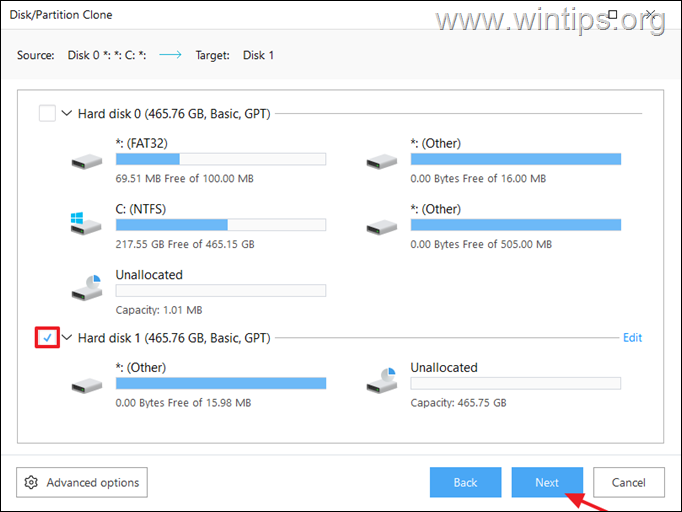
2. Check the Source disk (with the Operating System), and click Next.
3. Now check the Target disk which in this case is the new hard drive. Click Next to proceed.
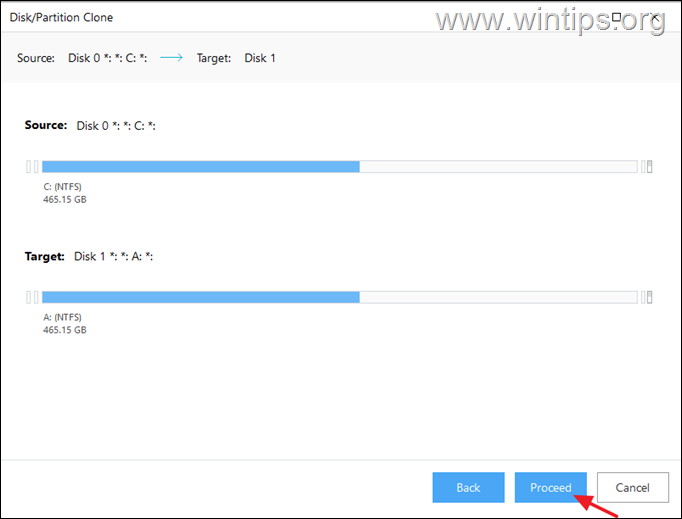
4a. Select Proceed.
4b. Now you will get a warning that all the data on the target drive will be erased. Click Continue to start cloning the drive.
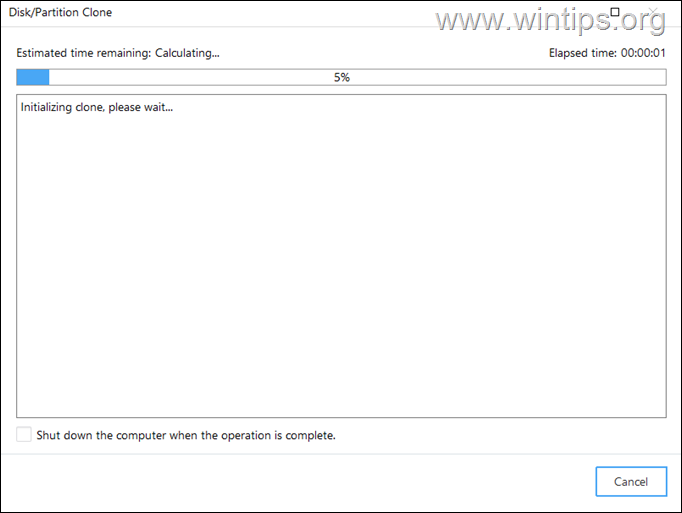
5. The cloning process will start and you will be able to see the progress on the screen. (Be patient until the process to complete).
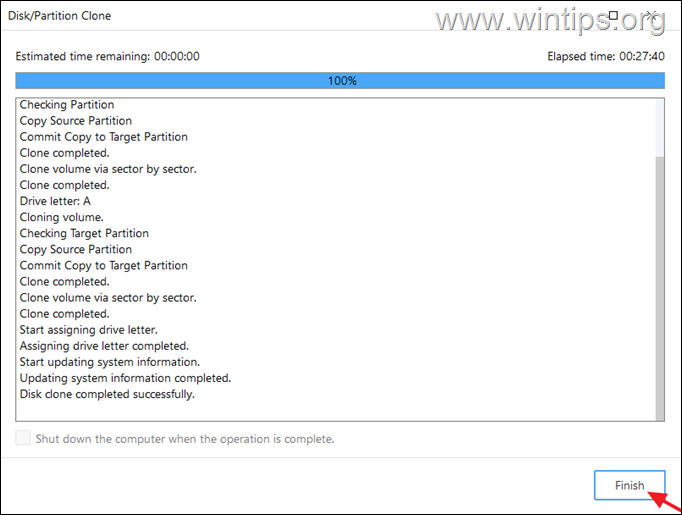
6. When the cloning process in completed, click Finish and close Easeus ToDo Backup.
7. Shut down the PC.
8. Remove the current hard drive from the computer and replace it with the cloned drive.
9. Finally power on your PC and let it to boot to Windows. If everything has gone well, the computer will boot into the Windows desktop just like it did with the old drive. *
* Note: If you PC can't boot to Windows enter BIOS setup and change the boot priority to the new drive.
That's it! Which method worked for you?
Let me know if this guide has helped you by leaving your comment about your experience. Please like and share this guide to help others.
We're hiring
We're looking for part-time or full-time technical writers to join our team! It's about a remote position that qualified tech writers from anywhere in the world can apply. Click here for more details.
- FIX: Numeric keypad Not Working on Windows 10/11 - July 24, 2024
- How to Share Files or Printers in Hyper-V? - July 22, 2024
- How to invoke Hyper-V Screen resolution prompt? - July 17, 2024


