
Fix: Event 7 Disk has a bad block at \Device\Harddisk#\DR#
The Event ID 7, on Windows Event Log, with description "\Device\Harddisk#\DR#" has a bad block", informs you, that an area of a hard drive, installed on your computer, cannot be written or read due to a physical damage on the disk's surface. (e.g: "The device \Device\Harddisk0\DR0" has a bad block")

The "Event 7, Disk has a bad block" warning event, means that you must take the following actions to avoid loosing your data:
1. Backup all your important files from the reported damaged disk (drive) to another storage device (e.g. to a USB Disk).
2. Check the disk surface for bad sectors and mark them by using the CHKDSK command. (Step-2).
3. Diagnose the hard disk for physical damage (Step-3).
In most cases, all the above tasks can be performed easily, because most users have only one disk installed on their system. But, if you have more than one hard disk installed on your system, you must first identify which of them is damaged.
In this tutorial you will find detailed instructions on how to identify the damaged hard disk, by using "Disk has a bad block" event's 7 details (e.g. "Device\Harddisk#\DR#") and how to check and diagnose it.
How to resolve the "Event ID 7, Disk has a bad block" error.
Step 1. Identify the Logical Drive Letter of the Damaged Hard Disk from Event 7 error. *
* Note: If you have only one hard disk installed on you system, then bypass this step and proceed to Step-2.
– The first step is to identify from the "Event ID 7, Disk has a bad block" event, which logical drive letter is assigned to the problematic hard disk. In order to accomplish this task:
1. From System event viewer, note the number after the word "HardDisk" in the Event 7 warning message.
e.g. As you can see at the example screenshot below, the System Event Viewer (Windows Logs > System) displays the event 7 alert message, on device "Harddisk3".
"Event 7, Disk – The device, \Device\Harddisk3\DR3, has a bad block"

2. Then download the WinObj (Free) program from Microsoft.
3. Extract the WinObj.zip file you downloaded.
4. Run Winobj.exe from the extracted folder.
5. At the left pane, expand "Device".
6. Select the Harddisk# (number) referred to the Event 7 error. *
* In this example is: "Harddisk3".

7. Now look at the right pane and note the "HardDiskVolume" number that is displayed under "SymLink" column. *
* In this example the number is "1" (\Device\HarddiskVolume1)".

8. Now select "GLOBAL??" at the left pane.

9. At the right pane: Click once at the "SymLink" column name, to sort the results.

10. Now scroll down until you find out the row that has the "\Device\HarddiskVolume1" value (at "SymLink" column).
11. When you find this row, you 'll see at the "Name" column" the drive letter of the damaged disk. *
* In this example the driver letter is: "G".

Step 2. Check and Repair File System Errors with CHKDSK.
After you have found which hard drive has the bad blocks, you must check that drive for bad sectors and mark them, by using the CHKDSK command. Additionally the CHKDSK command verifies the file system integrity and fixes logical file system errors.
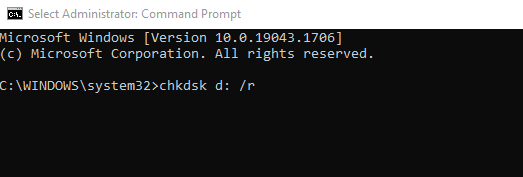
1. Open an administrative Command Prompt.
2. In the command prompt window, type the following command* and press Enter:
- chkdsk driveletter: /r
*Note: As driveletter type the drive letter of the disk that you want to check for errors (e.g. "D"). *
* In this case the command is: chkdsk d: /r
3. When the CHKDSK command operation is completed, use these instructions to view and analyze the CHKDSK's scanning results.
- Related article: How to Fix and Diagnose File System Errors with CHKDSK.
4. When finished, proceed to the next step.
Step 3. Diagnose the Damaged Hard Disk for Physical Problems.
The final step, to resolve the "Event 7, Disk has a bad block" error, is to test and diagnose the problematic hard disk for physical damages. To accomplish this task:
1. Download and install the free version of the HD Tune diagnostic utility.*
* Source: http://www.hdtune.com/download.html
2. After installation, launch HD Tune and select the Info tab.
3. On the top, select one by one all the listed hard disks until you find the one that has been assigned the drive letter you found at the previous step. *
* In this example, the damaged hard disk (with the drive letter "G"), is the "ST3500620AS (500GB)" (Seagate).

4. When you find the disk that is damaged, select the Health tab to view hard disk's "health", by reading the S.M.A.R.T. report. Here, check at the “Status” column if all values are reported as “OK”. If not, then proceed to perform a full surface scan (see below).

5. Finally, select the “Error Scan” tab and perform an full surface scan diagnosis in hard disk's surface. *
* Important: At least one red square, means that you must replace the hard disk as soon as possible.

That's it! Let me know if this guide has helped you by leaving your comment about your experience. Please like and share this guide to help others.

We're hiring
We're looking for part-time or full-time technical writers to join our team! It's about a remote position that qualified tech writers from anywhere in the world can apply. Click here for more details.
- How to Disable or Remove BitLocker from Windows RE. - April 24, 2024
- FIX: Error 0x8007025d in Windows 10 Update. - April 22, 2024
- How to Disable Device Encryption in Windows 11/10. - April 17, 2024


June 12, 2021 @ 7:28 am
Great article. Thanks!
October 5, 2018 @ 1:33 am
Instead of going through all the hoops of downloading WinObj and clicking and sorting, it is much simpler to just go to the "Create and format hard disk partitions" utility and see what disk is labled as Disk #. That solves the volumes issue, too, so that there's no confusion.
March 5, 2019 @ 5:12 pm
yeah i was thinking this was a fix an all it was was defining which Drive letter it is….dang it man. You are 100% correct all you have to do is go to Disk Manager and find the drive number associated with the Drive Letter…..errr. Like the last lines …if you find a red sector you need to replace the HDD….well duh….I was looking for a way to isolate the bad sectors and keep using the drive.
February 19, 2018 @ 4:51 am
Thanks. The article is probably very old, but still worth a serious try.
Unfortunately, WinObj > Device shows partitions 0,1,2,3 with Volumes 1 -3 and going to Global, well, it's still down to which drive, which partition.
This article sure helped to narrow it down though.
Microsoft has decided to remind me every 3 seconds that there is a problem with the drive. Every THREE seconds!!!