Remove “DiVapton – Pup.Optional.Divapton.A” Potentially Unwanted Program
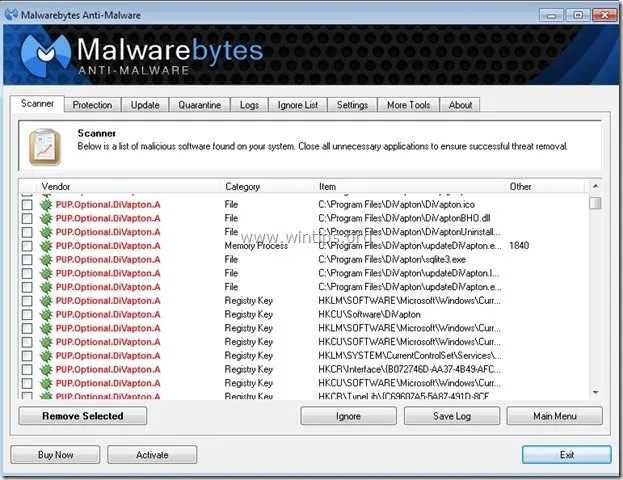
“DiVapton – Pup.Optional.Divapton.A” is a “Potentially Unwanted Program (PUP)” that may contain and install malicious programs on your computer, like adware, toolbars or viruses. “DiVapton” extension is identified by Malwarebyte Antimalware utility as a “Potentially Unwanted Program” (PUP) with the following name: “Pup.Optional.Divapton.A”.
As “PUP – Potentially Unwanted Programs” are categorized all the programs that can potentially harm your computer. This type of programs in most cases is installed on the computer according to user permission because they are bundled inside free software that the user wants to install.
“PUPs” may include adware, toolbars, spyware or dialers in their code and for that reason users must pay attention when installing free software on their computers. PUPs may run on the computer background in order to make your computer insecure to viruses or remote computer attacks.
When “DiVapton” is installed on your computer, the computer speed is slowed down, the Web browser performs browsing redirects when you search the Internet or it displays results and advertisements from unknown publishers.
To remove “Pup.Optional.Divapton.A” – virus from your computer follow the steps below:
How to remove "DiVapton” from your computer:
Step 1. Uninstall applications belonging to the “DiVapton” publisher from your Control panel.
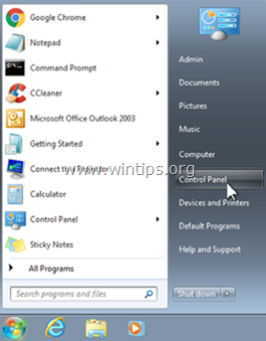
1. To do this, go to:
- Windows 8/7/Vista: Start > Control Panel.
- Windows XP: Start > Settings > Control Panel
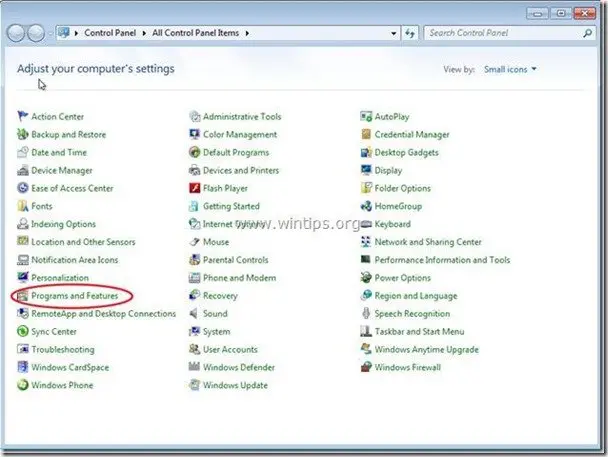
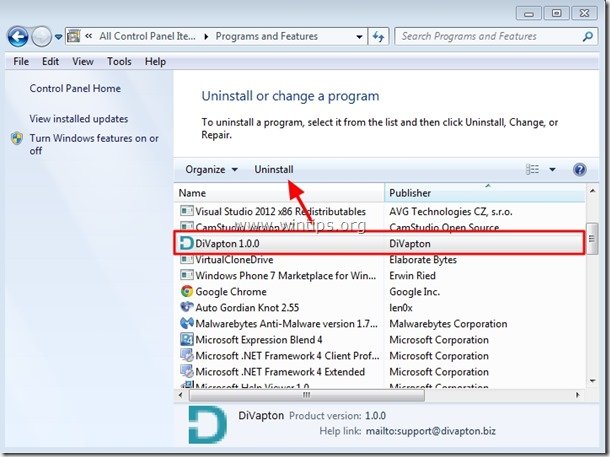
2. Double click to open
- Add or Remove Programs if you have Windows XP
- Programs and Features if you have Windows 8, 7 or Vista.
3. In the program list, find and Remove (Uninstall) the following applications:
- DiVapton 1.0.0
- Any other unwanted or unknown application
Step 2. Delete remaining “DiVapton” hidden files
Notice: You must enable the hidden files view to perform this task.:
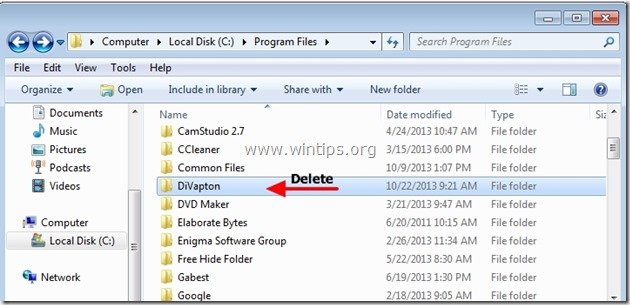
1. Navigate to the following path & delete the following folders if they exist.
- C:\Program Files\DiVapton
Step 3: Clean remaining registry entries using “AdwCleaner”.
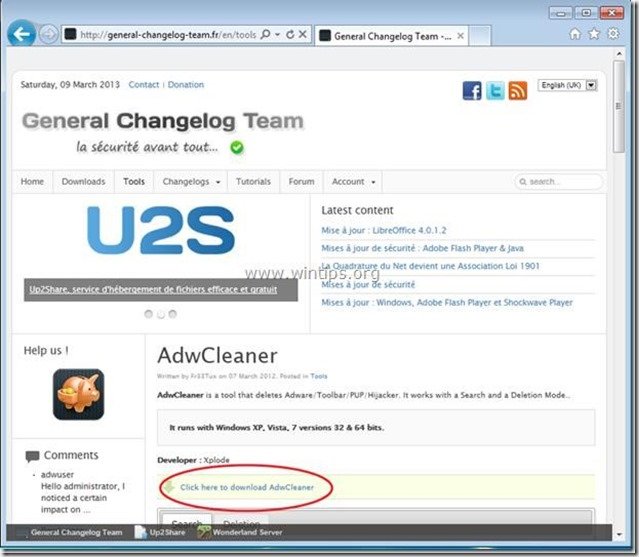
1. Download and save “AdwCleaner” utility to your desktop.
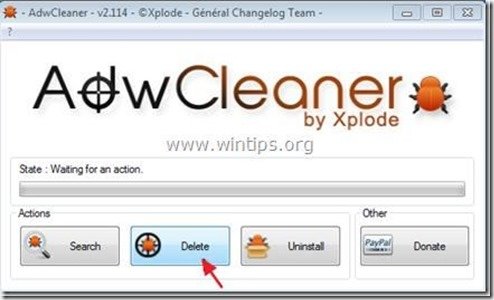
2. Close all open programs and Double Click to open ”AdwCleaner” from your desktop.
3. Press “Delete”.
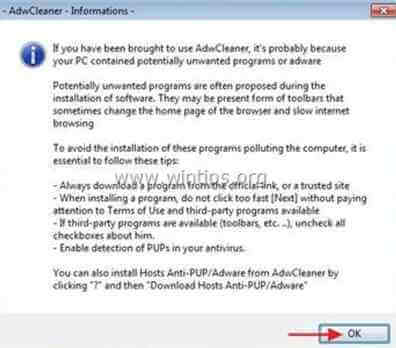
4. Press “OK” at “AdwCleaner – Information”and press “OK” again to restart your computer.
5. When your computer restarts, close "AdwCleaner" information (readme) window and continue to the next step.
Step 4. Ensure that “DiVapton” extension doesn’t exist anymore in your Internet browser.
Internet Explorer, Google Chrome, Mozilla Firefox
How to remove “DiVapton” extension from Internet Explorer.
1. Open Internet Explorer and then open go to IE’s file menu and choose:
“Tools” > “Manage Add-Ons”.
Notice*: In the latest versions of IE press the “Gear” icon ![]() on the top right.
on the top right.
2. Select "Toolbars and extensions” & disable the following extensions:
- Divapton
3. Close all Internet Explorer windows and restart your browser.
4. Proceed to Step 5.
How to remove “DiVapton” extension from Google Chrome.
1. Open Google Chrome and go to chrome menu ![]() and choose "Settings".
and choose "Settings".
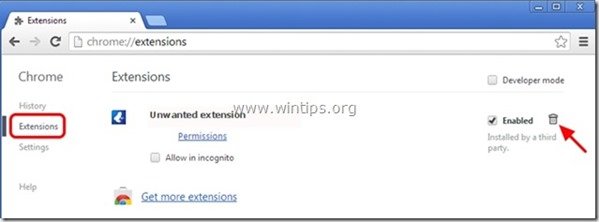
2. Choose "Extensions" on the left.
3. Remove the unwanted “DiVapton” extension by pressing the “recycle icon” to the right.
4. Close all Google Chrome windows and restart your browser.
5. Proceed to Step 5.
How to remove “DiVapton” extension from Mozilla Firefox.
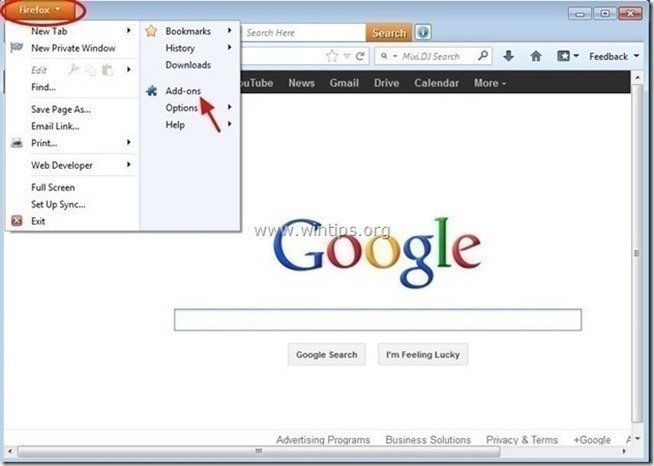
1. Click on “Firefox” menu button on the top left of Firefox window and select “Add-ons”.
2. Choose “Extensions” on the left and then remove the unwanted “DiVapton” extension (if it exists there), by pressing the "Remove" button.
3. Close all Firefox windows and restart your browser.
4. Proceed to the next Step.
Step 5. Clean your computer from remaining malicious threats.
Download and install one of the most reliable FREE anti malware programs today to clean your computer from remaining malicious threats. If you want to stay constantly protected from malware threats, existing and future ones, we recommend that you install Malwarebytes Anti-Malware PRO:
Malwarebytes™ Protection
Removes Spyware, Adware & Malware.
Start Your Free Download Now!
1. Run "Malwarebytes Anti-Malware" and allow the program to update to its latest version and malicious database if needed.
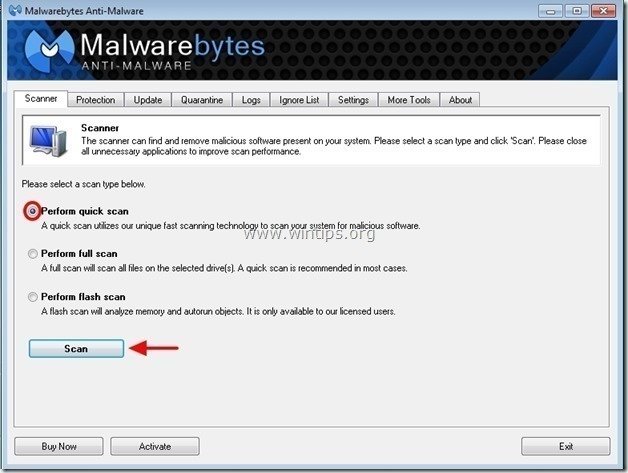
2. When the "Malwarebytes Anti-Malware" main window appears on your screen, choose the "Perform quick scan" option and then press "Scan" button and let the program scan your system for threats.
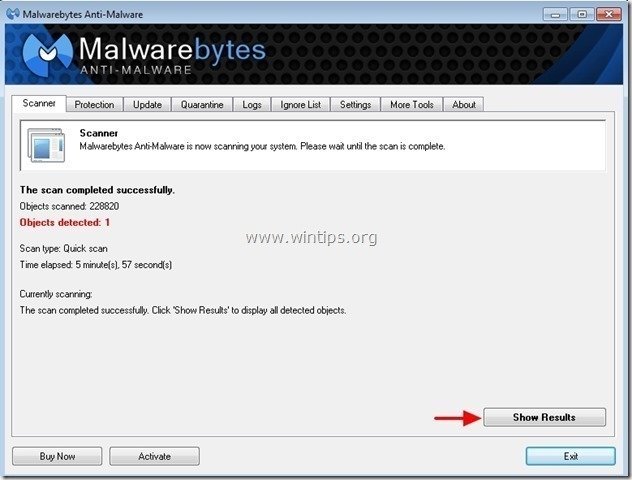
3. When the scanning is completed, press “OK” to close the information message and then press the "Show results" button to view and remove the malicious threats found.
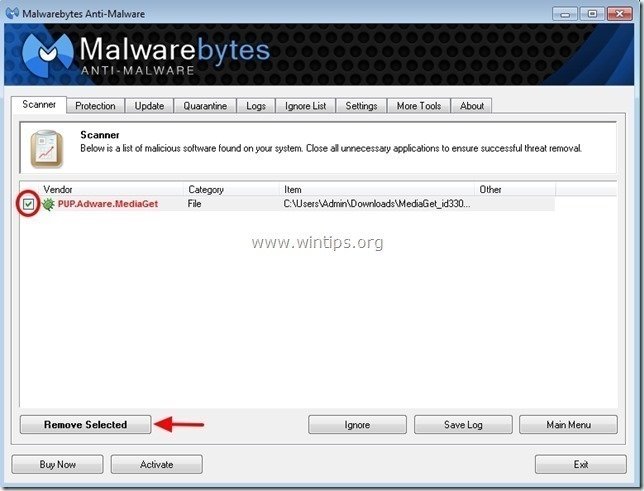
4. At the "Show Results" window check – using your mouse's left button- all the infected objects and then choose the "Remove Selected" option and let the program remove the selected threats.
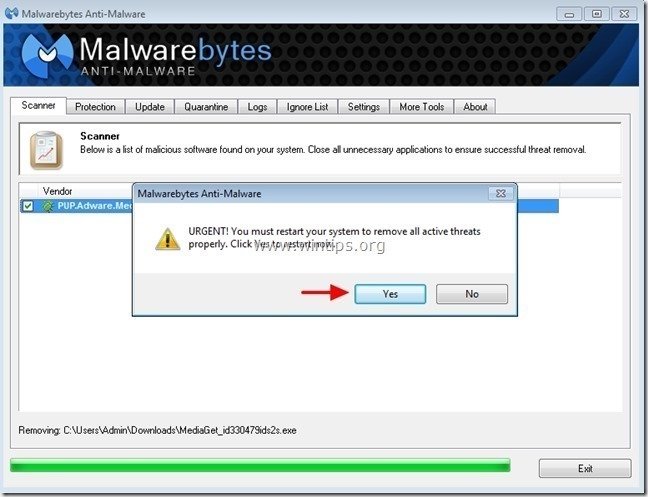
5. When the removal of infected objects process is complete, "Restart your system to remove all active threats properly"
6. Continue to the next step.
Advice: To ensure your computer is clean and safe, perform a Malwarebytes’ Anti-Malware full scan in Windows “Safe mode“.*
*To get into Windows Safe mode, press the “F8” key as your computer is booting up, before the appearance of the Windows logo. When the “Windows Advanced Options Menu” appears on your screen, use your keyboard arrows keys to move to the Safe Mode option and then press “ENTER“.
Step 6. Clean unwanted files and entries.
Use “CCleaner” program and proceed to clean your system from temporary Internet files and invalid registry entries.*
*If you don’t know how to install and use “CCleaner”, read these instructions.
Step 7. Restart your computer for changes to take effect and perform a full scan with your antivirus program.
We're hiring
We're looking for part-time or full-time technical writers to join our team! It's about a remote position that qualified tech writers from anywhere in the world can apply. Click here for more details.
- How to Disable Device Encryption in Windows 11. - April 17, 2024
- How to View Permissions on Shared Folders on Windows 10/11. - April 15, 2024
- FIX 0x80070643 error in KB5034441 update (Solved) - April 10, 2024

![b3smoiti_thumb[1] b3smoiti_thumb[1]](https://www.wintips.org/wp-content/uploads/2013/10/b3smoiti_thumb1_thumb.jpg)
![ukprk3hm_thumb[1] ukprk3hm_thumb[1]](https://www.wintips.org/wp-content/uploads/2013/10/ukprk3hm_thumb1_thumb.jpg)
![vmal1bh5_thumb[1] vmal1bh5_thumb[1]](https://www.wintips.org/wp-content/uploads/2013/10/vmal1bh5_thumb1_thumb.jpg)
![yxsbifov_thumb1_thumb_thumb_thumb[1] yxsbifov_thumb1_thumb_thumb_thumb[1]](https://www.wintips.org/wp-content/uploads/2013/10/yxsbifov_thumb1_thumb_thumb_thumb1_thumb.jpg)
