
Unblock your computer and remove the latest variant of Police Ukash, Paysafecard, MoneyPak or Your PC is blocked virus (September 2013)
Is your computer locked and you see a message on your screen that says “Attention. Your PC is blocked because you have been violating Copyright and related laws…”? In this case you have been infected with a trojan, formerly known as FBI virus or Police Ukash or MoneyPak virus. As with all previous versions of this virus, the trojan locks computer systems and asks infected computer users to pay a penalty of 100$, 200$ or 300$ to unlock their computers, because they are violating “Copyright Laws” or distributing Pornographic material.
As with previous versions of this ransomware virus, the fake warning message seems real because it displays your location, your IP address and your own photo (or video) captured by your webcam.
Notice that the fake warning message that comes with this virus, is not associated with the government or any police or justice department.


The latest version of this ransomware virus cannot be removed by using previous removal methods:
Previous removal methods used for "Police Virus (Your PC is blocked):
FBI Virus removal Method 1: Safe Mode With Command Prompt.
FBI Virus removal Method 2: Safe Mode With Command Prompt & System Restore
FBI Virus removal Method 3: Boot with Hiren’s Boot CD and Run RogueKiller.
If you want to clean your computer from all versions of Police Ukash, Paysafecard or MoneyPak virus, follow the steps below:
How to disinfect and unblock your computer from the latest variant of FBI Police Ukash or MoneyPak virus (Removal Instructions) :
Step 1. Download and burn “Hiren’s BootCD” into an optical disk.
1. From another computer, download “Hiren’s BootCD” .
( Hiren’s BootCD Download page: http://www.hirensbootcd.org/download/
Scroll page down and click on “Hirens.BootCD.15.2.zip” )

2. Right click on “Hirens.BootCD.15.2.zip” file and extract it.

3. Inside “Hirens.BootCD.15.2” folder, find the “Hiren's.BootCD.15.2.ISO” disc image file and burn it to a CD.

Step 2: Boot the infected computer with Hirens.BootCD.
1. Take the CD out from the clean computer and insert it on the infected computer's CDROM drive.
2. Restart (Reset) the infected computer and boot from CD/DVD drive (Hiren’s CD).*
Notice*: First make sure that CD/DVD Drive is selected as the first boot device inside BIOS.
3. When the "Hiren’s BootCD” menu appears on your screen, use your keyboard arrows keys to move into the “Mini Windows Xp” option and then press "ENTER".

Step 3: Delete malicious files from the infected computer's hard disk.
Inside Mini Windows XP environment:
1. Navigate to the following paths and delete all malicious files/shortcuts from Windows Startup folder(s).
For Windows XP:
a. C:\Documents and Settings\<YOUR USERNAME>\Start Menu\Programs\Startup
b. C:\Documents and Settings\All Users\Start Menu\Programs\Startup
For Windows Vista or Windows 7:
a. C:\Users\Admin\<YOUR USERNAME>\AppData\Roaming\Microsoft\Windows\Start Menu\Programs\Startup
b. C:\Users\All Users\Microsoft\Windows\Start Menu\Programs\Startup
Malicious shortcut name(s):
“RandomName.lnk”
“RandomName.reg”

2. Navigate to the following paths and delete all malicious files* inside these folders:
For Windows XP:
a. C:\Documents and Settings\<YOUR USERNAME>\Application Data
b. C:\Documents and Settings\All Users\Application Data
For Windows Vista or Windows 7:
a. C:\Users\<YOUR USERNAME>\AppData\Roaming
b. C:\Users\<YOUR USERNAME>\AppData\Local
c. C:\Users\Default\AppData\Roaming
* Malicious file(s) name(s):
“RandomName” (e.g. 2433r433)
RandomName.DAT (e.g. data.DAT)
“RandomName.plz”
“RandomName.ctrl”
“RandomName.pff”

3. Finally delete all files and folders inside these folders:
a. C:\Users\<YOUR USERNAME>\AppData\Local\Temp\
b. C:\Windows\Temp\
4. Eject Hiren’s CD from your CD-drive and restart your computer.*
* Normally you should log on to Windows without any lock problems. At this point, if your computer is stuck on a “Command Prompt” window and it doesn’t open Windows Explorer, then in command prompt, type “explorer” and press “Enter“.

Step 4. Prevent malicious programs running at Windows Startup.
1. Download and run CCleaner.
2. At “CCleaner” main window, choose "Tools" on the left pane.

3. In "Tools" section, choose "Startup".

4. Choose "Windows” tab and then select and delete the following malicious entry, if it exists:
“C:\Users\<YOUR USERNAME>\AppData\Local\Temp\svchost.exe”

5. Close “CCleaner” and continue to the next step.
Step 5. Remove Winlogon Registry Values
1. Go to Start > Run, type “regedit” and press “Enter”.

2. Delete the “shell REG_SZ cmd.exe” value from the following registry path:
“HKEY_CURRENT_USER\Software\Microsoft\Windows NT\CurrentVersion\Winlogon”

3. Close registry editor and continue to the next step.
Step 6. Download RogueKiller.
1. Download and save "RogueKiller" utility on your computer'* (e.g. your Desktop).
Notice*: Download version x86 or X64 according your operating system’s version. To find your operating system's version, "Right Click" on your computer icon, choose "Properties" and look at "System Type" section.

2. Double Click to run RogueKiller.
3. Let the prescan to complete and then press on "Scan" button to perform a full scan.
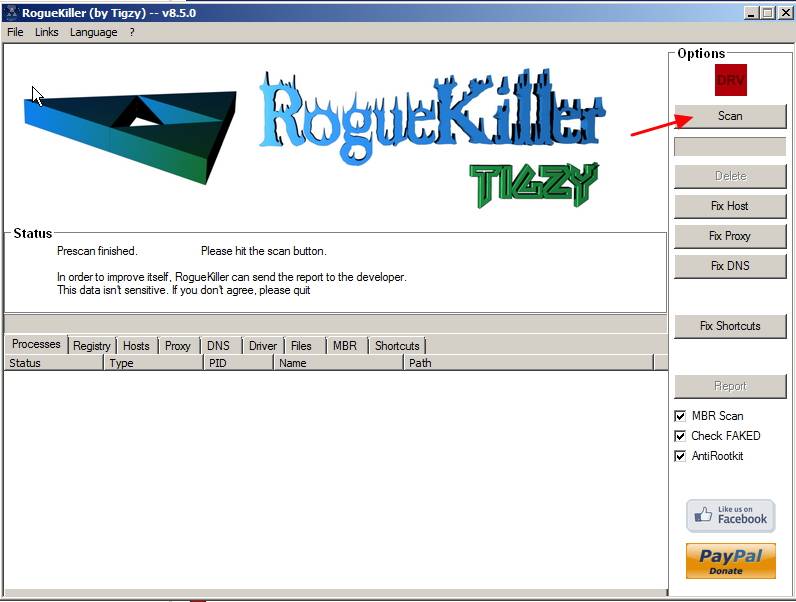
4. When the full scan is completed, press the "Delete" button to remove all malicious items found.

5. Restart your computer and continue to the next step.
Step 7: Clean remaining registry entries using “AdwCleaner”.
1. Download and save “AdwCleaner” utility to your computer.

2. Close all open programs and Double Click to open ”AdwCleaner” from your computer.
3. Press “Scan”.

4. When the scan is completed, press “Clean” to remove all the unwanted malicious entries.

4. Press “OK” at “AdwCleaner – Information” and press “OK” again to restart your computer.

5. When your computer restarts, close "AdwCleaner" information (readme) window and continue to the next step.
Step 8. Clean your computer from remaining malicious threats.
Download and install one of the most reliable FREE anti malware programs today to clean your computer from remaining malicious threats. If you want to stay constantly protected from malware threats, existing and future ones, we recommend that you install Malwarebytes Anti-Malware PRO:
Malwarebytes™ Protection
Removes Spyware, Adware & Malware.
Start Your Free Download Now!
1. Run "Malwarebytes Anti-Malware" and allow the program to update to it's latest version and malicious database if needed.
2. When the "Malwarebytes Anti-Malware" main window appears on your screen, choose the default scanning option:
"Perform quick scan" and then choose "Scan" and let the program scan your system for threats.
![malwarebytes-quick-scan_thumb2_thumb[1]](https://www.wintips.org/wp-content/uploads/2013/09/malwarebytes-quick-scan_thumb2_thumb1.jpg "malwarebytes-quick-scan_thumb2_thumb[1]")
3. When the scanning is completed, press “OK” to close the information message and then press the "Show results" button to view and remove the malicious threats found.
 .
.
4. At the "Show Results" window check – using your mouse's left button- all the infected objects and then choose the "Remove Selected" option and let the program remove the selected threats.

5. When the removal process of infected objects is complete, "Restart your system to remove all active threats properly".

6. Continue to the next step.
Advice: To ensure your computer is clean and safe, perform a Malwarebytes’ Anti-Malware full scan in windows “Safe mode“.*
*To get into Windows Safe mode, press the “F8” key as your computer is booting up, before the appearance of the Windows logo. When the “Windows Advanced Options Menu” appears on your screen, use your keyboard arrows keys to move to the Safe Mode option and then press “ENTER“.
Step 9. Clean unwanted files and entries.
Use “CCleaner” program and proceed to clean your system from temporary internet files and invalid registry entries.*
*If you don’t know how to install and use “CCleaner”, read these instructions.
Step 10. Restart your computer for changes to take effect and perform a full scan with your antivirus program.


")
ds lite neuve
October 4, 2013 @ 3:36 am
Extremely effectively created details. It will be worthwhile to anybody who usess it, like myself. Sustain the great work a?? for constructive i will examine out added posts.
April 19, 2014 @ 12:26 am
could not delete malicoious shortcut :unreadable or corrupted data..
April 19, 2014 @ 12:29 am
Update: also tried from command prompt: not found
April 19, 2014 @ 9:04 am
DRL, try UNLOCLER : https://www.wintips.org/force-delete-file/