How to Fix Windows 10 High CPU Usage problems.
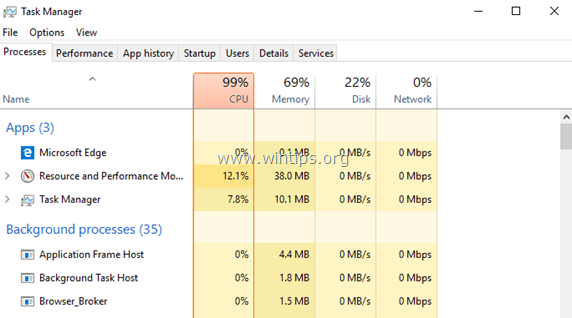
The problem: On a Windows 10 based computer, you may face high CPU usage problems, even without any programs running. In general, Windows 10 and without an obvious reason, can significantly slow down your PC, because, due to their new design, many services and applications can run on the background affecting your system's performance.
For that reason, in a previous tutorial I have mentioned the most common ways to optimize Windows 10 to run faster.
This tutorial contains several methods to resolve the high CPU usage issue on Windows 10.
How to resolve High CPU USAGE issues On Windows 10.
The Window 10 high CPU usage problem, in most cases, is caused from the Windows Update background task or after a malware infection or because a specific Windows service (e.g. the "System and Compressed Memory" or the "Window Store Service", etc.) causes your system to run slow.
Related articles:
- How to fix: "System and Compressed Memory" High CPU Usage on Windows 10.
- How to fix: WSAPPX (WSService) High CPU usage issue on Windows 10/8
Method 1. Scan your computer for viruses.
Method 2. Modify Virtual Memory (Paging File) settings.
Method 3. Install All Available Windows 10 Updates.
Method 4. Turn Off Updates for more than one place.
Other methods to fix high CPU usage problems in Windows 10.
Method 1. Scan your computer for viruses.
If your Windows PC runs very slow without an obvious reason then make sure that your computer is clean from viruses, or other malware programs that can affect its performance. * For that task, you can follow the steps mentioned in this Quick Malware Scan and Removal Guide.
* Note: If you experience the high CPU usage problem on a fresh Windows 10 installation, then ignore this solution and proceed below.
Method 2. Modify Virtual Memory (Paging File) settings.
1. Right click on Computer icon (Name) and select Properties.
2. Click Change Settings.
3. At Advanced tab select Settings at Performance section.
4. At Performance options, click the Advanced tab and then select Change at Virtual memory section.
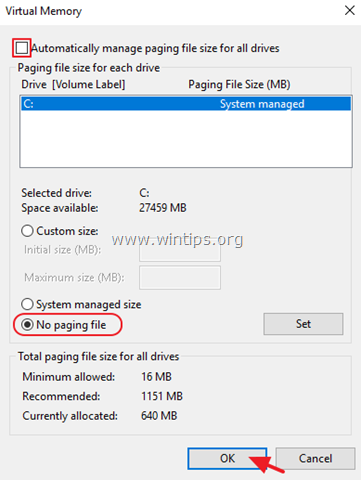
5. At 'Virtual Memory' properties:
a. Uncheck the "Automatically manage paging file size for all drives" check box.
b. Select the No paging file radio button.
c. Click OK at all windows and restart your computer.
Method 3. Install All Available Windows 10 Updates.
In some cases, Windows 10 issues may be fixed after installing latest Windows updates. To ensure that your PC is up to date:
1. At Cortana's Search Box type the word "Updates" (without quotes) and then click Check for Updates from the results.
2. Then click the Check for Updates button to find and install all available updates.
Method 4. Turn Off Updates for more than one place.
One of the new features of Windows 10, is to download updates for other PCs from your local network or Internet, which improves the download and update speed. But, in some cases, this feature may lead to very high CPU usage. To prevent Windows 10 to get updates from other PCs:
1. Launch Windows Update settings and click Advanced Options.
2. At Advanced options, select Choose how updates are delivered.
3. Switch Off the "Updates from more than one place" setting.
4. Restart you computer.
Other methods to fix high CPU usage problems in Windows 10.
If the high CPU usage problem, is not resolved, then try one of the following:
1. Optimize Windows 10 performance.
2. Identify which process makes Windows 10 to run slow.
3. Restore Windows 10 to an earlier build.
4. Perform a Repair Upgrade of Windows 10
5. Perform a fresh Windows 10 installation.
That's it! Let me know if this guide has helped you by leaving your comment about your experience. Please like and share this guide to help others.
We're hiring
We're looking for part-time or full-time technical writers to join our team! It's about a remote position that qualified tech writers from anywhere in the world can apply. Click here for more details.
- FIX: Numeric keypad Not Working on Windows 10/11 - July 24, 2024
- How to Share Files or Printers in Hyper-V? - July 22, 2024
- How to invoke Hyper-V Screen resolution prompt? - July 17, 2024


September 26, 2021 @ 7:47 pm
Helped a great deal, thanks.