Remove MyWebSearch homepage and MyWebSearch settings hijacker
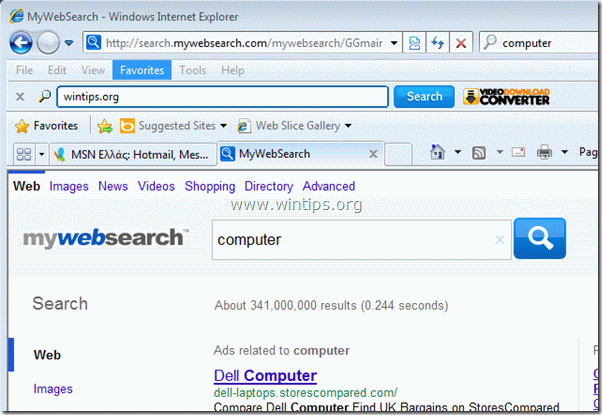
MyWebSearch, is a browser adware and hijacker program, that changes your browser’s default search settings and performs redirects when you browse the internet. The adware is bundled inside software installation programs. Upon the program is installed, it changes your start page to “http://home.mywebsearch.com”, it emulates the Google search engine and displays advertisements from online marketing.
This adware program, is also responsible for malware programs that can harm your computer.
To completely remove “MyWebSearch” settings follow the bellow procedure:
Step 1. Remove “MyWebSearch” from your browser (Internet Explorer or Firefox).
Internet Explorer
How to remove “MyWebSearch” from Internet Explorer and restore browser settings.
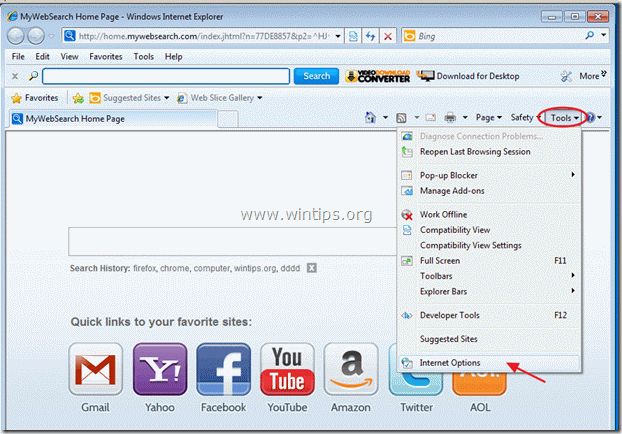
1. Open Internet Explorer and then open “Internet Options”.
To do this from IE’s file menu, choose “Tools” > “Internet Options”.
Notice*: In the latest versions of IE press the “Gear” icon ![]() on the top right.
on the top right.
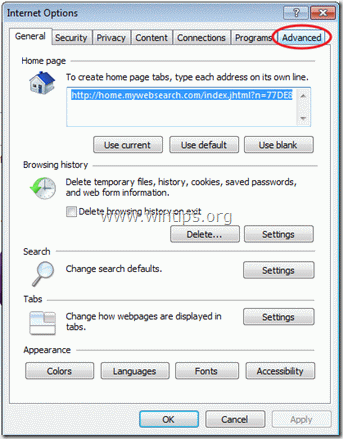
2. Click the “Advanced” tab.
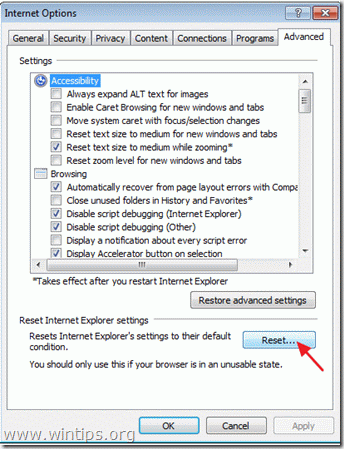
3. Choose “Reset”.
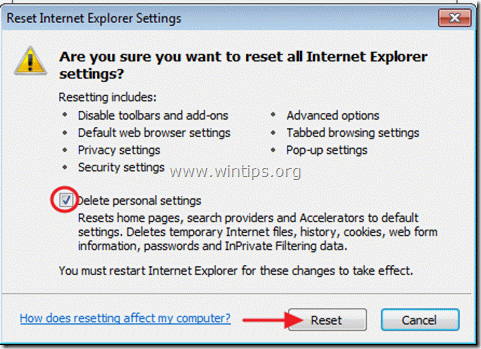
4. Check (to enable) the “Delete personal settings” box and choose “Reset”.
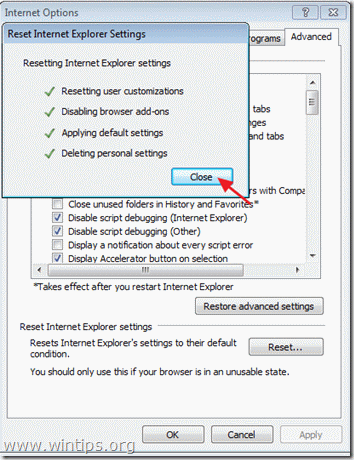
5. After the resetting action is completed, press “Close” and then choose “OK” to exit Internet Explorer options.
6. Close Internet explorer and proceed to Step 2.
Mozilla Firefox
How to remove “MyWebSearch” from Mozilla Firefox and restore browser settings.
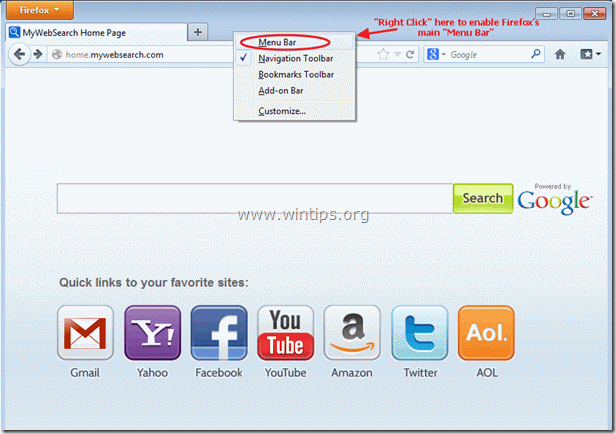
1. First you must have enabled the Firefox’s main “Menu Bar”.
* Right Click, on the empty space at right of “Page Tab” and enable Firefox “Menu Bar”.
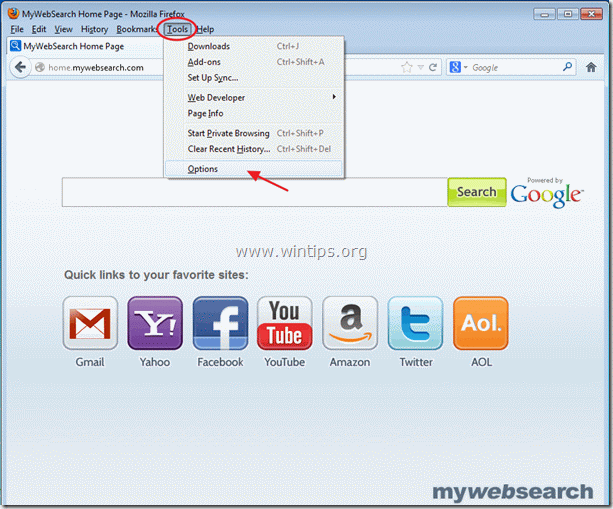
2. From Firefox's main menu, go to: “Tools” > “Options”.
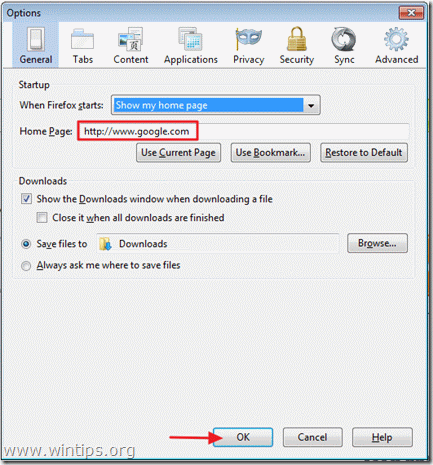
2. At “General” tab, go to “Home Page” settings and delete the “home.mywebsearch.com” homepage and type your preferred home page: e.g. www.google.com. Then choose “OK” to exit Firefox options.
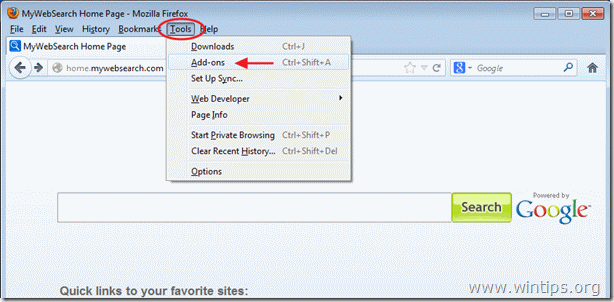
3. From Firefox's main menu, go to: “Tools” > “Add-ons”.
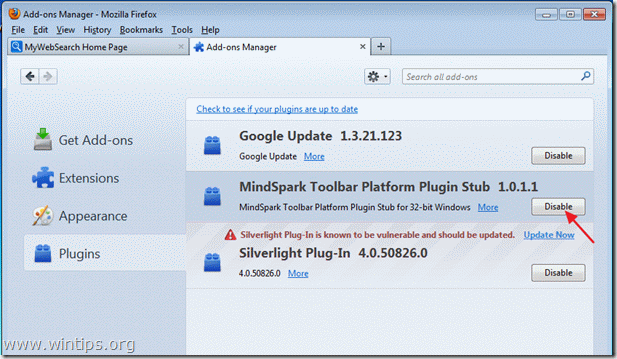
4. At “Add-ons” manager, choose the “Plugins” options on the left.
5. Choose the “MindSpark Toolbar Platform Plugin Stub…: and press the “Disable” button on that line.
6. Close all Firefox windows and proceed to the next Step.
Step 2: Clean your computer from malicious threats.
Use “MalwareBytes Anti-Malware” to clean your computer from malicious threats.
1. Download and install “MalwareBytes Anti-Malware” from here.*
Notice*: If you don’t know how to install “MalwareBytes Anti-Malware” read this post.
2. Run “Malwarebytes Anti-Malware” and allow the program to update to it’s latest version and malicious database if needed.
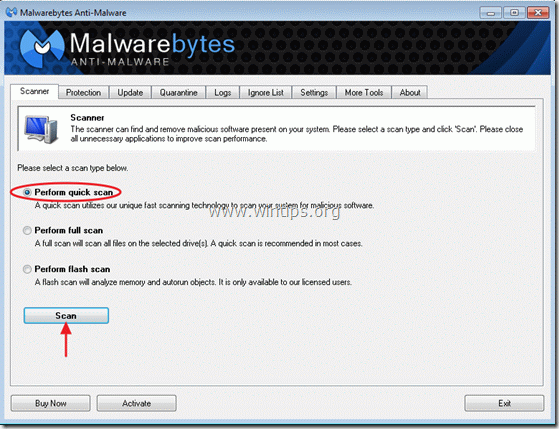
3. When the “Malwarebytes Anti-Malware” main window appears on your screen, choose the default scanning option:
“Perform quick scan” and then choose “Scan” and let the program scan your system for threats.
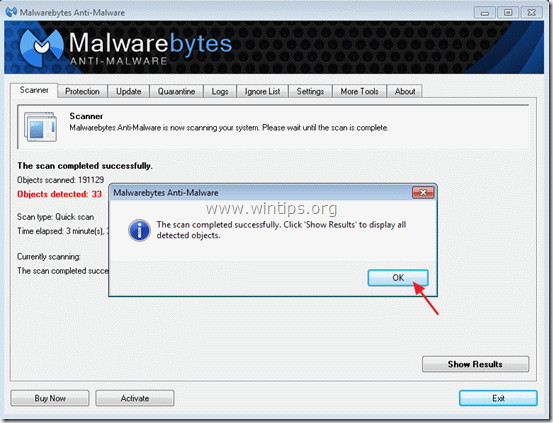
4. When the scanning is completed, choose “OK”
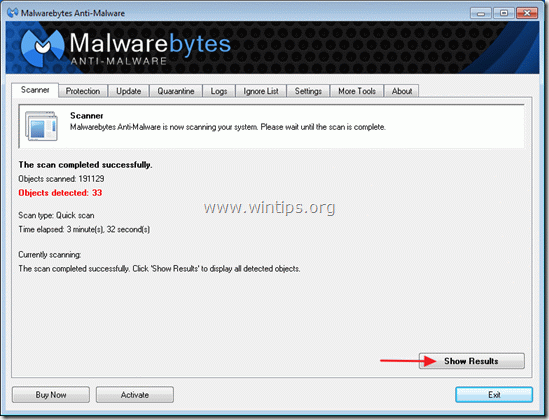
5. Press the “Show results” button to view and remove the malicious threats.
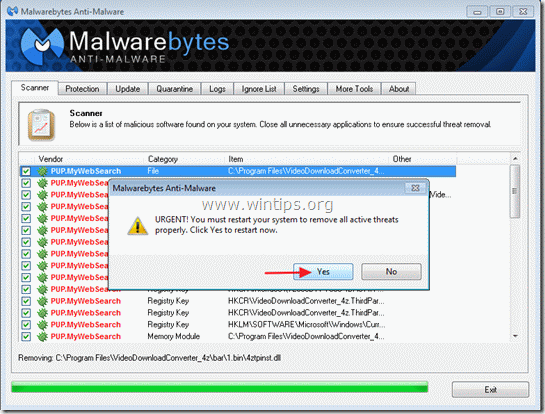
6. At the “Show Results” window check – using your mouse’s left button- all the infected objects and then choose the “Remove Selected” option and let the program remove the selected threats.
7. When the removal of infected objects process is complete, “Restart your system to remove all active threats properly”.
8. After the system restarts, run Malwarebytes’ Anti-Malware again to ensure that no other threats remaining in your system*.
Step 3: Clean unwanted temporary files and invalid registry entries.
Use “CCleaner” program and proceed to clean your system from temporary internet files and invalid registry entries.
If you don’t know how to install and use “CCleaner”, read these instructions.
Advice: To ensure your computer is clean and safe, perform a Malwarebytes’ Anti-Malware full scan in windows “Safe mode“.
{To get into Windows Safe mode, press the “F8” key as your computer is booting up, before the appearance of the Windows logo. When the “Windows Advanced Options Menu” appears on your screen, use your keyboard arrows keys to move to the Safe Mode option and then press “ENTER“}
We're hiring
We're looking for part-time or full-time technical writers to join our team! It's about a remote position that qualified tech writers from anywhere in the world can apply. Click here for more details.
- How to Disable Device Encryption in Windows 11. - April 17, 2024
- How to View Permissions on Shared Folders on Windows 10/11. - April 15, 2024
- FIX 0x80070643 error in KB5034441 update (Solved) - April 10, 2024

